How to create a Google app for MCP Tools Plus
In order for the AI to securely access your Google Analytics account, you need to connect your shop to your Google account through a Google application. To create this Google application, follow these steps:
1. Create a project on Google Cloud
Go to the Google Cloud Console and sign in with your professional Google email address.
At the top left, click on "Select a project" and then on "New project":
Note: You may already be inside a project (another project created previously). In this case, simply click on the name of this project next to the “Google Cloud” label and select “New project”

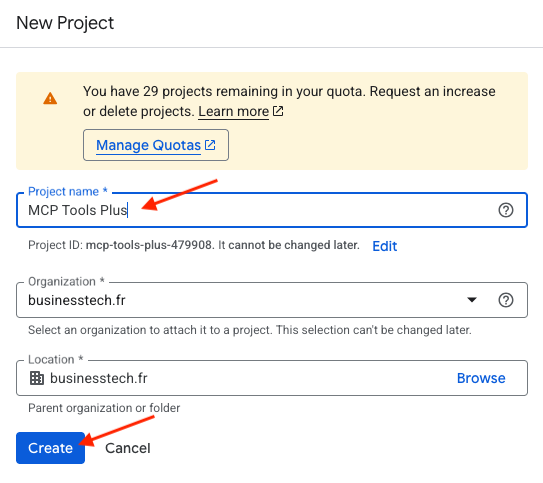
Enter a name for your project, such as MCP Tools Plus for example, then click on "Create":
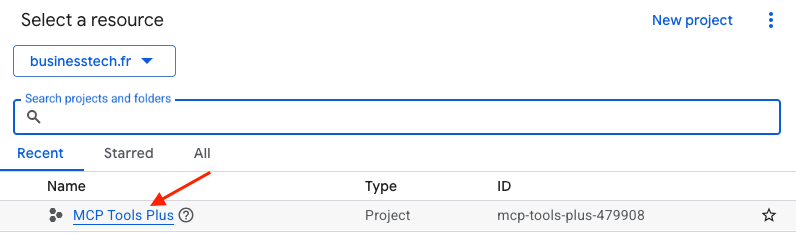
Click again on "Select a project" and then on the name of your new project to access it:
2. Enable the "Google Analytics Data API"
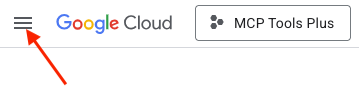
Click on the three horizontal bars of the menu at the top left:
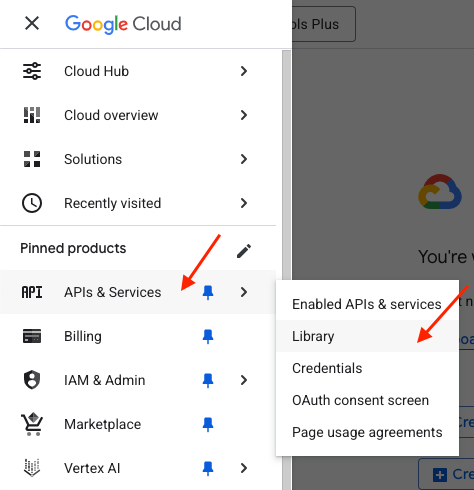
Click on "APIs & Services" then "Library":
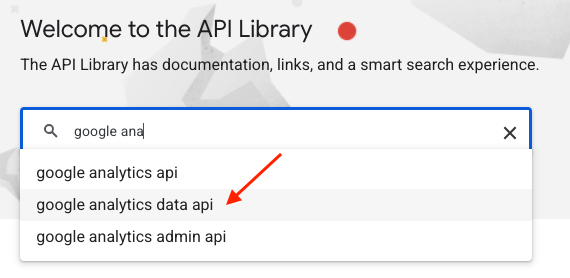
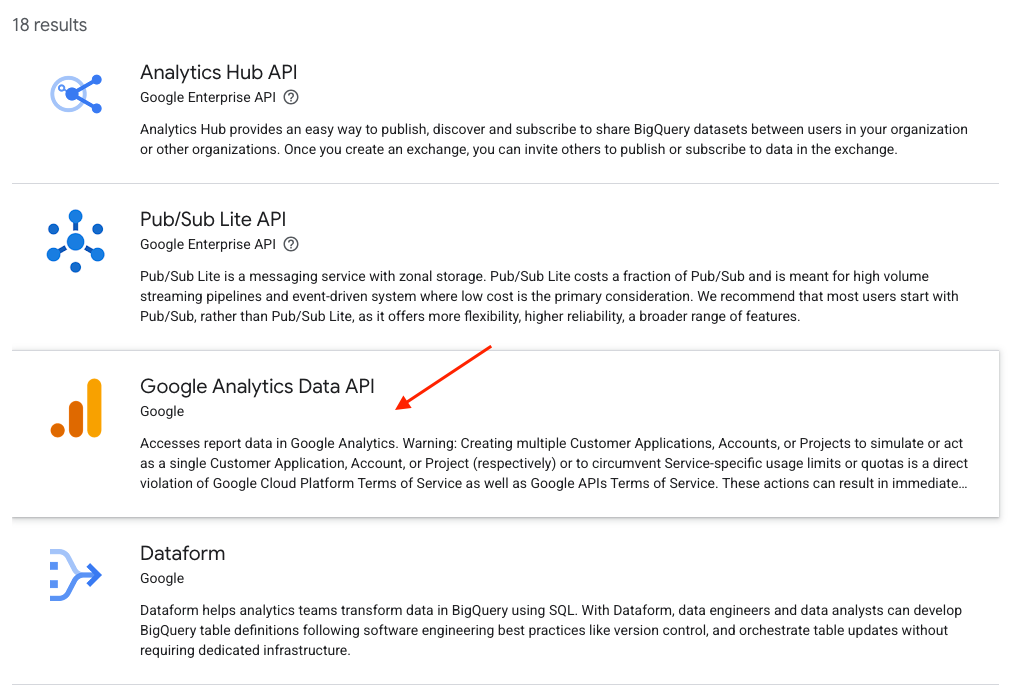
In the search bar, look for "google analytics data api" and select it from the list:
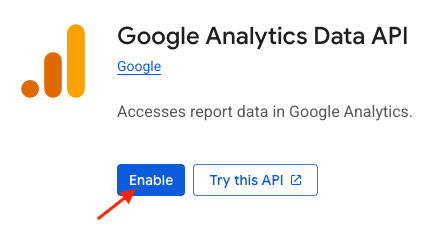
Enable the API:
3. Configure the OAuth consent screen
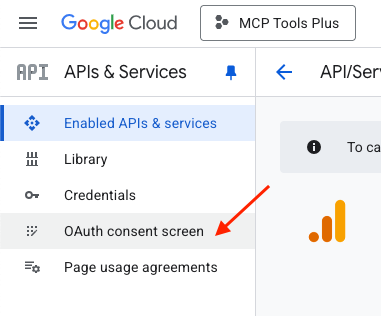
In the menu on the left, click on "OAuth consent screen":
Click on Get Started:

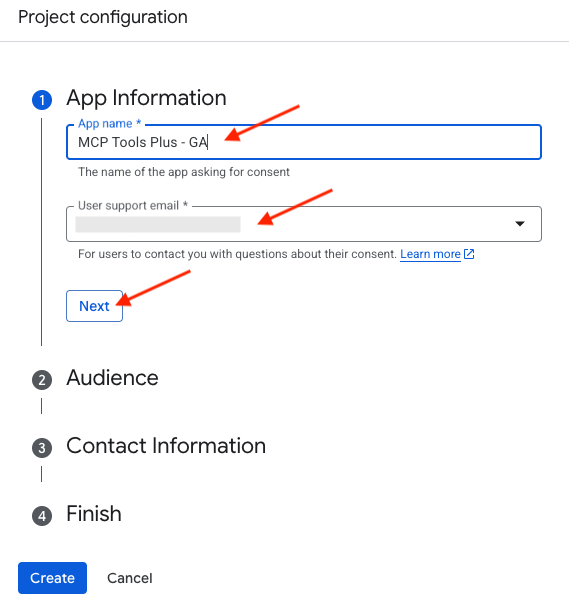
Give your application a name, select your professional email address, and click "Next":
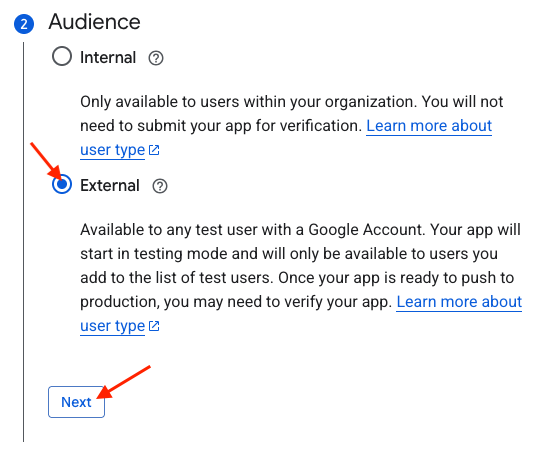
Choose an "External" target, then click "Next":
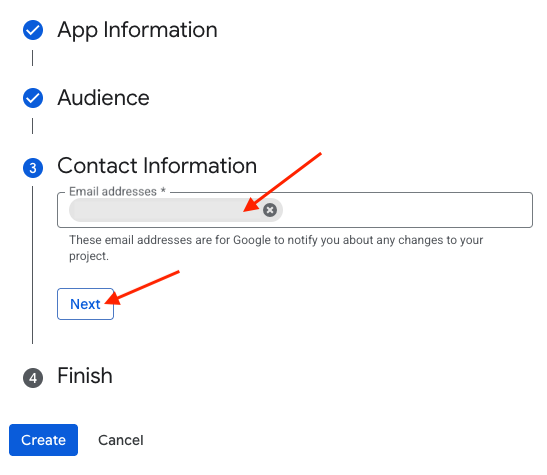
Add your email address so that Google can notify you about any changes to your project:
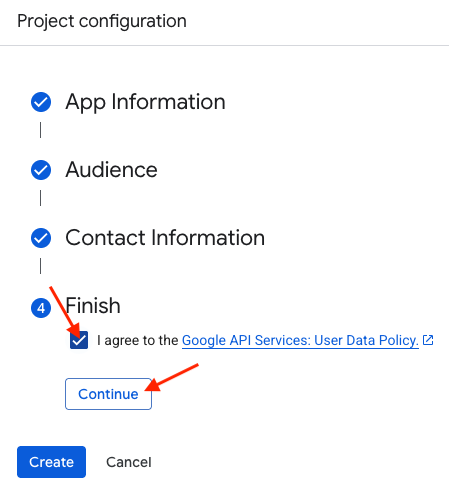
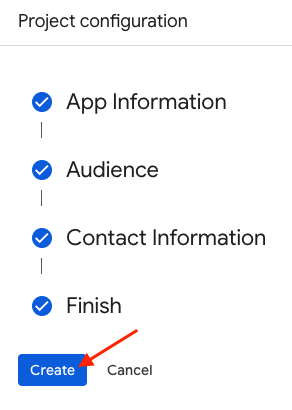
Check the box to accept the user data policy for Google API services, then click "Continue":
Finally, click "Create":
4. Create OAuth credentials
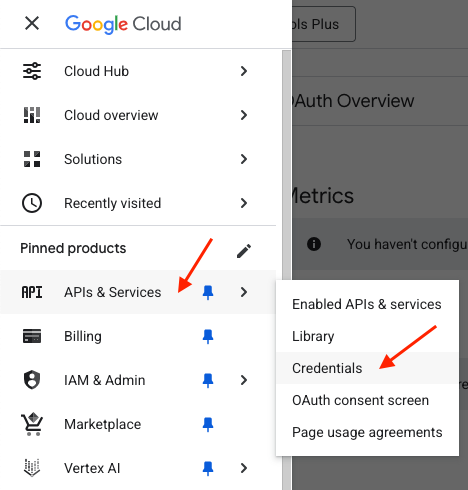
Click on the three horizontal bars in the menu at the top left, click on "APIs & Services" and select "Credentials":
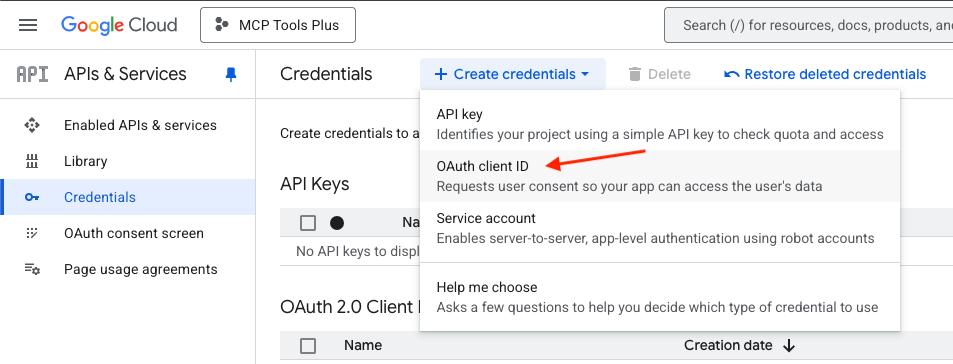
Click on the "Create credentials" dropdown menu and select "OAuth client ID":
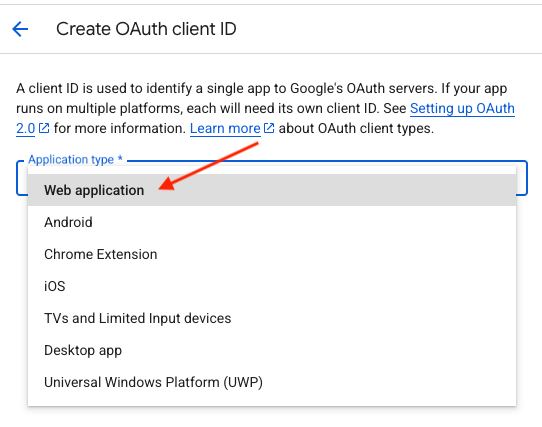
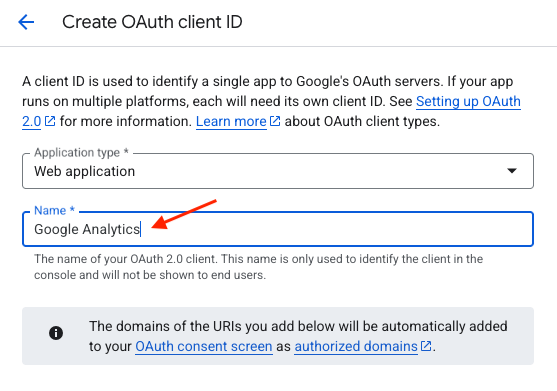
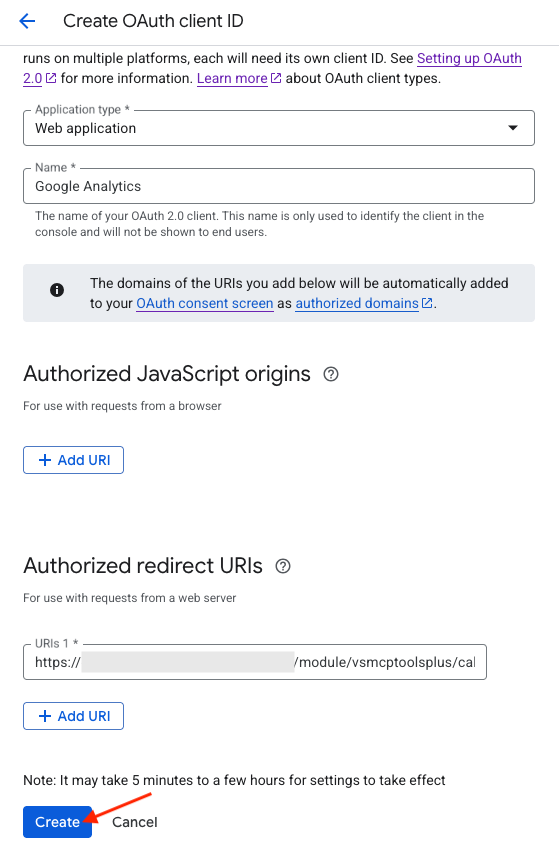
Select "Web application" as the application type in the dropdown menu:
Give a name to the OAuth client:
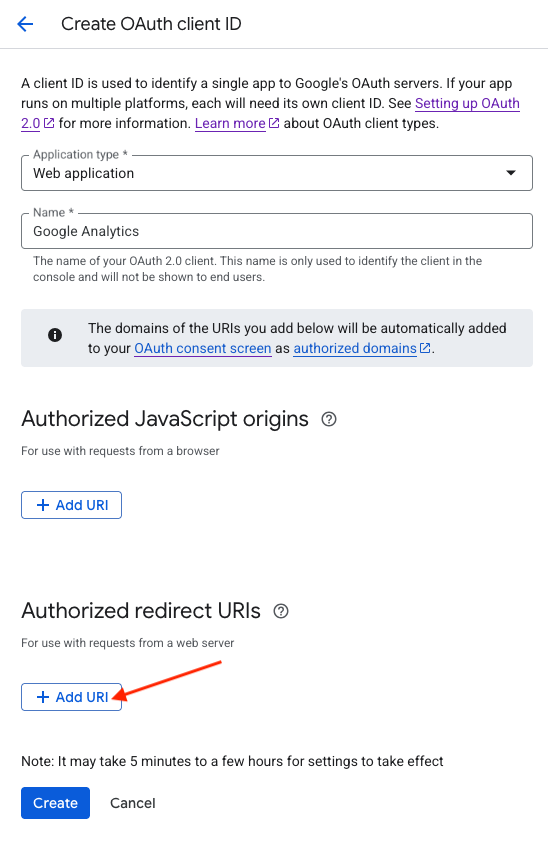
Further down, in the "Authorized redirect URIs" section, click on "Add URI":
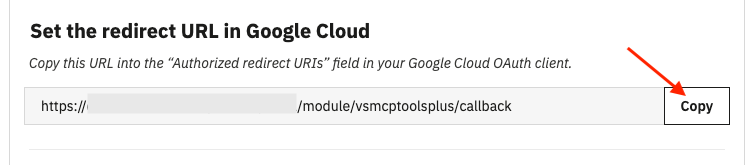
Go to the MCP Tools Plus module's configuration, and in the Google Settings tab, click the "copy" button to copy the redirect URL:
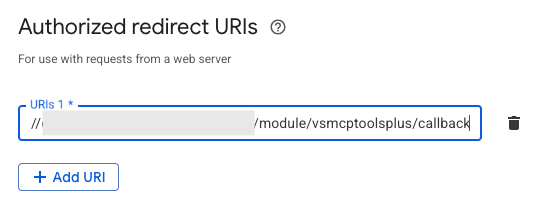
Then paste it into the Google Cloud console:
Finally, click "Create":
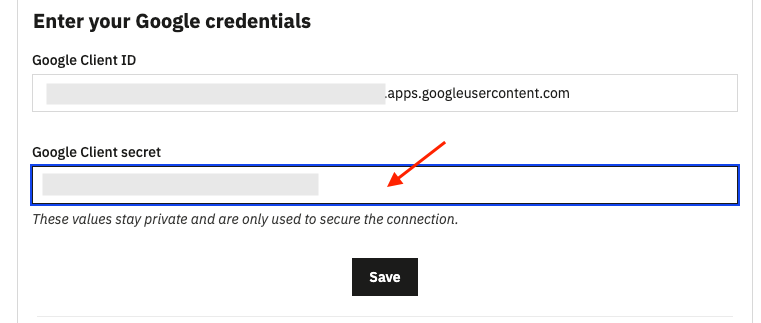
Copy your client ID and paste it in the appropriate field of the "Google Settings" tab in the module:
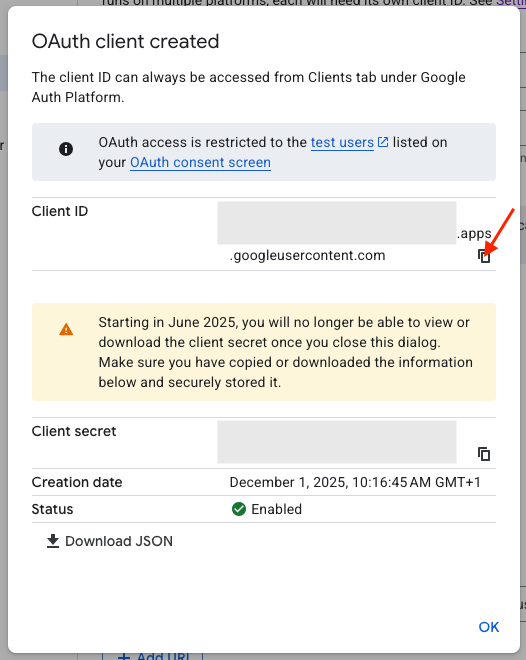
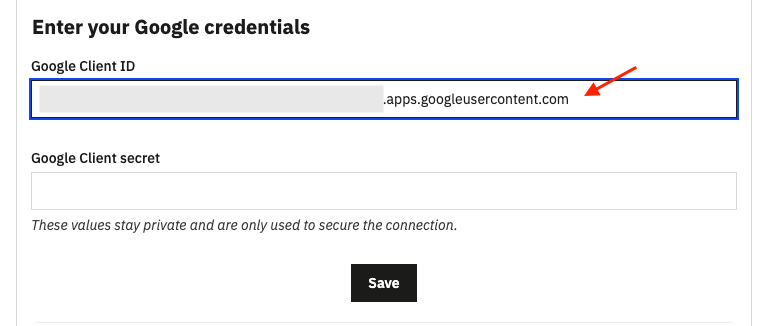
Similarly, copy the client secret and paste it in the "Google Settings" tab of the module:
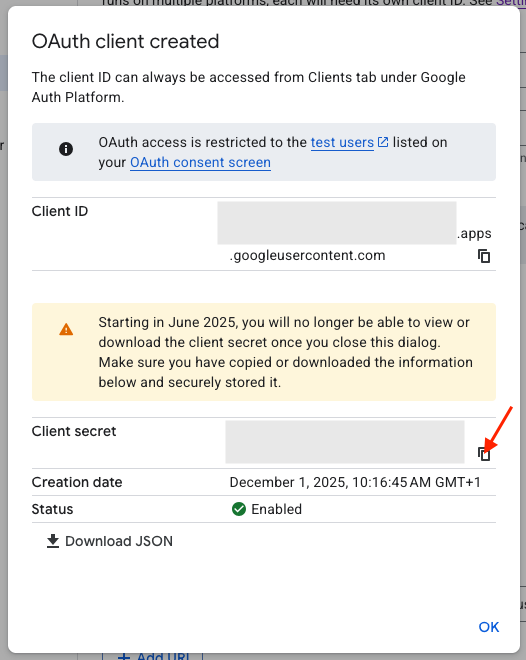
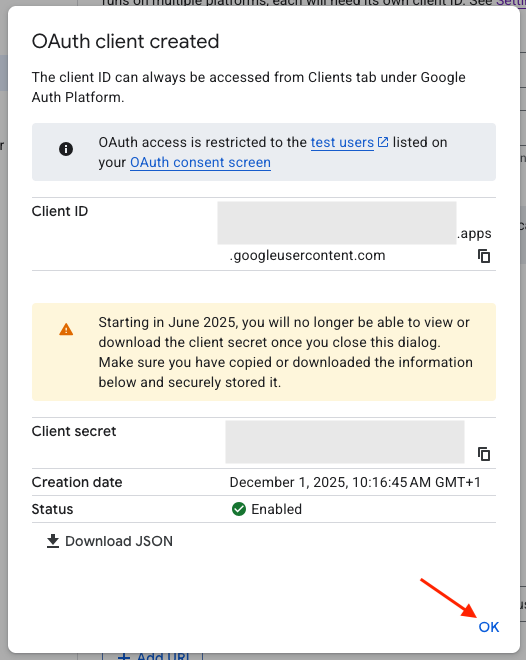
Warning: these credentials are confidential, do not share them. Click "OK" in the Google console:
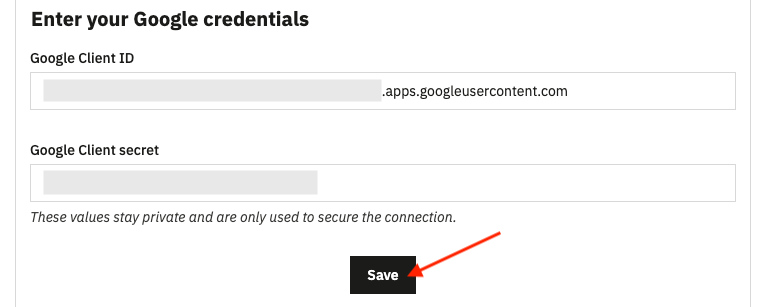
In the module, click "Save":
Still in the module, establish the connection with your Google application by clicking "Connect with Google":

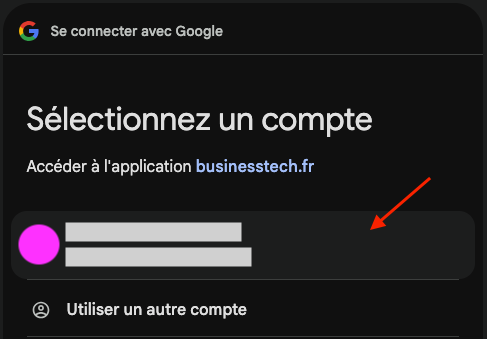
Select the email address you used to create the Google application in the Google console:
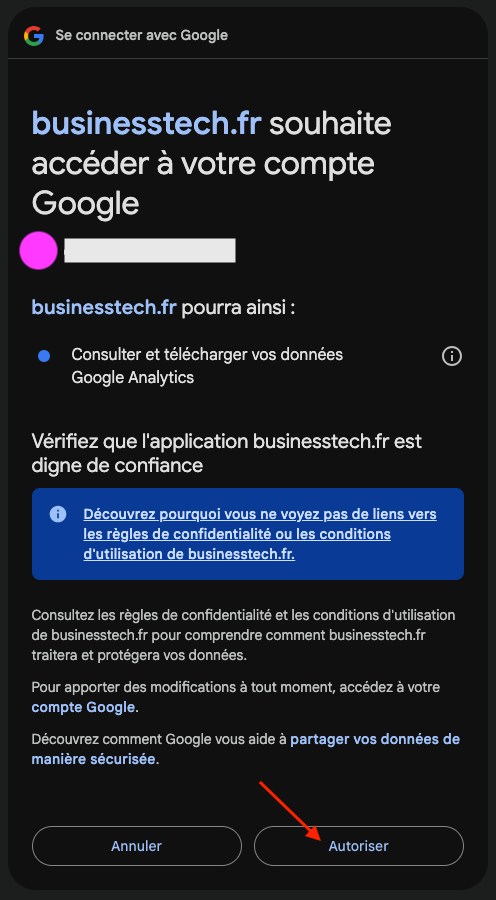
Click to authorize your shop to access your Google Analytics account:
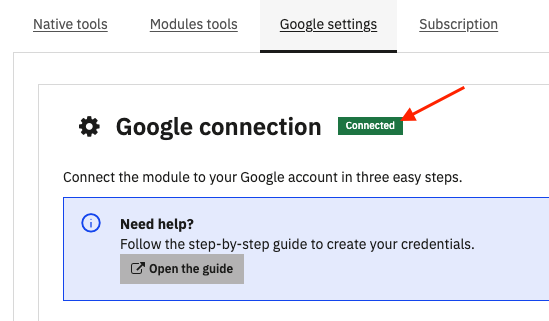
The module's configuration page will reload and you should see a green "connected" badge appear in the Google Settings tab, next to the Google Connection title:
You can now proceed to register your Google Analytics property ID in the module.