How do I create my conversion action in Google Ads and retrieve my Google Ads tag ID and my conversion label?
If you've already created your conversion action, follow this FAQ instead
If you haven't yet created a conversion action in your Google Ads account, follow this procedure:
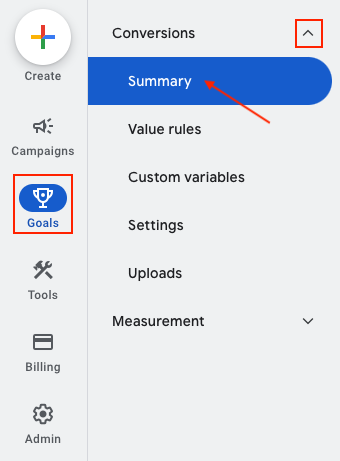
In the interface of your Google Ads account, in the left-hand menu, click on "Goals" and then go to the "Conversions" section, in the "Summary" tab:
Click on the blue button to add a new conversion action:

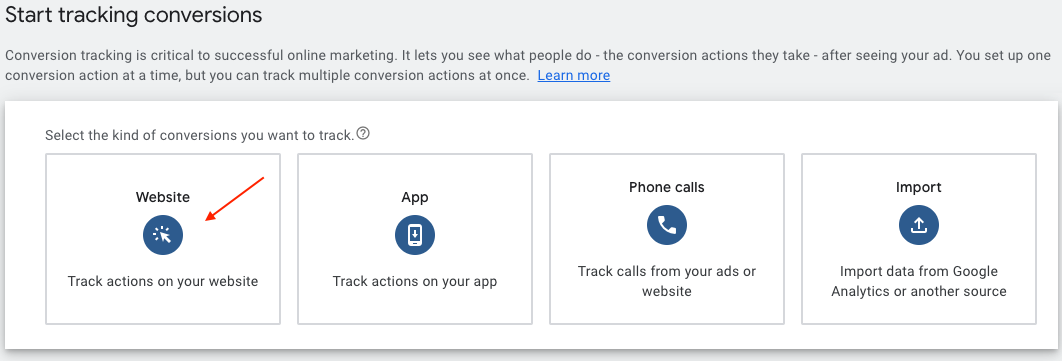
Then select "Website" to indicate that you want to track the conversions that will be made on your merchant website:
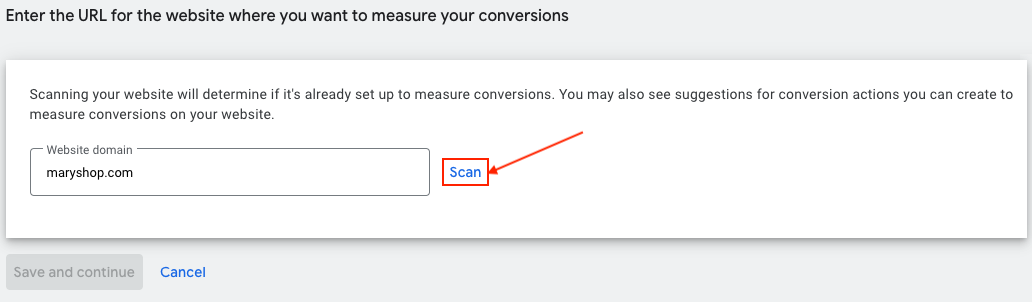
Enter your domain name and click on "Scan":
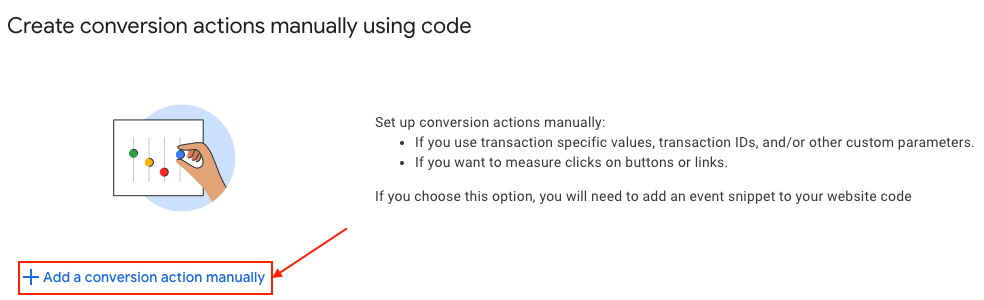
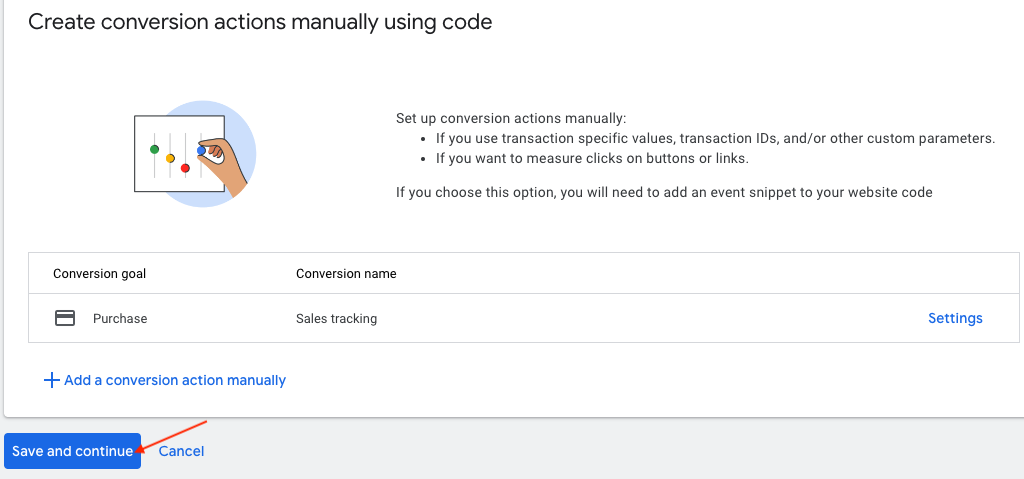
You are about to create a new conversion action for your website. Scroll down to the "Create conversion actions manually using code" section and click on "Add a conversion action manually":
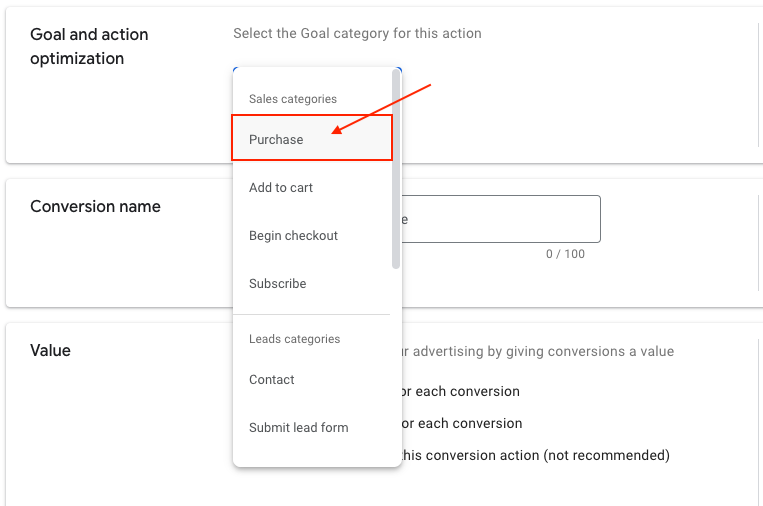
Select "Purchase" for the conversion goal:
Then give a name to the conversion. Since it's about sales tracking, you can for example enter "Sales tracking" (but you can choose what you want):

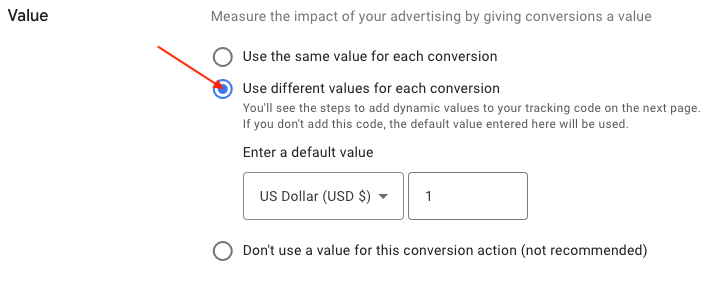
You are then asked to select the conversion value. In the case of a purchase the value is important because it's the price of the order and this one is, of course, different for each conversion made on your website. So you have to select "Use different values for each conversion" and then select the default currency (for example US Dollar (USD $)) and a default value (you can leave the "1" value):
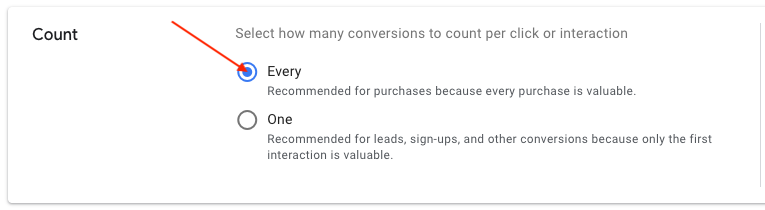
For the "Count" part, select "Every" to indicate that you want each conversion to be counted (if a person places 3 orders after clicking on one of your ads, the system will count 3 conversions and not only one):
For the following three settings, you can leave the default values, or change them according to your strategy. In this case, we advise you to read the helping texts that appear when you click on each parameter.

Then click on "Attribution" to define your attribution model:
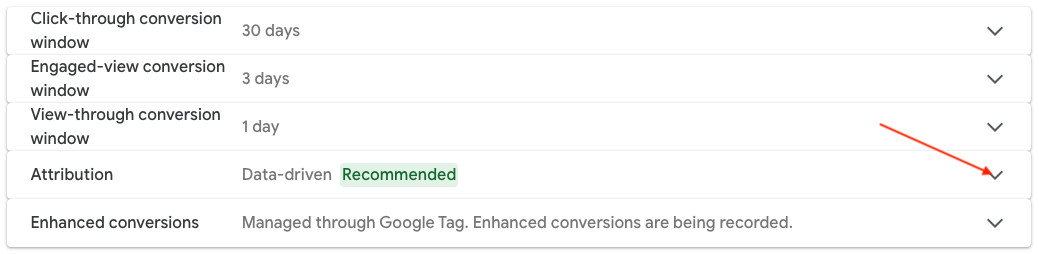
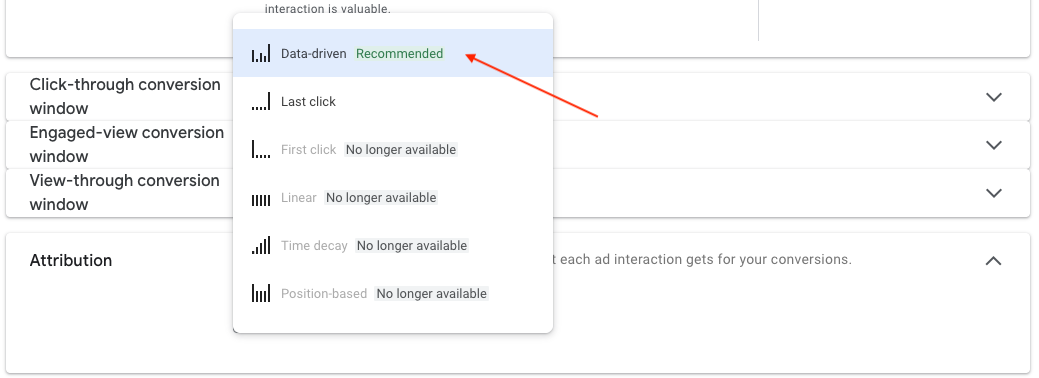
First of all, read Google's documentation on attribution models. Click here to consult it. Once you've made your choice, select your model from the drop-down menu. For the example, we'll leave the default choice, i.e. "Data-driven":
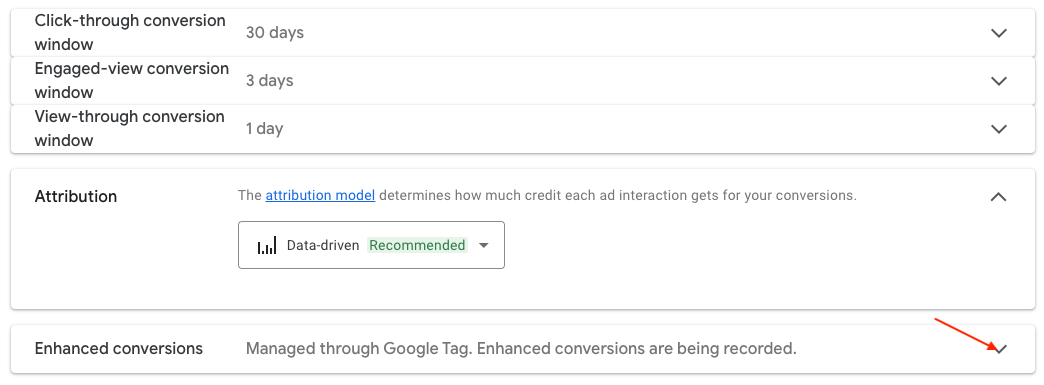
Finally click on "Enhanced conversions":
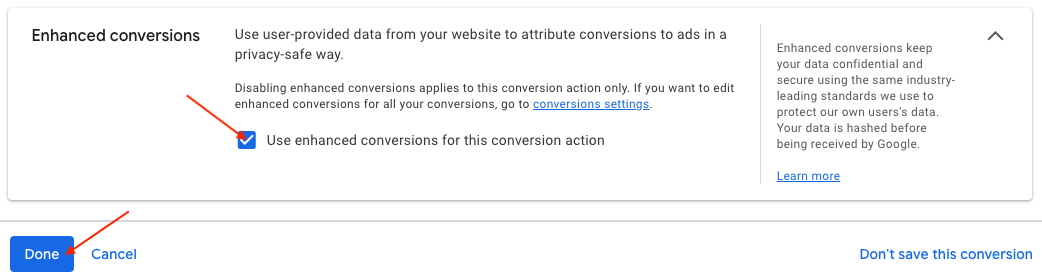
If you have activated advanced matching in the module, leave the "Use enhanced conversions for this conversion action" box checked, otherwise uncheck it, then click "Done" to confirm:
Click "Save and Continue":
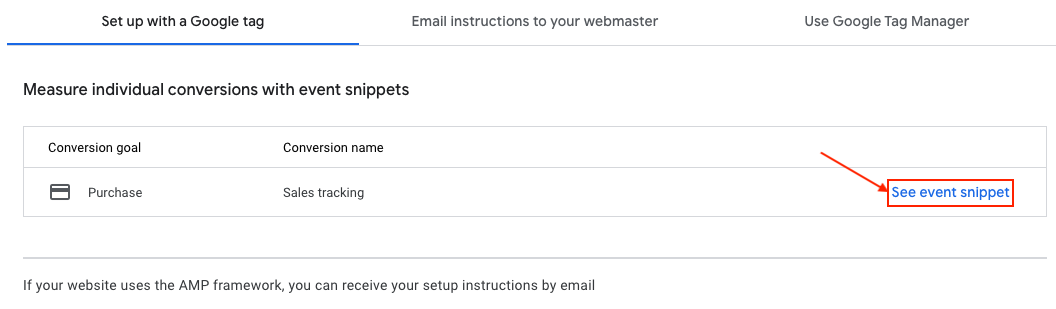
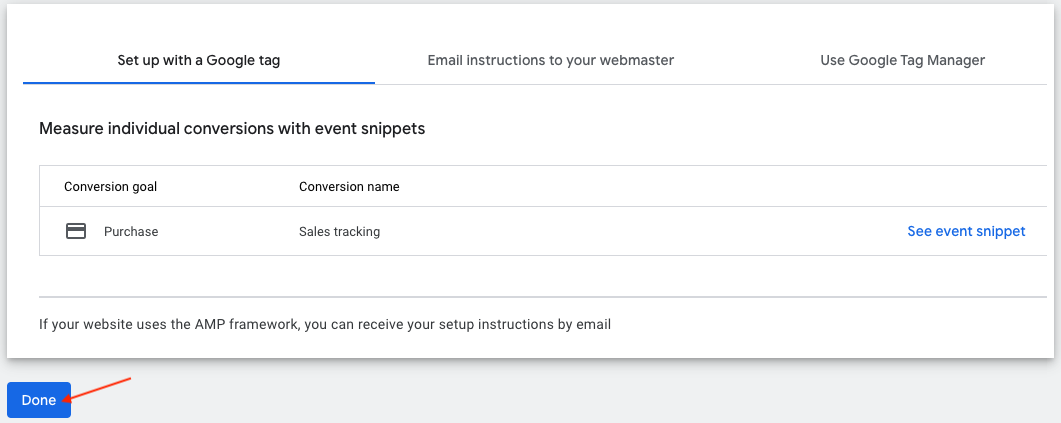
In the "Set up with a Google tag" section, click on "See event snippet":
Leave "Page load" checked to indicate that you want a purchase to be counted from the moment the order confirmation page is displayed, then click on "Download":
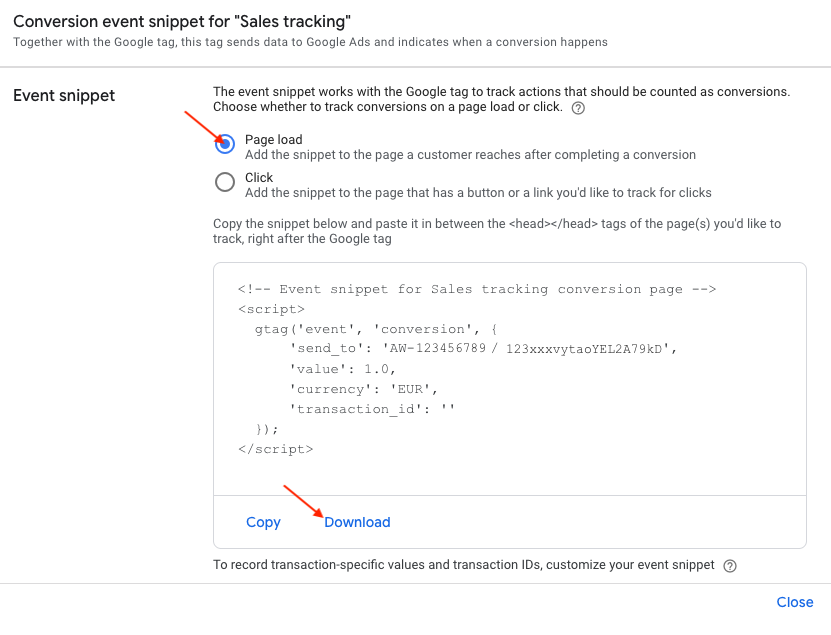
Save the snippet on your computer and open it with a text editor.
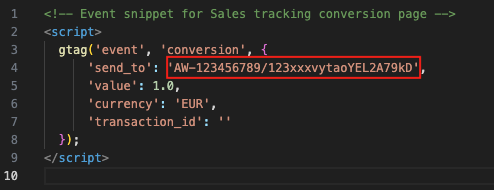
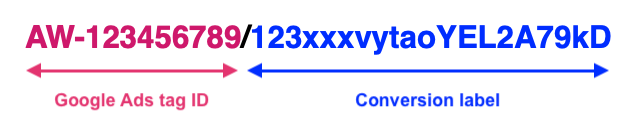
Look at the code after 'send_to'. The part of the code before the "/" is your Google Ads tag ID and the part after the "/" is your conversion label:
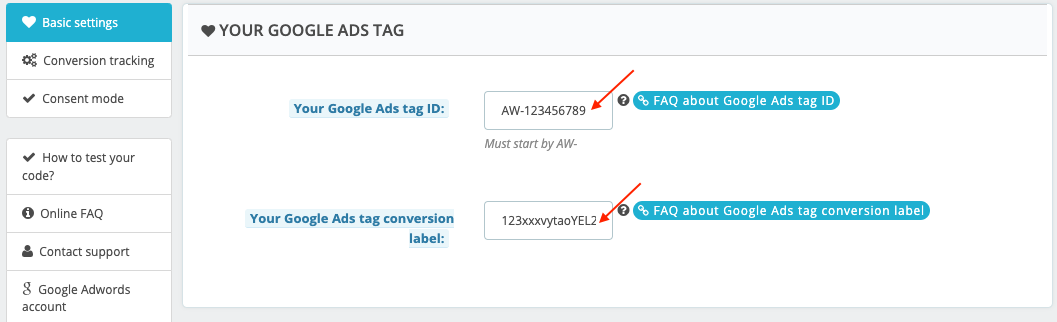
Copy and paste these two codes into the corresponding fields in the "Basic" tab of your module:
Save the module "Basic settings" tab once the codes are copied.
To finish the conversion tag creation, go back to your Google Ads interface and click on the "Done" button:
To know how to test your conversion tag thanks to a test order, read this FAQ.