How to test my Google Ads dynamic remarketing tag?
To know if visitor remarketing is working properly, you need to test the "remarketing tag" triggering on your store.
Step 1: Disable ad blockers
Disable any ad blocker that might be installed on your browser (like "AdBlock" or others) for your store's domain. If you don't do this, the test may not work and you won't know if the tag is triggering properly.
Step 2: Consent Configuration
Configure consent management
Make sure to properly configure consent management. To do this, please follow this FAQ.
Accept cookies
Regardless of your cookie consent banner module, it's important to perform the test by accepting all cookies on your cookie consent banner. Indeed, we will test the technical implementation of your tag, so if the test works when all cookies are authorized, it means that everything is technically in place for tracking information to be sent to Google. Later, you can test different types of consent. If you then notice a stop or abnormal decrease in data reporting in your Google Ads account, then the problem will come from your cookie banner module (see this FAQ).
Step 3: Testing dynamic remarketing tag functionality
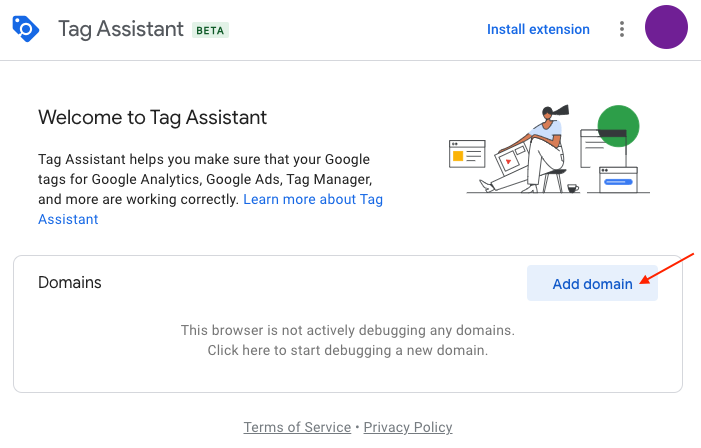
Go to tagassistant.google.com
Click on "Add domain":
Enter your site's URL and click "Connect":

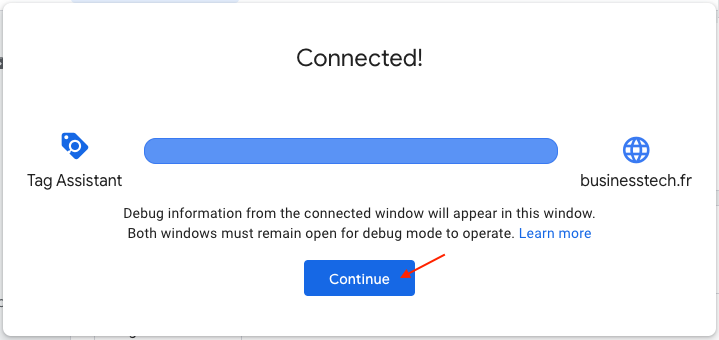
The Tag Assistant will open your site's homepage in a new tab. This is the tab where you'll need to perform the tests.
In the Tag Assistant window, click the "Continue" button:
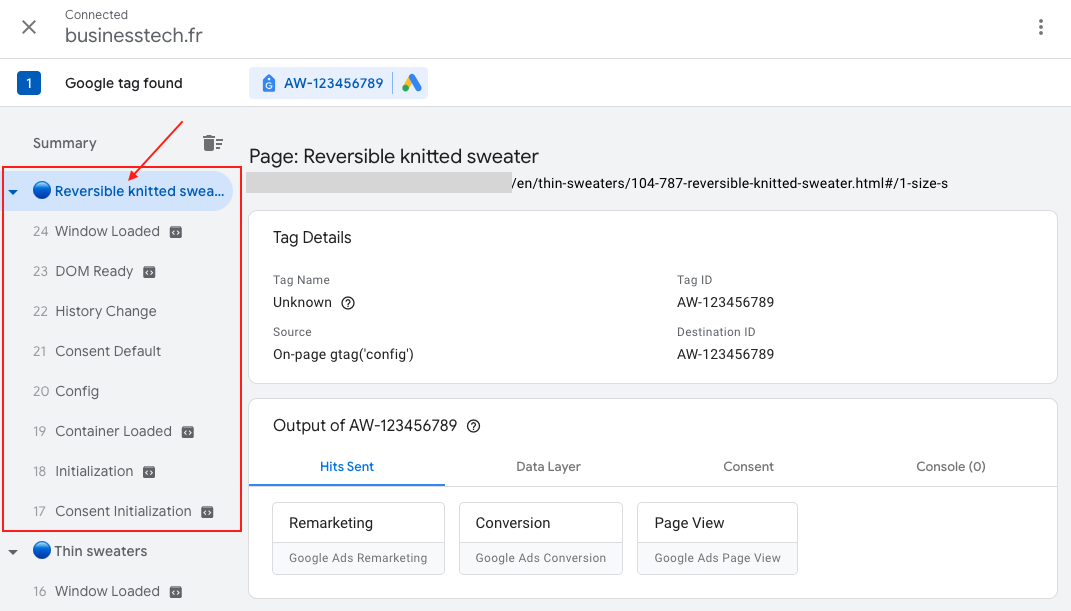
The Tag Assistant should normally have detected your Google Ads tag and you should see a window like this:
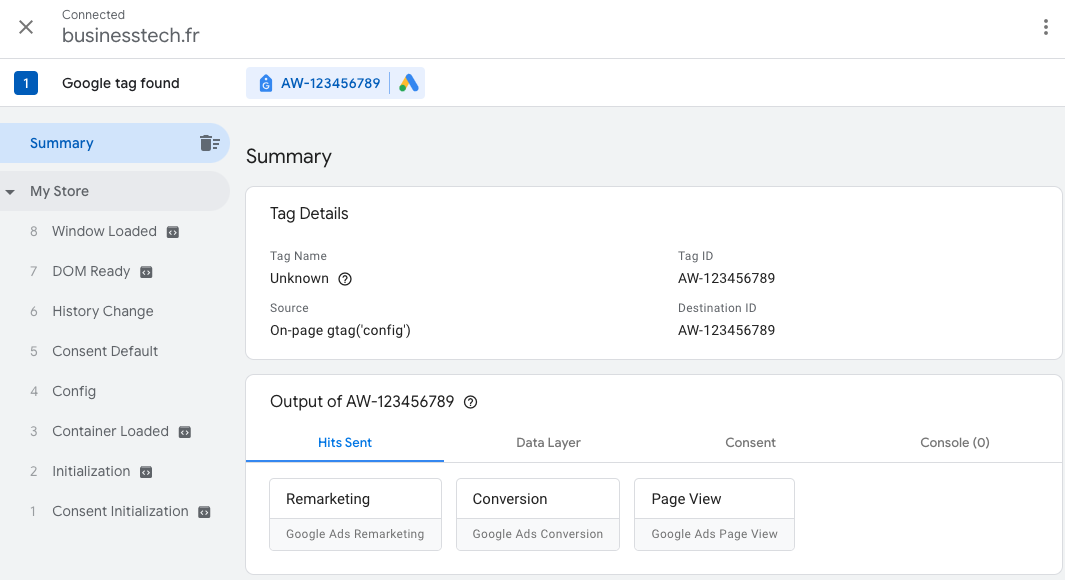
To know if your Google Ads dynamic remarketing tag is properly sending information about your visitors' activity to Google, you need to test its triggering on your site's pages. We'll take the example of a product page. You don't need to test your tag on all pages of your site: if your tag works for one, it will work for all.
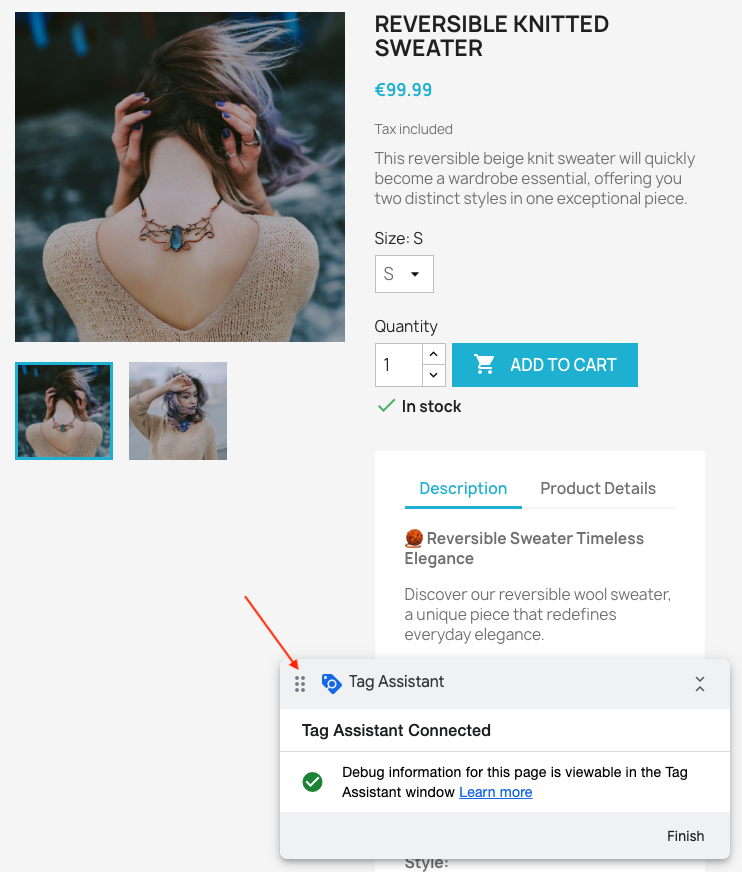
In your site's tab, opened by Tag Assistant, after accepting cookies on your consent banner, go to a product page. A small window in the bottom right indicates that Tag Assistant is connected to this product page:
Switch back to the tag assistant tab.
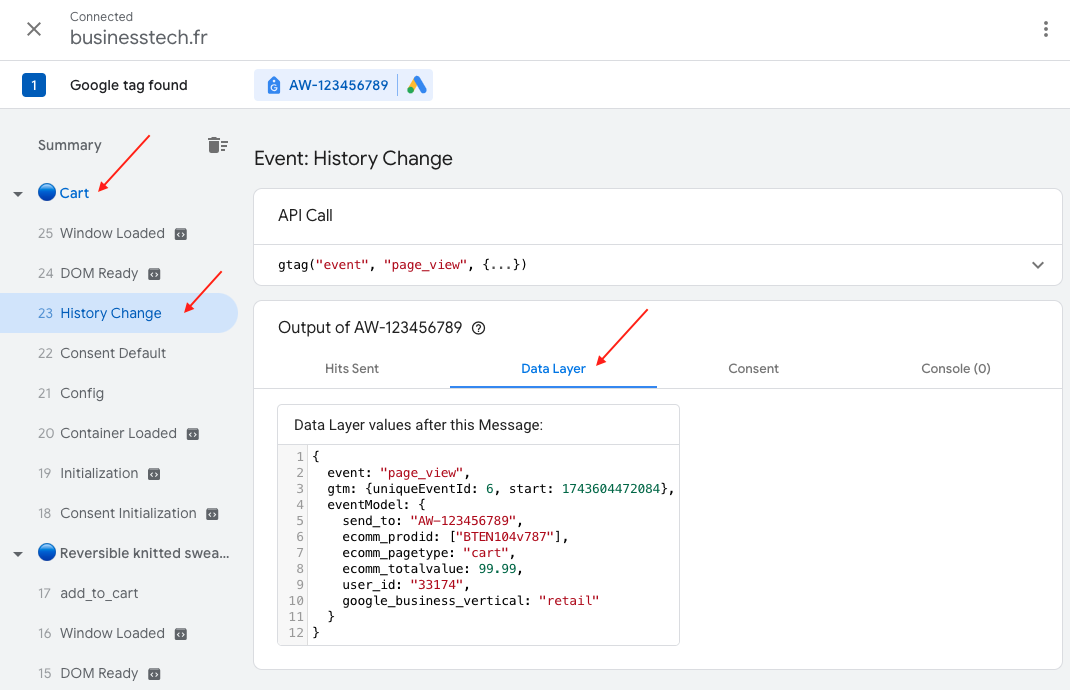
In the left menu, locate the section corresponding to this product page load. For example here, the product page displayed is for the "Reversible knitted sweater". In the left column of the tag assistant, at the very top we see the section corresponding to the "Reversible knitted sweater":
In this section click on "History change":
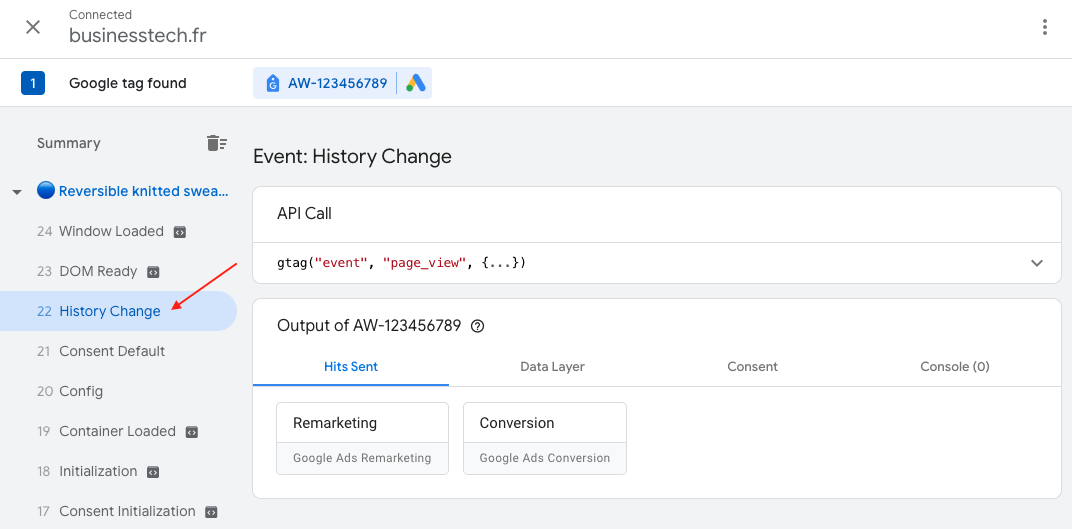
Then on "Data Layer":

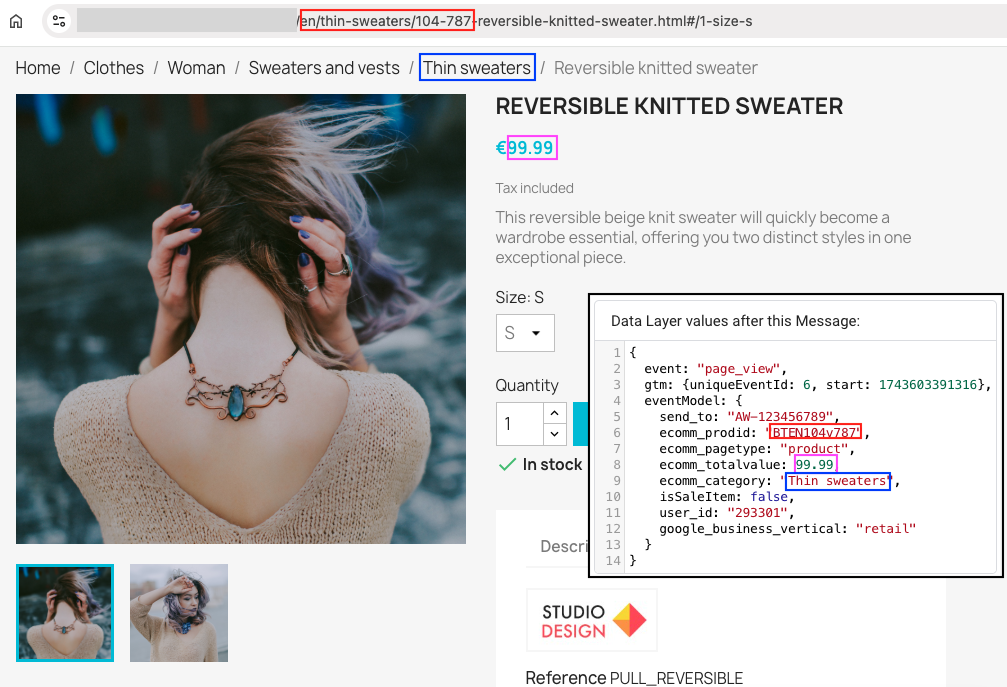
Here's the interpretation of the data in our example:
- event: "page_view" -> the event is a page view
- send_to: "AW-123456789" -> corresponds to the conversion ID of the detected Google Ads Dynamic Remarketing tag
- ecomm_prodid = "BTEN104v787" -> corresponds to the product ID displayed in your Google Merchant Center feed: store prefix: BT, language prefix: EN, product id: 104 and variation: 787
- ecomm_pagetype = "product" -> the viewed page is a product page
- ecomm_totalvalue = "99.99" -> the product price value is 99.99
- ecomm_category = "Thin sweaters" -> the product category is "Thin sweaters"
- isSaleItem = "false" -> the product is not on sale
- user_id = "293301" -> the user ID is 293301
Verify that the product data matches the displayed product:
- If you can see the product information in the data layer, it means your dynamic remarketing tag is working correctly and technically everything is in place for visitor activity tracking in your Google Ads account. If later you don't see any data in your Google Ads account, or you observe a significant loss of data, start by verifying that the dynamic remarketing campaign configuration in your Google Ads account has been properly done. If this doesn't resolve anything, please refer to this FAQ.
- If you don't see any data appear, it means the Google Ads tag execution has been blocked. Please refer to this FAQ to know the possible causes and resolve them. Once the problem(s) are resolved, restart the test following the previous procedure.
Click on "Consent". You should find the consents granted for different Google signals:
- ad_storage: reading and writing cookies by Google advertising tags
- analytics_storage: reading and writing cookies by Google analytics tags
- ad_user_data: use of user data in Google advertising products
- ad_personalization: display of personalized ads (remarketing)
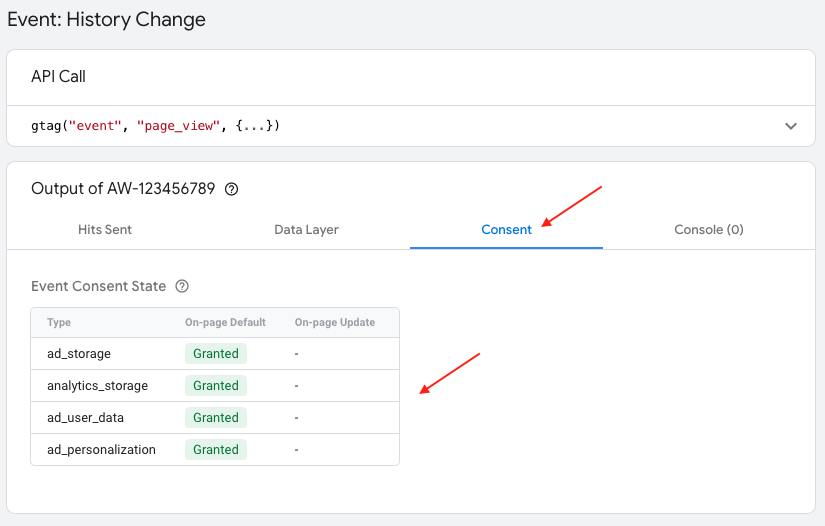
Here, we authorized all cookies (and all signals), so they are all in "granted" state. Test different consent levels on your CMP (cookie banner) and verify here that the permissions are properly updated. To have perfect granularity in consents and total GDPR compliance, we recommend using the "Advanced Cookie Banner" module as your cookie banner (a subscription version is also available).
For any information about configuring the module with your CMP (cookie banner), go here.
To learn more about verifying Consent mode, click here.
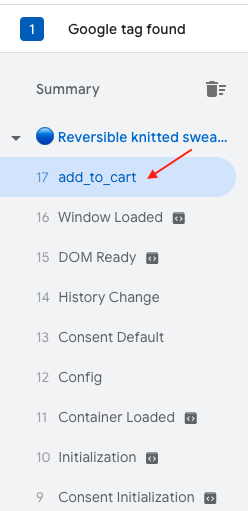
Add the product to cart and verify that the "add_to_cart" event has appeared at the top of the section:
Then go to the cart page. Similarly, you can verify the data sent to Google Ads in the "Data Layer" tab:
Do the same for other events.