How to configure the Google Ads Conversion Tracking Pro module?
Module - Google Ads Conversion Tracking Pro
The Google Ads Conversion Tracking Pro module allows you to automatically install the Google Ads conversion tracking tag on your PrestaShop store. Thanks to this module, you can accurately measure the return on investment (ROI) of your Google Ads campaigns, track every generated conversion, and optimize your advertising spend.
This module makes it easy to configure tracking, manage consent (GDPR), and offers advanced options for tailor-made tracking, compatible with the latest versions of PrestaShop and Google’s requirements.
You thus benefit from complete visibility on the profitability of your campaigns, while respecting your customers’ privacy.
1. Basic configuration
This section allows you to connect your store to your Google Ads account by entering the required identifiers.
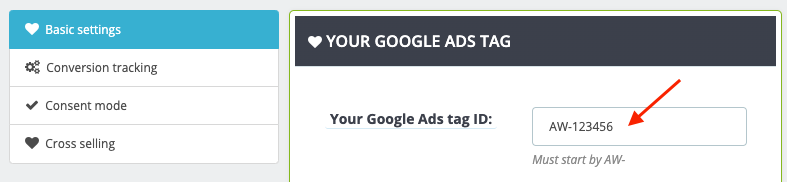
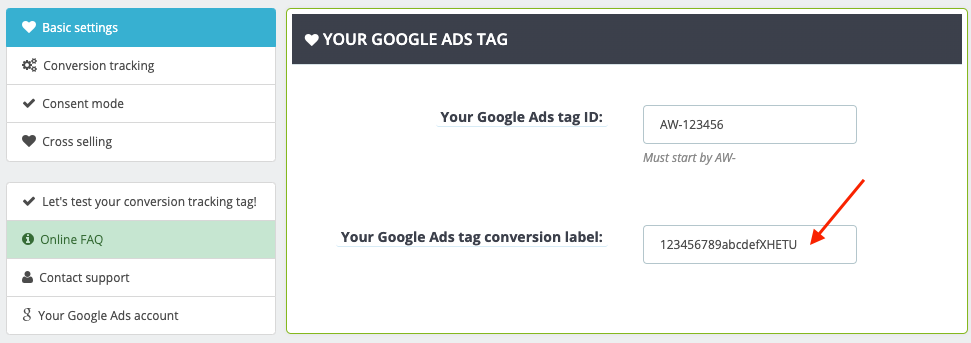
Why? For Google to receive conversion information (purchases, important actions) from your store, it is essential to enter Your Google Ads tag ID and Your Google Ads tag conversion label.
Prerequisites:
- Have an active Google Ads account
- Retrieve the tag ID and conversion label from your Google Ads interface (see the dedicated FAQ)
To configure the connection with Google Ads:
- In the Your Google Ads tag ID field, enter the identifier provided by Google (format: AW-XXXXXXX):
- In the Your Google Ads tag conversion label field, enter the label associated with your conversion action (provided by Google):
- Click the Save button to validate your settings.
2. Conversion tracking
This section allows you to customize how the conversion value is calculated and to enable advanced options for optimal tracking.
Why? Adapting the calculation of the conversion value to your business model (including or excluding tax, shipping costs, etc.) allows you to obtain accurate and relevant statistics for your Google Ads campaigns.
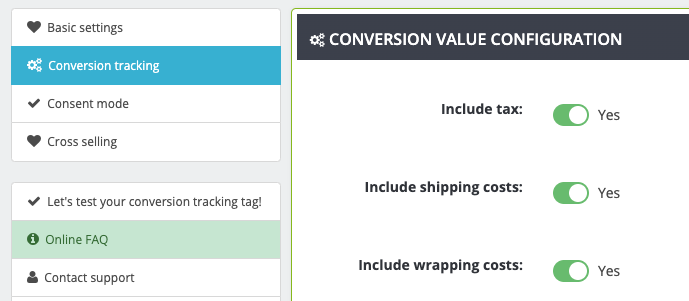
a) Conversion value configuration
Choose whether you want tax, shipping costs, and wrapping costs to be included in the conversion value sent to Google Ads:
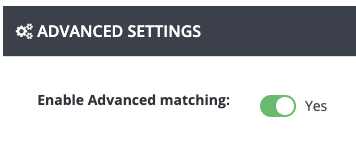
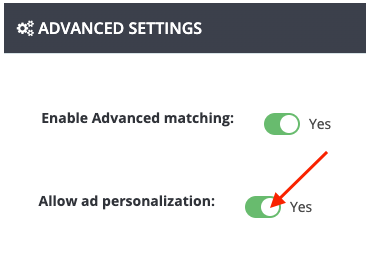
b) Advanced settings
Enable advanced options to improve the quality and accuracy of conversion tracking:
- Enable Advanced matching: allows you to securely send to Google the customer's email, first name, and last name during a conversion. This improves the accuracy of tracking and conversion attribution:
- Allow ad personalization: allows you to use conversion data for remarketing purposes (ad personalization):
c) Custom controller management
If the conversion tag does not trigger for certain payment methods, you may need to enter the name of the custom controller used by your payment module. For example:
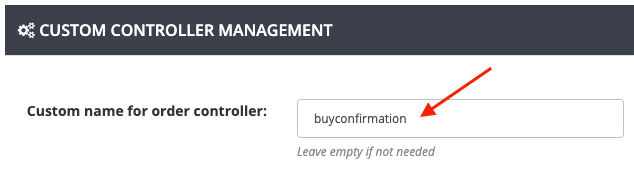
Note: Leave this field empty if you are not concerned.
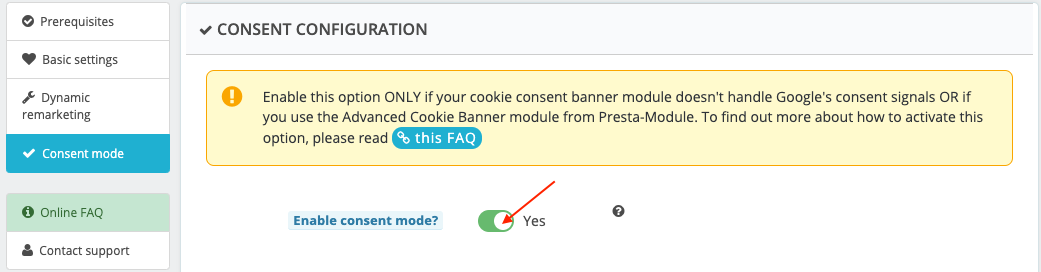
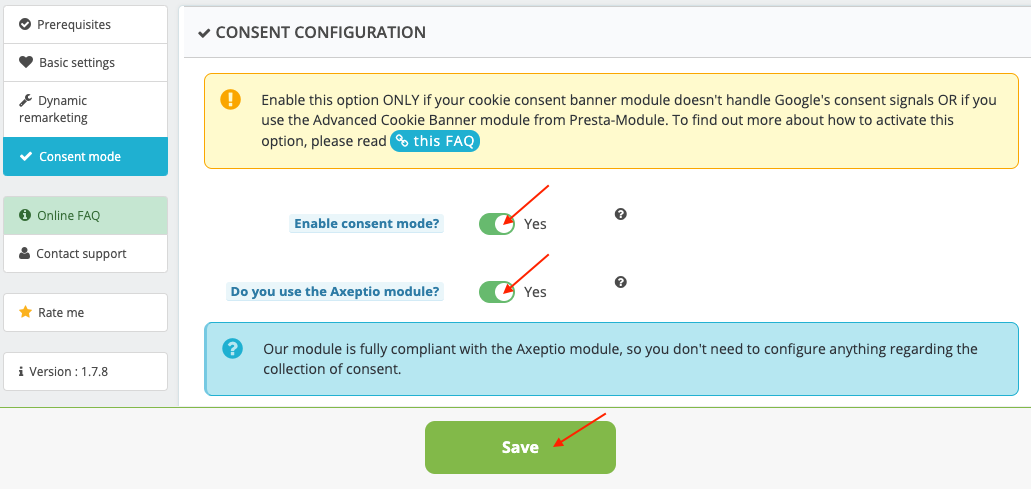
3. Consent mode
This section allows you to manage GDPR compliance by adapting the triggering of the Google Ads tag according to your visitors' consent.
Why? Respecting your customers' privacy and legal requirements (GDPR) is essential for the trust and compliance of your store.
Prerequisites:
- Check if your cookie banner module already manages Google consent signals
- If you use the Advanced Cookie Banner module from Presta-Module, management is automated
- If you use the Axeptio module, consent management is also automated between the two modules
To fully understand the issues of Google Consent mode and how to configure it according to your situation, we recommend reading this dedicated FAQ before continuing the configuration.
Note: Using the Advanced Cookie Banner module from Presta-Module offers fine management of different consent levels (statistics, marketing, etc.) and optimal compatibility with BusinessTech modules, which is not possible with Axeptio or other consent modules. For more information or to purchase this module, visit its official page or its subscription version.
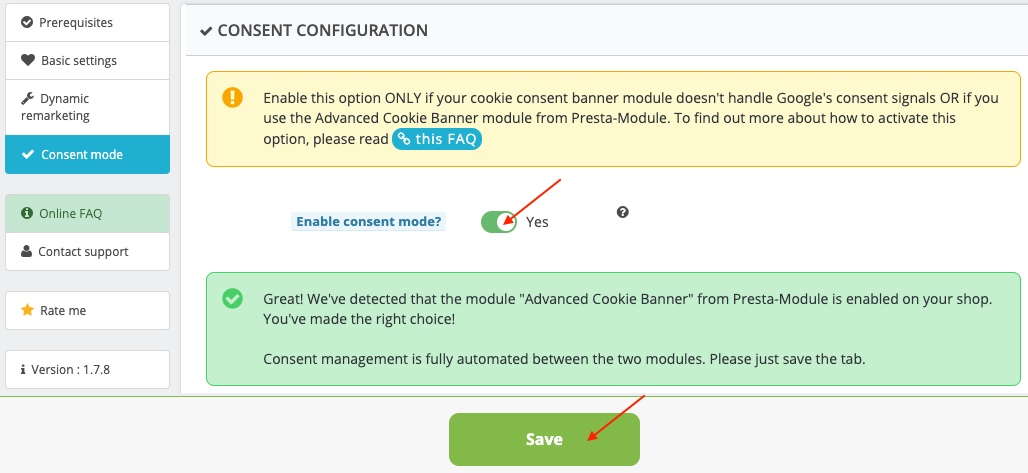
- Enable consent mode: Enable this option only if your cookie banner does not already manage Google signals, or if you use Advanced Cookie Banner or the Axeptio module:
- Compatibility with Advanced Cookie Banner: If the module detects Advanced Cookie Banner, consent management is automatic: just save the tab:
- Compatibility with the Axeptio module: If you use the Axeptio module, enable the corresponding option. No further configuration is necessary:
- Manual configuration of consent buttons: If you do not use Advanced Cookie Banner or Axeptio, indicate the ID or CSS class of the button that allows cookies to be accepted (e.g.,
#accept-cookiesor.btn-accept):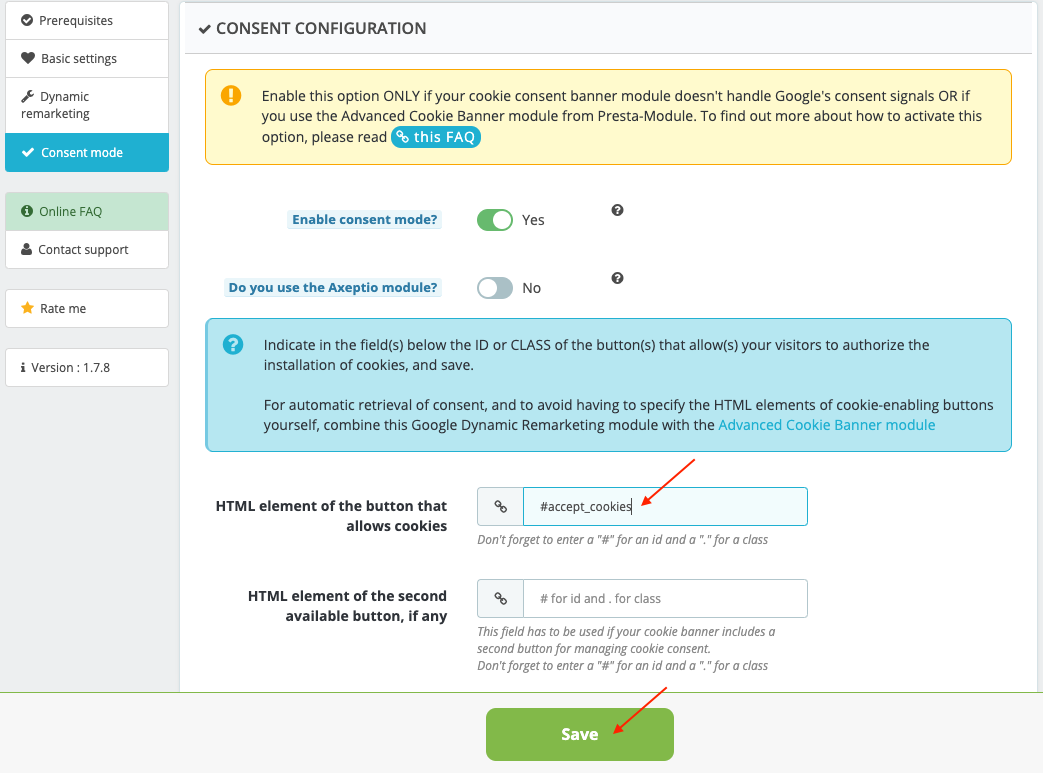
4. Test the conversion tag
Once the module configuration is complete (including consent mode), it is recommended to check that the Google Ads Conversion Tracking tag is triggered correctly on the order confirmation page. To do this, follow the detailed procedure in this FAQ.
Related FAQs: to go further
- Where to find the Google Ads tag ID and conversion label?
See this FAQ to know exactly where to retrieve this information in your Google Ads account and how to enter it in the module. - All about Google Consent mode
This FAQ explains in detail how Google Consent mode works, the different scenarios depending on your cookie banner, and how to configure the module accordingly. - Advanced matching: how it works and benefits
To understand the benefits of advanced matching and how to enable it in the module, read this FAQ. - Google Ads remarketing: how does it work?
This FAQ details the ad personalization option and its impact on your remarketing campaigns.