How to create my Google app?
To set a Google connector on your PrestaShop website, first go to the configuration of your Social Login module and click the "Social login buttons configuration" tab. On the line of the Google connector, click on the pencil button to configure the connector ("edit" column):

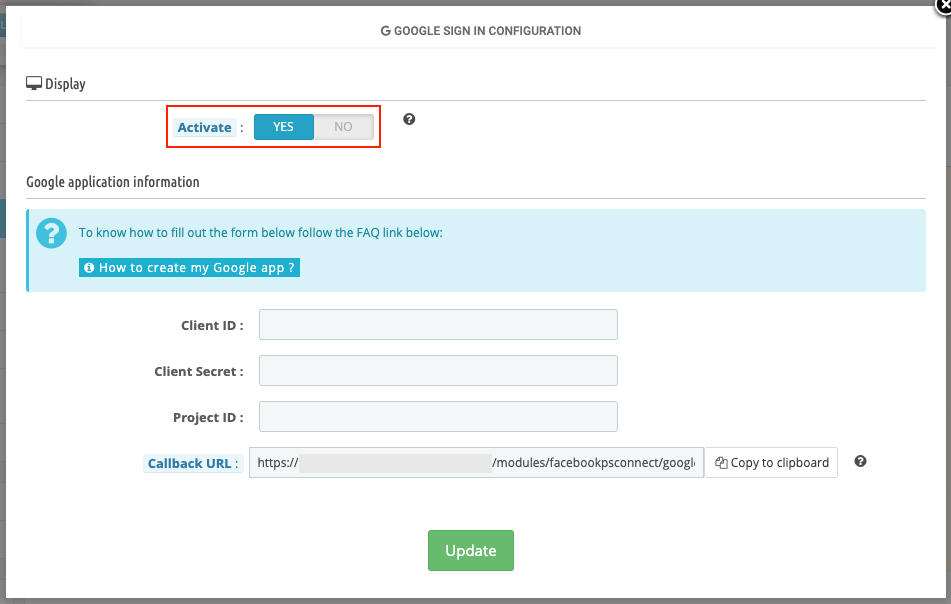
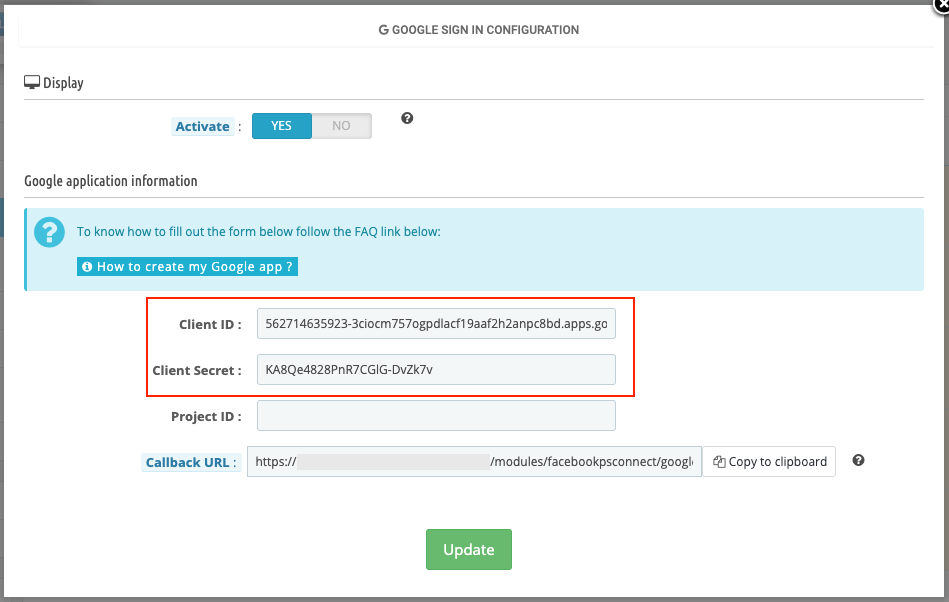
Select YES to activate the connector display on your site:
Do not close this configuration window, you will have to fill in other information. For that, you have to create a Google app. Follow the following process:
In another tab, reach the "Credentials" tab of the Google for developers interface and Log in(*).
(*)Note:
Be careful you must log in with a gmail address to which you agree to receive messages from your customers, if needed. Indeed, Google will redirect the visitors to this email address if they want to contact you via the consent screen (see below) that will appear at the click on the Google login button.
Google provides only one alternative to this: log in with the gmail address you want and then, when you configure the consent screen, indicate the email address of a Google Group you are admin of.
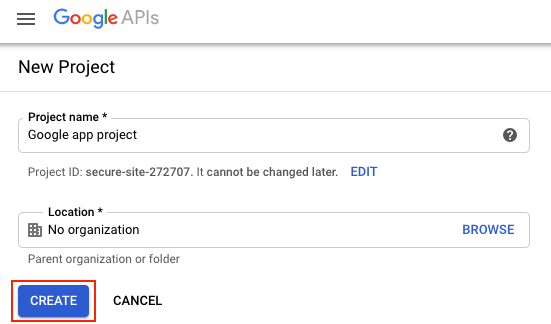
Click on "Create project" on the right side of the screen to create a new project:

Enter a name for the project, for example "Google app project" and click "Create":
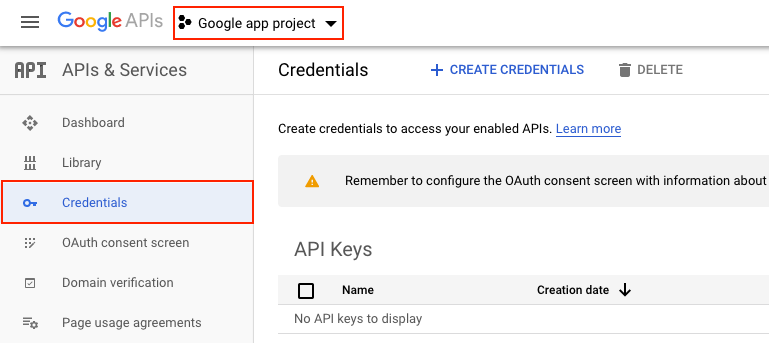
Then, check that you are well inside the project you just created by checking the name of the tab, next to the "Google APIs" logo (if this is not the name of the project you just created, select it by clicking on the little black arrow). Also check in the left menu that you are in the "Credentials" tab:
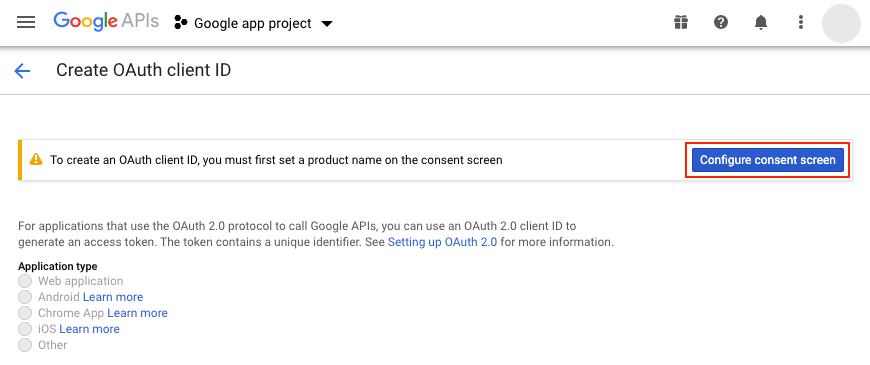
First of all, you will have to configure the "consent screen", i.e. the screen that will be displayed when one of your visitors clicks on the Google login button.
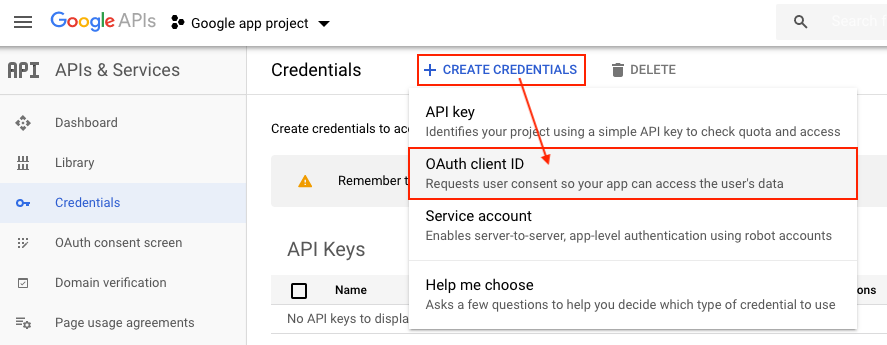
Click on the "Create credentials" button and select "OAuth client ID":
Click on "Configure consent screen":
First, you are going to configure the screen that will appear to your users when they click the Google login button.
To do that, click "Configure consent screen":
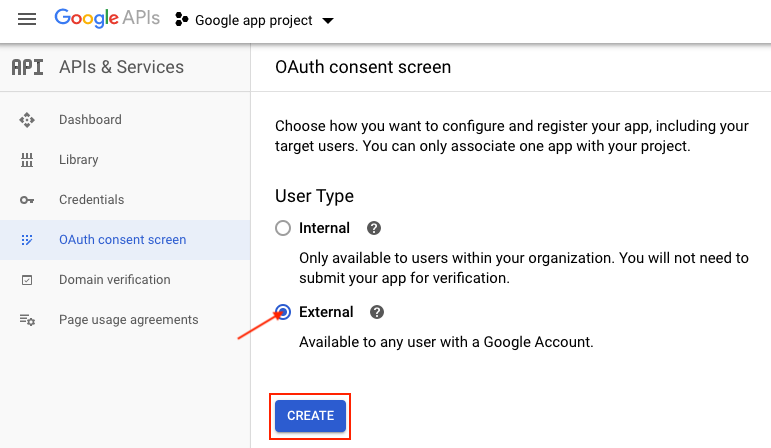
You are first asked what type of user will be using your application. It will be used by your visitors and customers and therefore, by users outside your company. You must therefore select "External". Then click on "Create".
Be careful: since the introduction of the General Data Protection Regulation, data recovery is highly regulated and only takes place under certain conditions. If you want to be able to use your app immediately, without having to submit it for review (which can take four to six weeks) we advise you to follow our configuration advice in the following steps.
The consent screen tells your users who is requesting access to their data and what kind of data you're asking to access. Indeed, according to the GDPR, you must get the explicit consent of your users if you want to use their data.
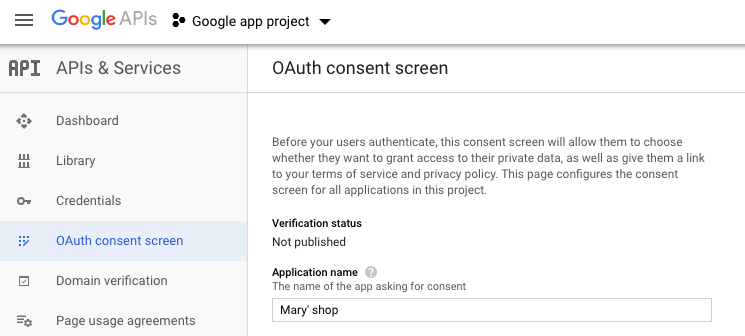
For the "Application name", enter the name of your shop so that your visitors understand right away who is asking consent to collect some of their data:
Be careful: do not add a logo for your app if you want to avoid the review of your app:
![]()
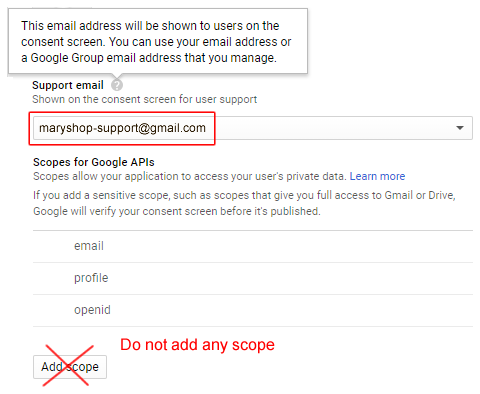
Enter the email address of your support service (with which you have logged in, see the note at the beginning of the FAQ) or of the "Google Group" of which you are administrator.
In the "Scopes for Google APIs" section do not touch anything. Google simply indicates that by default it gives you access to the email address and the name of your user.
Do not add other scopes otherwise you will have to wait for Google to validate your app. Anyway, to create the Google quick connect button, all you need is the email address and the name of your users (which they are approved by default by Google), so it is useless to ask for other data.
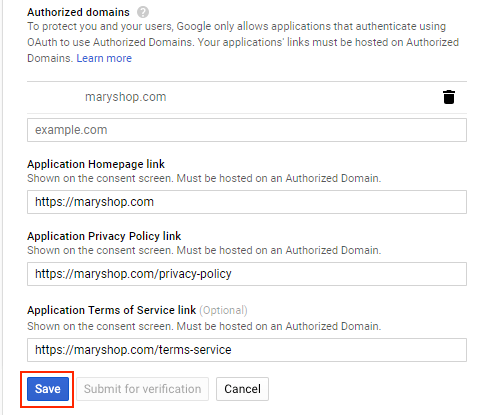
In "Authorized domains", enter the name of your domain, the URL of your website homepage, the one of your policy privacy and the one of your terms of service (note that the last two URLs can be the same). Finally click "Save":
The configuration of the consent screen is complete. Do not pay attention to the OAuth rate limits (limit on the number of users), this only applies if you are requesting sensitive data, which is not the case here. You will therefore not be limited.
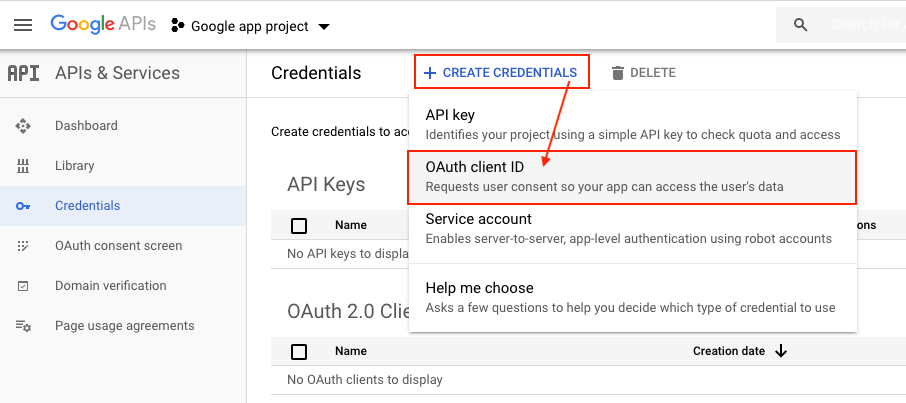
Return in the "Credentials" tab:

Now, you have to generate secured access token to allow Google to authenticate the app you just created when a customer asks to connect and make the link with your website.
Click again on "Create credentials" -> "OAuth client ID":
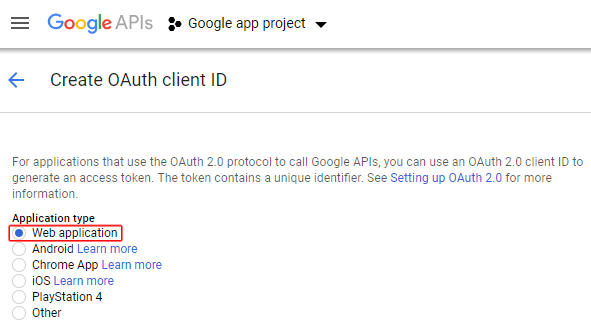
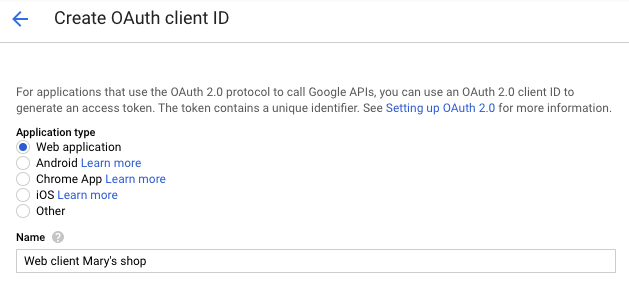
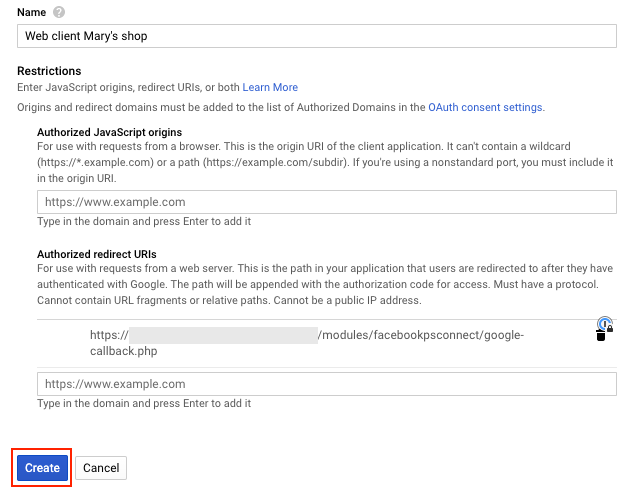
Select "Web Application" for the type of application:
Give a name, for example "Web Client Mary's shop" (be careful this name must be different from your app):
Do not put anything in the "Authorized JavaScript origins" field:
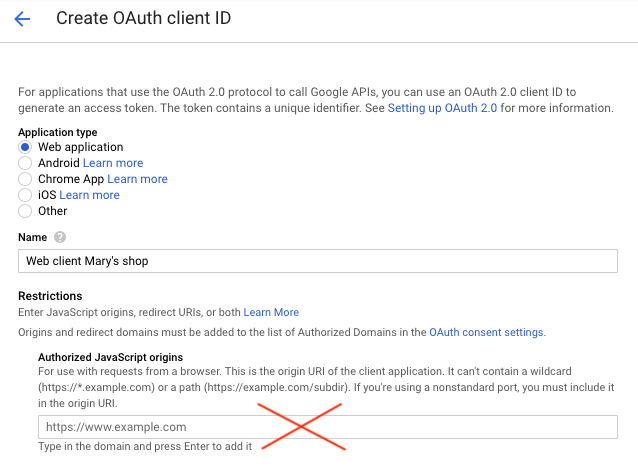
In "Authorized redirect URLs" field you have to copy and paste the callback URL that is given in the module. This is the URL of the page to which your customers will be redirected after clicking the Google login button.
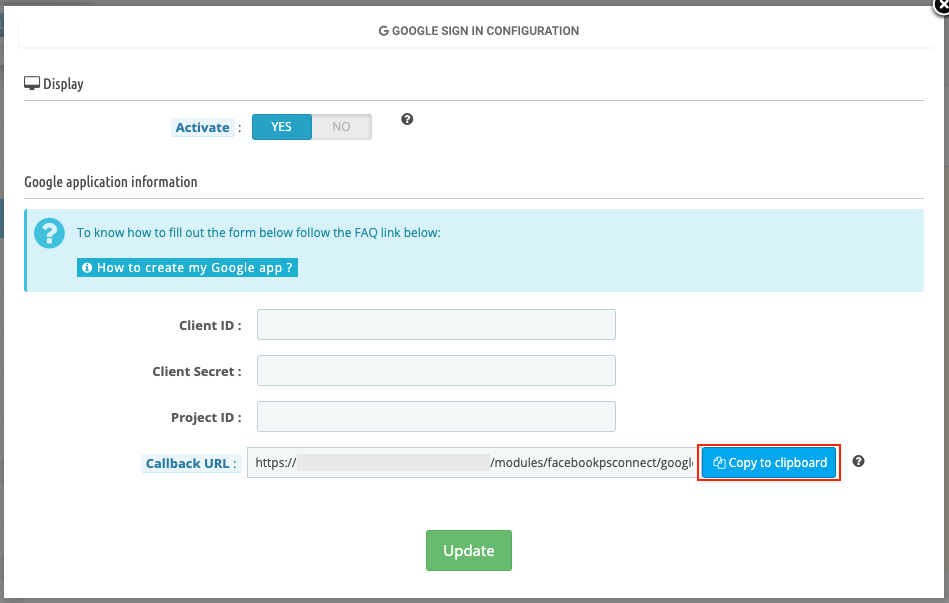
Return in the Google connector configuration in the module and on the "Callback URL" field click "Copy to clipboard":
Return in the app configuration and paste this URL in the "Authorized redirect URLs" field:
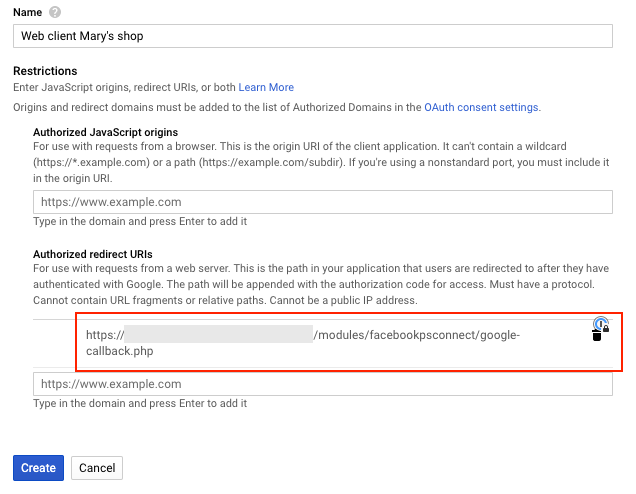
Be careful: once the callback URL is filled, before clicking "Create", click outside the field so that Google saves this URL. Then click on "Create":
A modale appears with your client ID and your client secret code. Copy each of them and paste them into the connector configuration in the module:
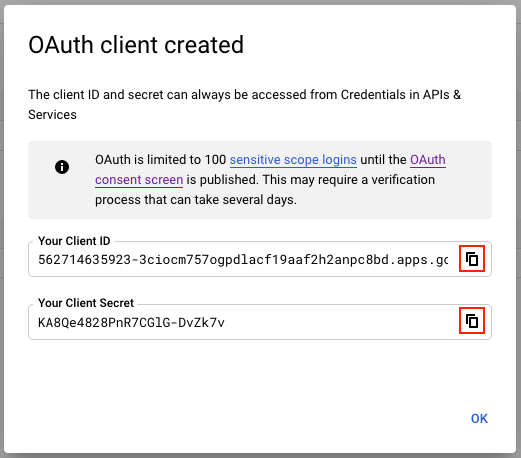
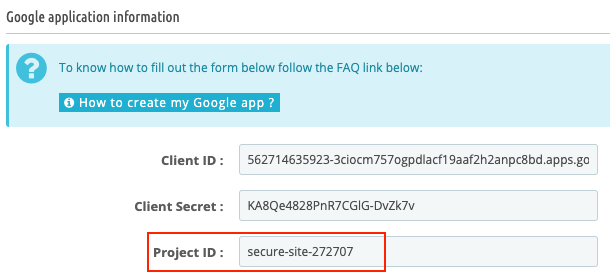
Do not close the connector configuration window as you still need to enter the project ID. Go back to your Google Developer Account interface and close the small window with your IDs by clicking "ok".
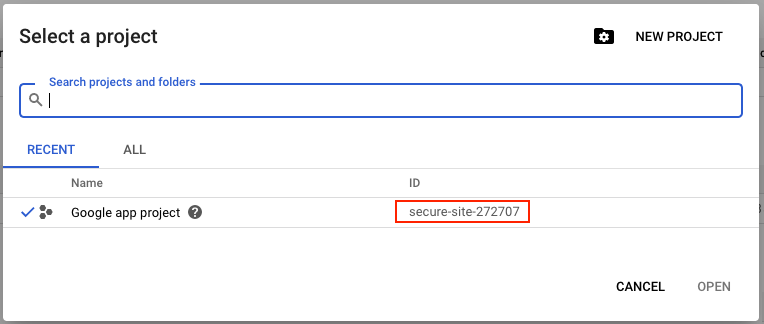
Click on your project name (next to the Google APIs logo):

A modale appears in which you can find the number assigned to your project. Copy it and paste it in the connector configuration in the module:
Check that the display of the connector on your site is enabled (see the very beginning of this FAQ) and click on "Update".
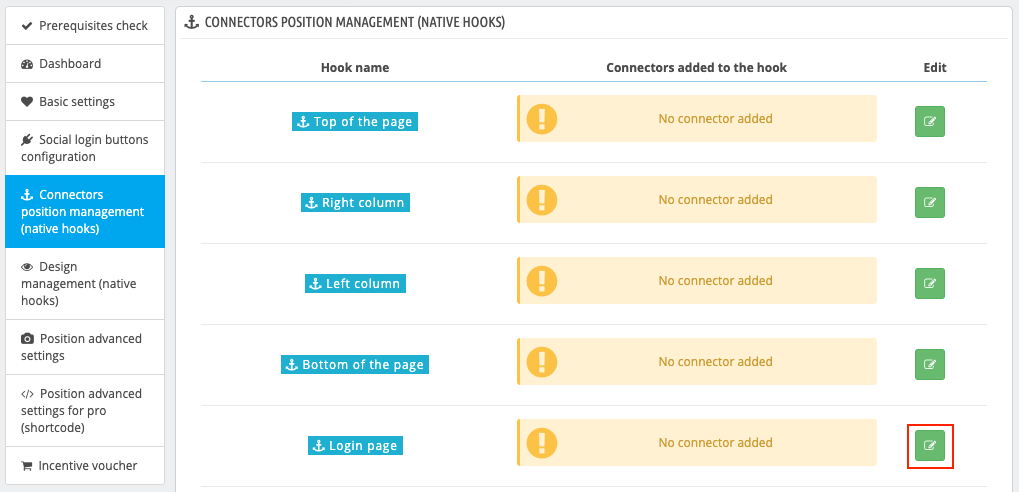
Still in the module, click on the "Connectors Position Management (native hooks)" tab and choose the desired location for your Google connector, for example the "Login Page" hook(*). Click on the pencil icon in the "Edit" column:
Drag and drop the Google connector (while holding the mouse down) into the "Active Connectors" column, then click "Update":
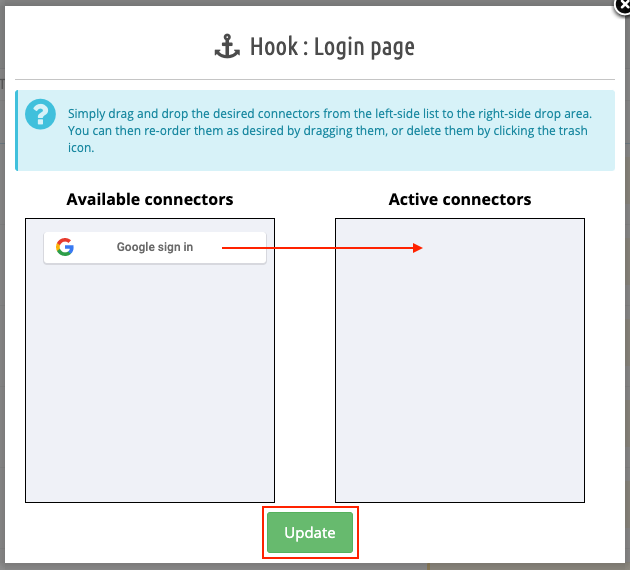
Do the same for all the positions where you want to see the Google connector.
(*)This is just an example but, of course, to define the connector position more precisely, you can use the advanced position tool.
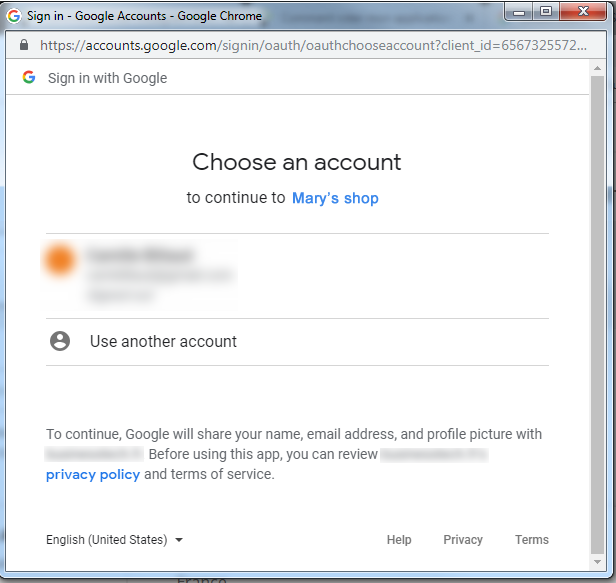
Finally go to your site and test the Google login button:
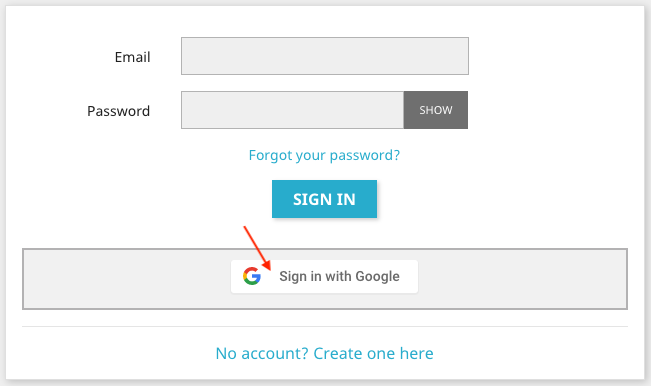
If a screen like the one below appears, it means that the application works:
Please note that if you click on the name of the application or the domain name (it may be the name of the domain that appears instead of the name of the application), you access, among other things, the e-mail address you entered when configuring the consent screen:
