How to create my Amazon app?
Preliminary note: Amazon requires that your shop be in HTTPS in order to use the "Login with Amazon" service. Before following the following procedure, make sure that this is the case. If your shop has not a HTTPS protocol, you will not be able to use the Amazon connector on your site.
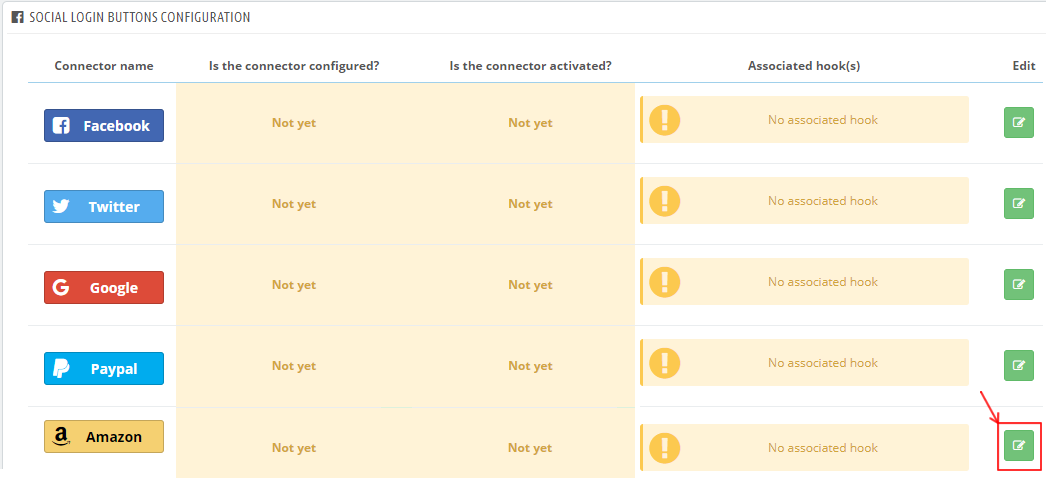
To set a Google connector on your PrestaShop website, first go to the configuration of your Social Login module and click the "Social login buttons configuration" tab. On the line of the Google connector, click on the pencil button to configure the connector ("edit" column):
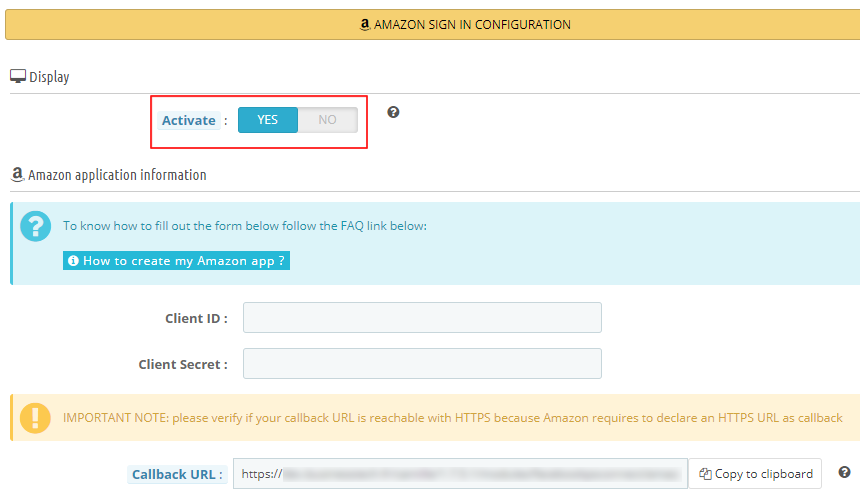
Select YES to enable the display of the connector on your site:
To complete the following information, you must create an Amazon app.
To do this, follow this procedure:
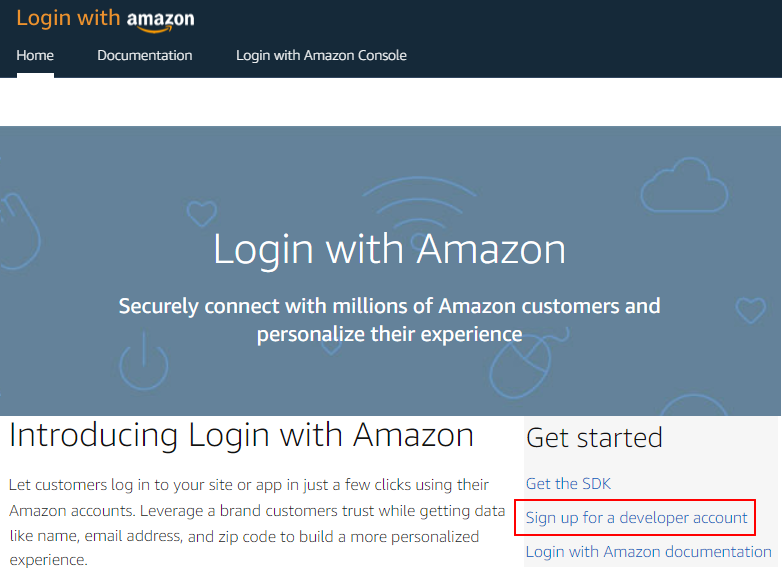
First, click here to reach the "Login with Amazon" interface. Then, click "Sign up for a developer account":
If you already have an Amazon developer account, please login, otherwise create an account:
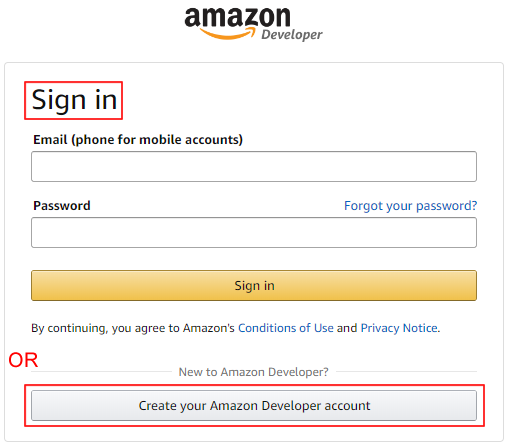
If you create a new account:
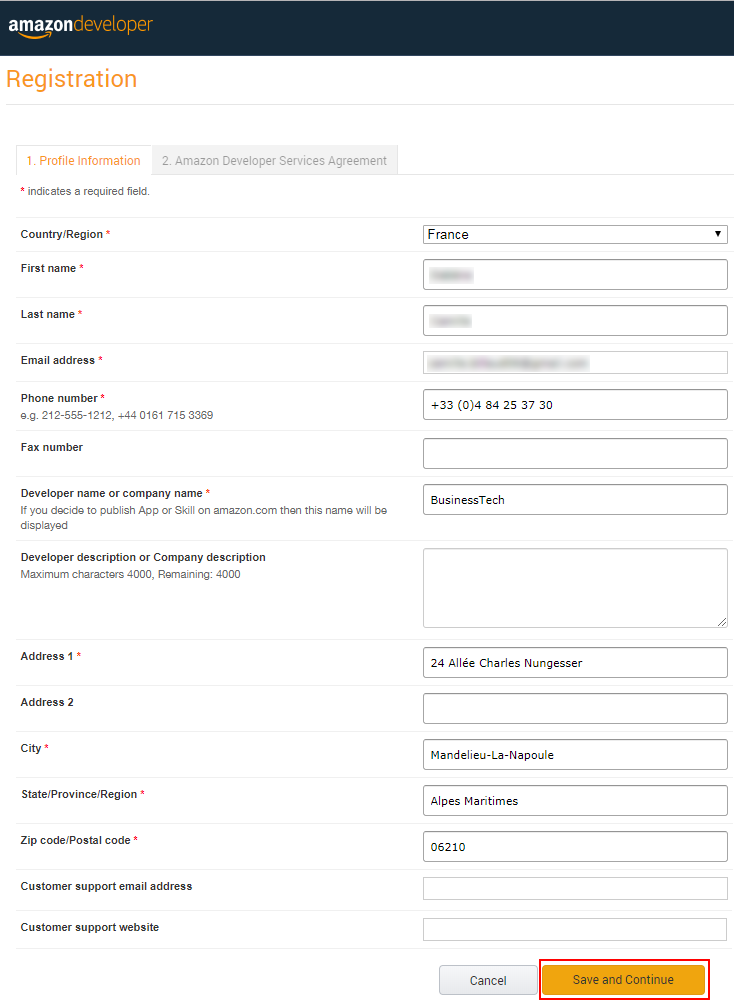
- Fill out the form that is displayed to register information about your company. Fill in at least the fields marked with an asterisk, then click "Save and Continue":
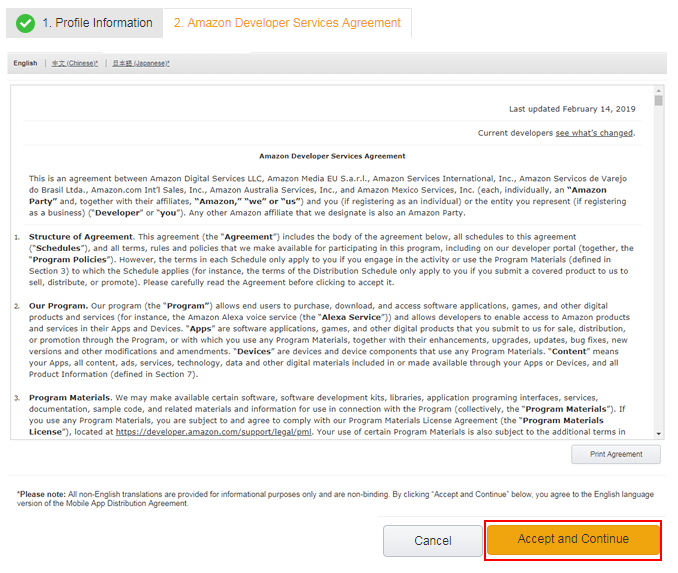
- Accept the agreement and continue:
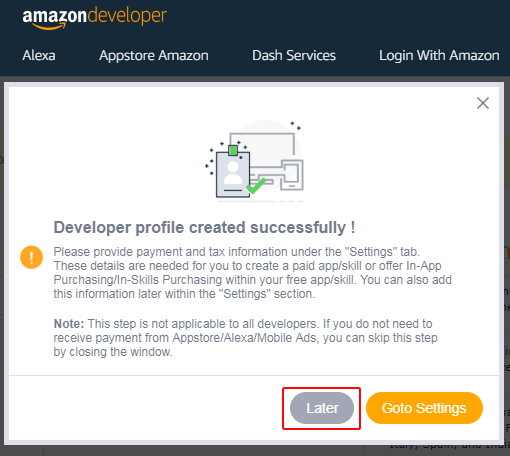
Finally, a pop-up appears to let you know that your account has been created and to suggest that you enter your payment information. Click on "Later" or close this pop-up because it is not necessary to fill in this information at all.
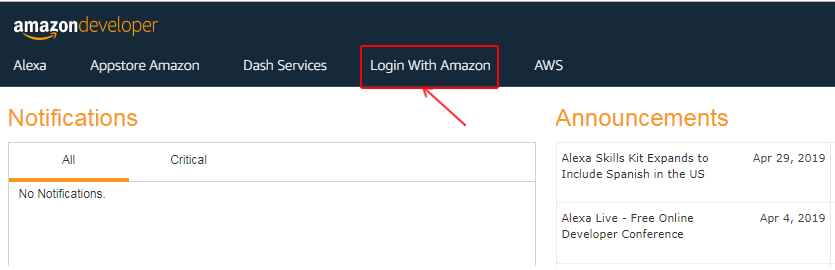
Once you have created your account, or logged in, click on the "Login with Amazon" tab:
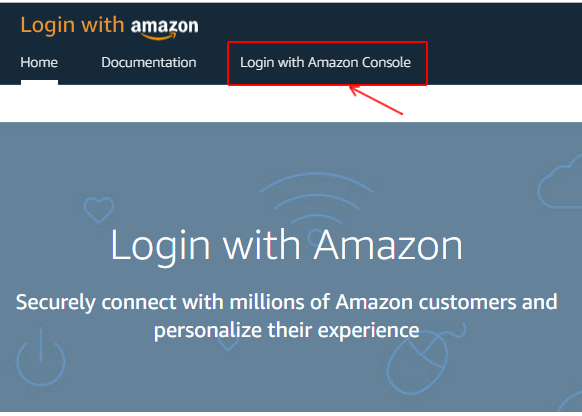
To use the Amazon login credentials on your website, you must register a security profile via the Developer Console. Click on the "Login With Amazon Console" tab:
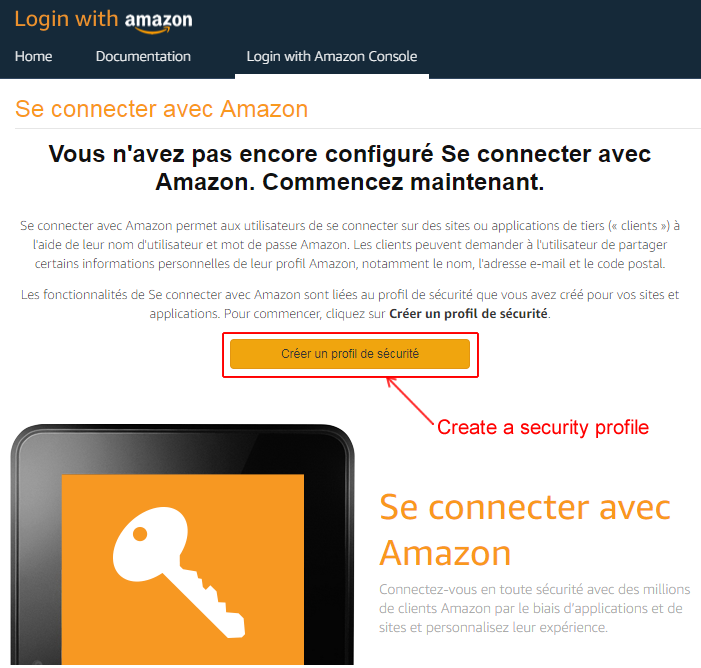
Then click "Create a security profile" to configure the consent screen that will appear when customers click on the login with Amazon button:
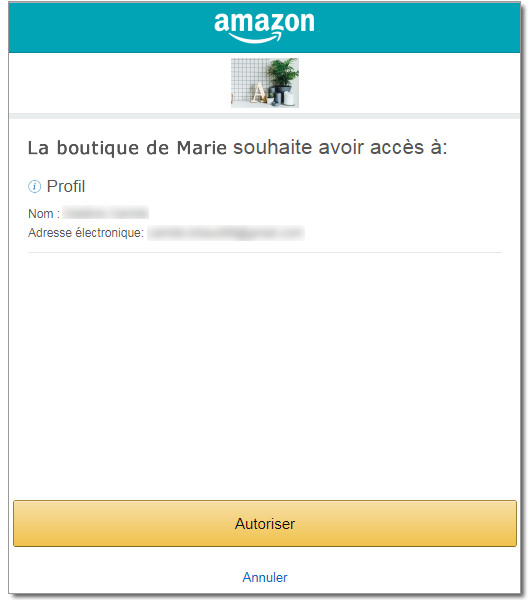
The consent screen will tell your users who is requesting access to their data and what kind of data you're asking to access (i.e here the name and email address). This is a consequence of the coming into effect of the General Data Protection Regulation (GDPR). It's now required to explicitly get the agreement of your users if you want to use their data.
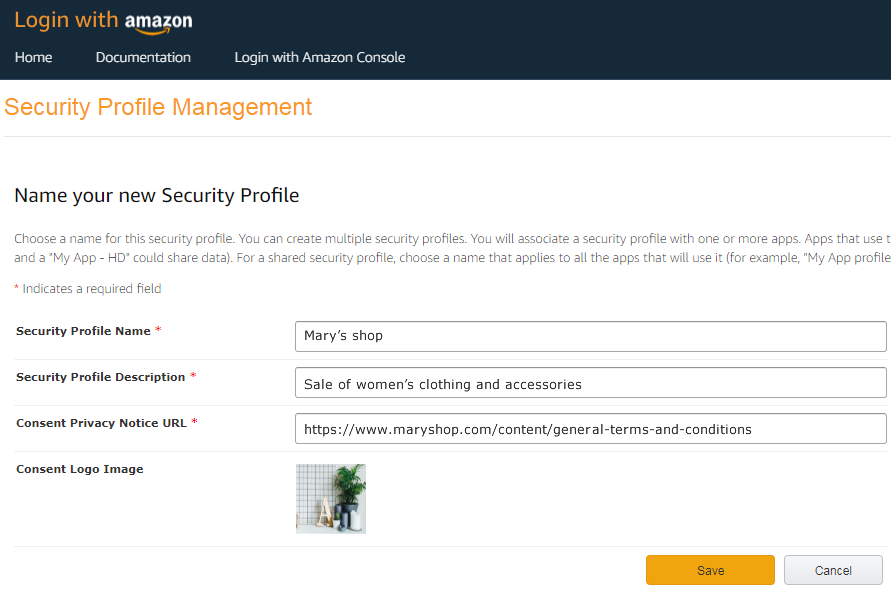
Give the name of your shop to your "security profile" so that users immediately understand that it is your website that is requesting access to the data. Quickly describe your shop in the description field (or enter your slogan for example) and then indicate the URL of your privacy policy. You also have the possibility to add a logo. We advise you, for reinsurance purposes, to download the logo of your shop. Please be aware that users will see this information every time they use the "Login with Amazon" button on your website. At a glance, they need to be reassured by recognizing your shop's identity and feel confident.
Click "Save":
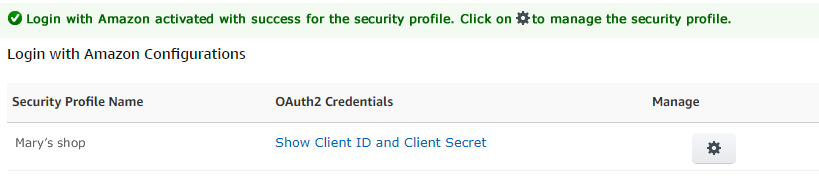
Vous should get a message telling you that your security profile has been created with success:
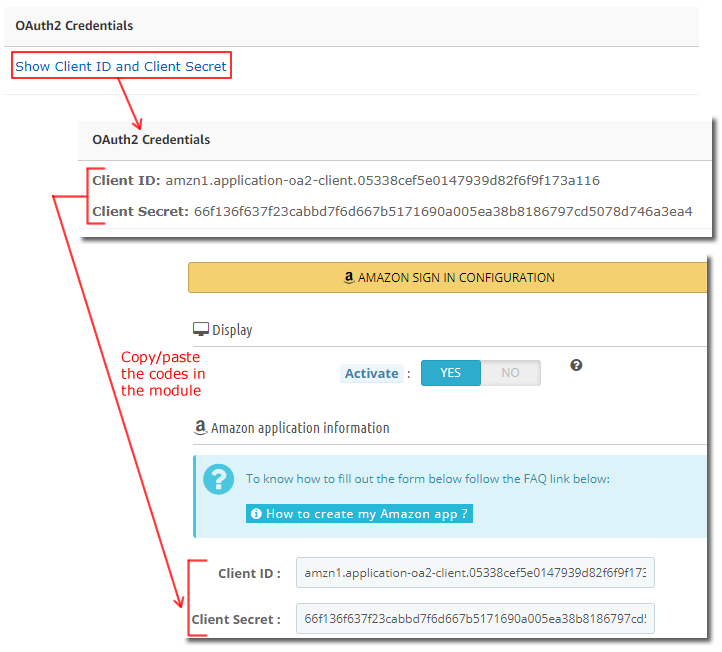
Click "Show Client ID and Client Secret" and copy/paste the values in the Amazon connector configuration in the module:
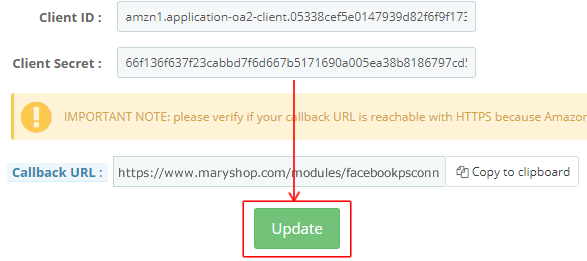
Click "Update" to save the Amazon connector configuration in the module (for the moment do not take into account the callback URL, we will talk about it later):
Return to Amazon's developer console. You will now have to specify the "redirection" URL, i.e. the URL to which your customers will be redirected after clicking on the Amazon login button. To do this, click on the small wheel in the "Manage" column and select "Web Settings":
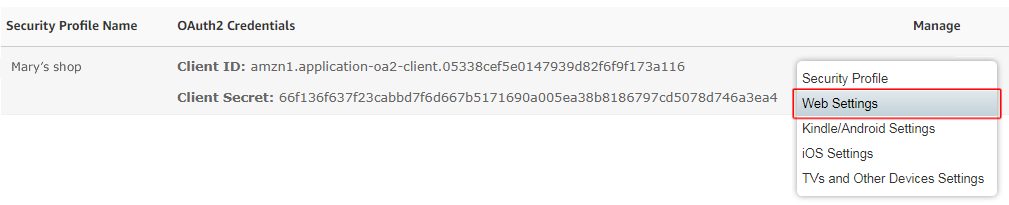
Click on "Modify" at the botton right:
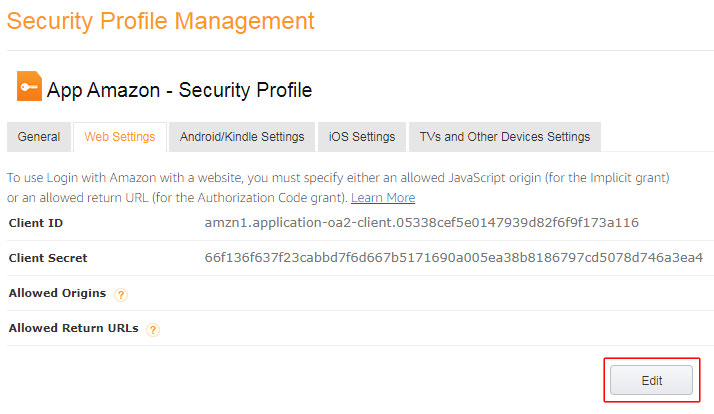
Do not fill in anything in the "Allowed Origins" field. In the module, reopen the Amazon connector configuration and copy the Callback URL indicated there (click on the "Copy to clipboard" button). Paste this URL into the "Allowed Return URLs" field of your app's web settings, into the Amazon Developer Console, and click "Save":

Return in the module configuration and configure the Amazon connector position on your site (thanks to the native hooks or the advanced position tool).
Test the connector to verify its function.
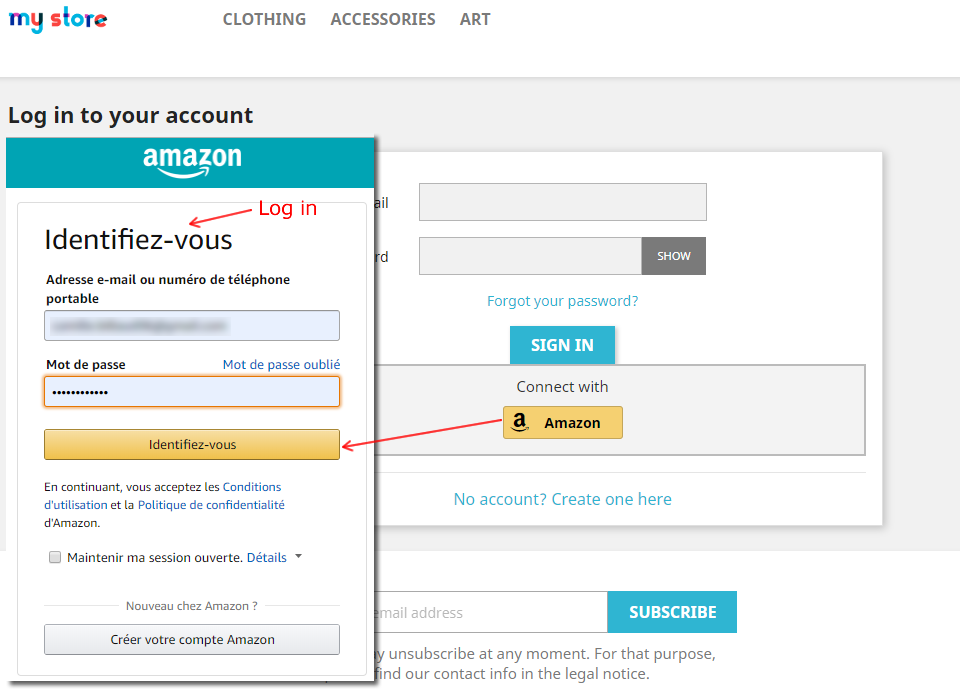
Here is an example: