How to create my Paypal app?
Attention, because of the implementation of the General Data Protection Regulation, Paypal has updated its data protection policy and we have, therefore, make changes in the module.
Then, to use the Paypal button, you must have a Social Login module version higher than or equal to 3.0.10. If this is not the case, update your module (click here for the procedure).
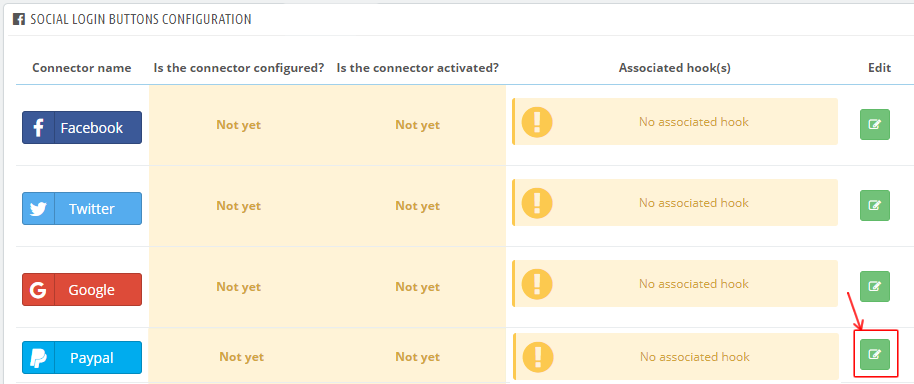
To set a PayPal connector on your PrestaShop website, first go to the configuration of your Social Login module and click the "Social login buttons configuration" tab. On the line of the PayPal connector, click on the pencil button to configure the connector ("edit" column):
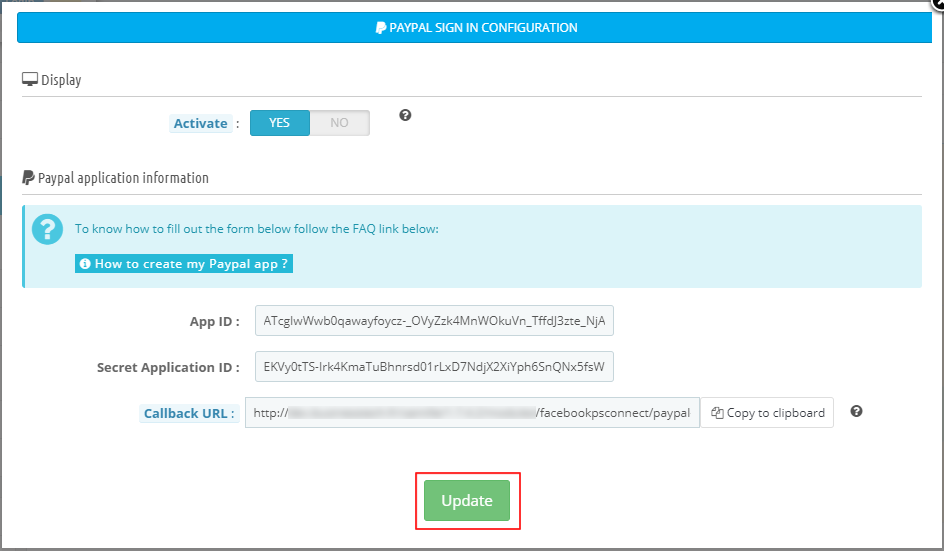
Select YES to activate the connector display on your site:
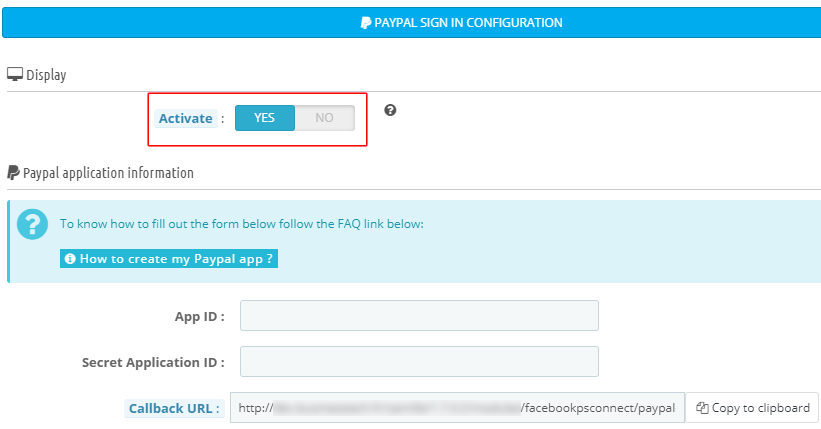
To fill out the following information you must create a PayPal application.
To do that, follow the following procedure:
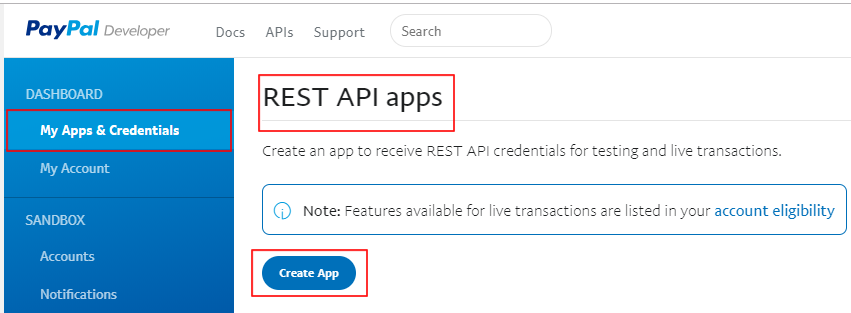
First of all, click here to reach the PayPal for developers interface on which you will have to log in with your personal PayPal account and then create the app. If you don't have a personal Paypal account, you will have to create one.
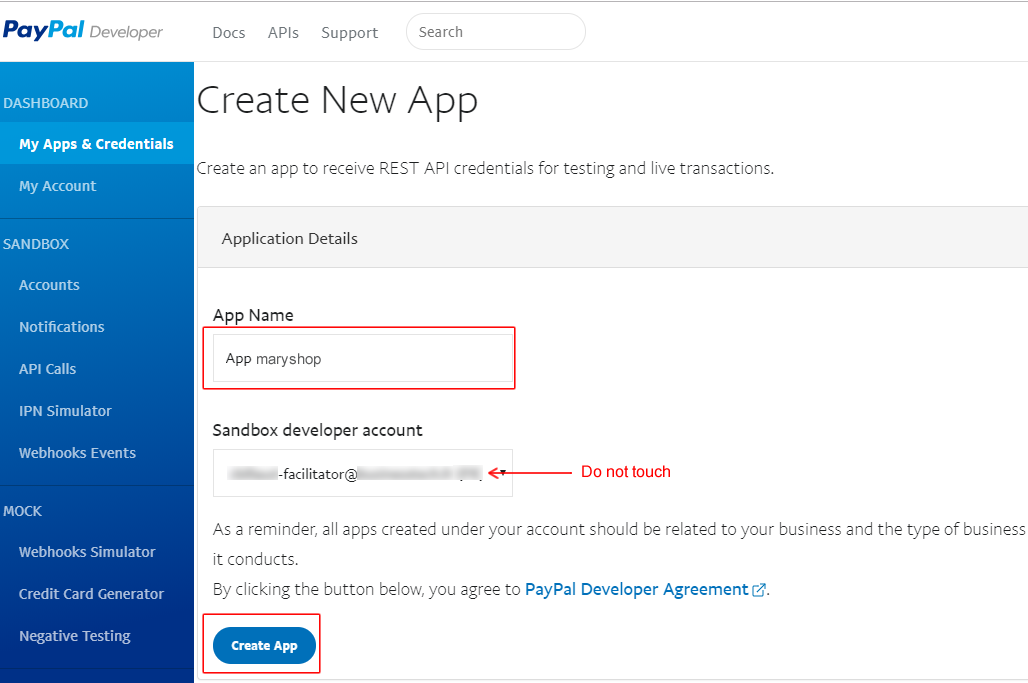
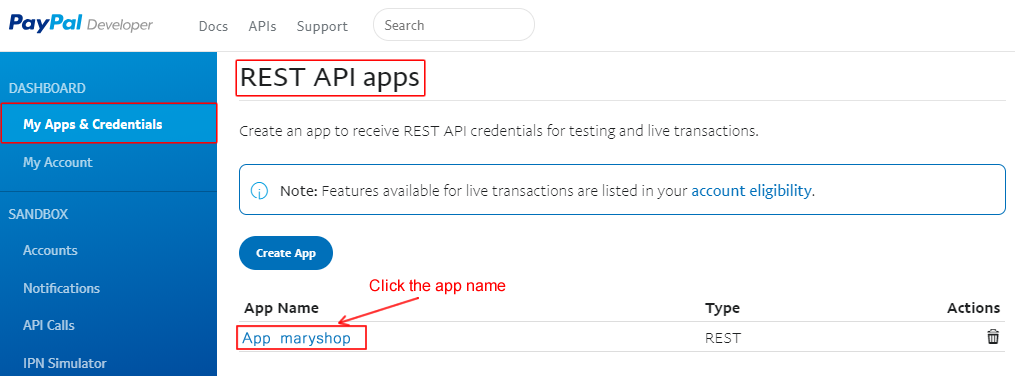
In the left menu, check you are in the "My Apps & Credentials" tab and scroll down to the "REST API apps" section. Click "Create App":
Enter a name for your application, then click on "Create app" (do not touch the box "Sandbox developer account", it is an e-mail address created automatically by Paypal to allow you to access a test space, but you'll only need it for the app validation email, as explained below):
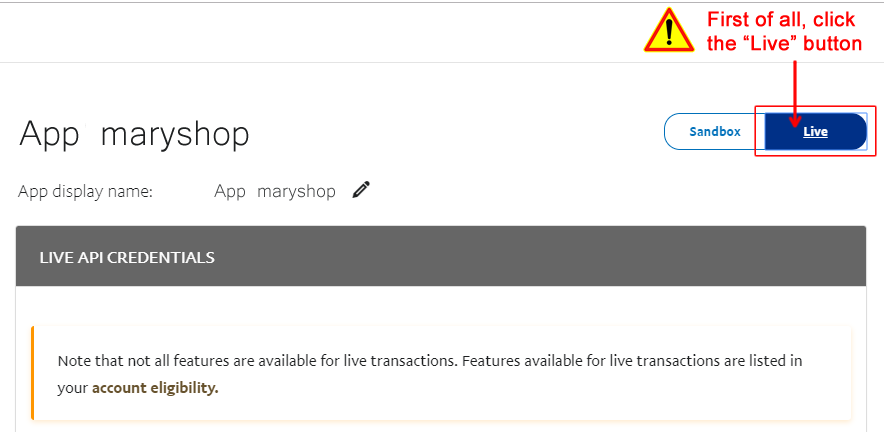
Once the button "Create App" clicked you arrive on a test space (sandbox).
ATTENTION: first of all, it is imperative that you click on the "LIVE" button at the top right in order to move on the app publication area, otherwise it will not work on your website:
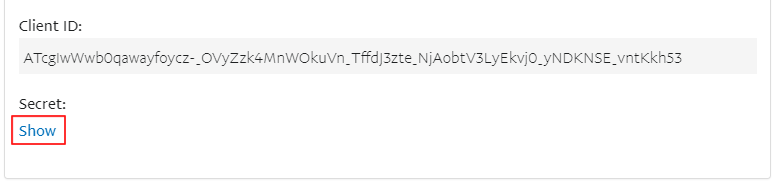
In this LIVE area, copy and paste your "Client ID" into the "Application ID" field of the Paypal Connector configuration in your module:

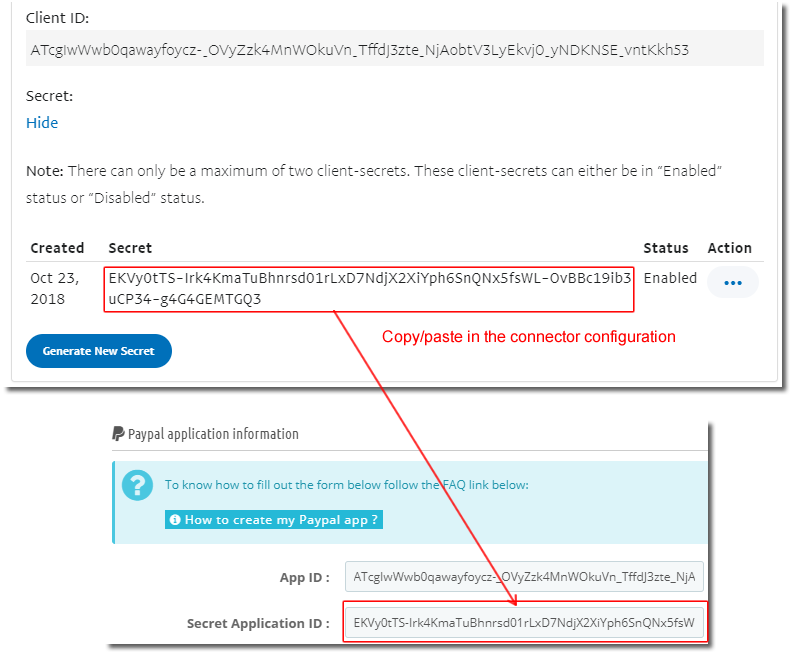
Click "show" to see the secret key:
Copy and paste the secret key in the "Secret Application ID" of the PayPal connector configuration in the module:
Then, scroll down to the "Live App Settings" part and for "Live Return URL" click "Show" to display the field where you have to enter the callback URL to which your visitors will be redirected after clicking the PayPal connector:

Copy and paste the callback URL given by the module in the PayPal connector configuration window:
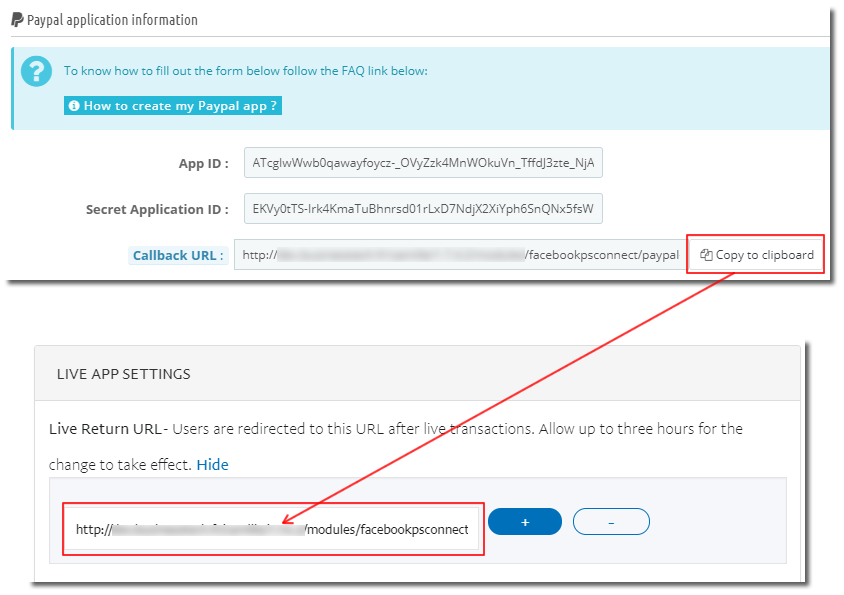
Important NOTE : please note that if you subsequently modify the callback URL, you will have to wait 3 hours before the update is taken into account by PayPal.
In the configuration of the connector, module side, click "Update":
Do not configure the connector position yet, because, as it's explained later, you will first have to make you app approved for it to work. Return to the configuration of your app:
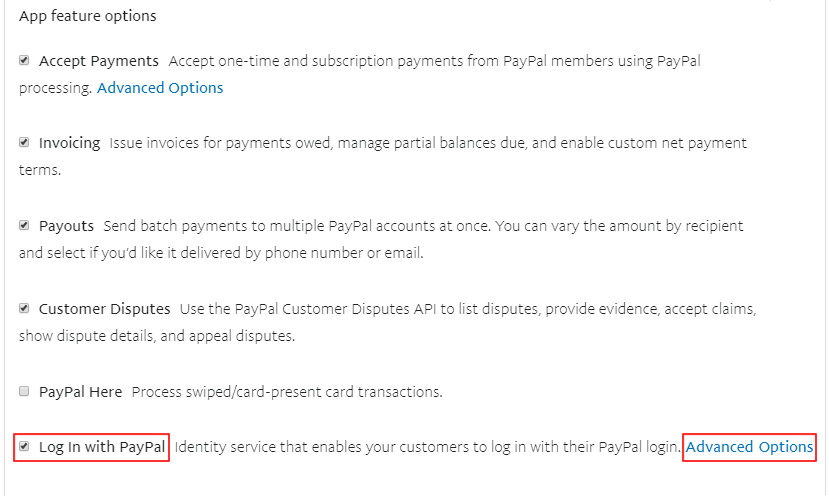
In the "App feature options" part, leave checked what it is checked and select the "Log In With PayPal" feature. Click then "Advanced Options":
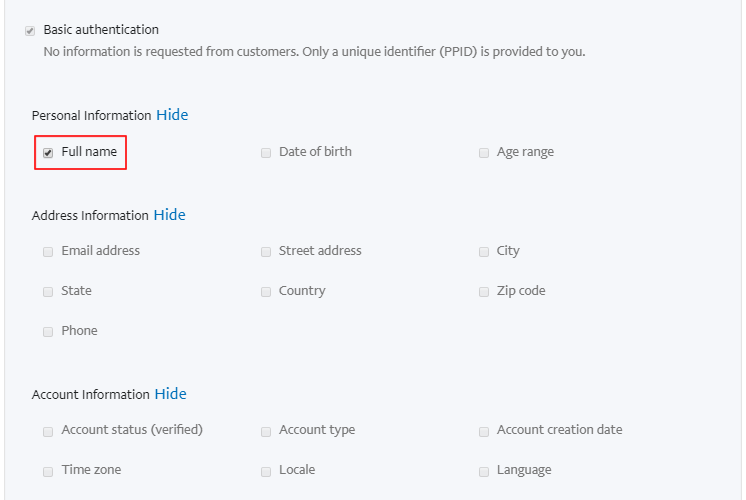
This is here where you have to check what you want to retrieve as personal information about your visitors, after they click the PayPal quick login button. However, the entry into force of the General Data Protection Regulation has led to the reinforcement of PayPal's security measures with regard to the collection of data through their applications.
Then, you are going to see this message:
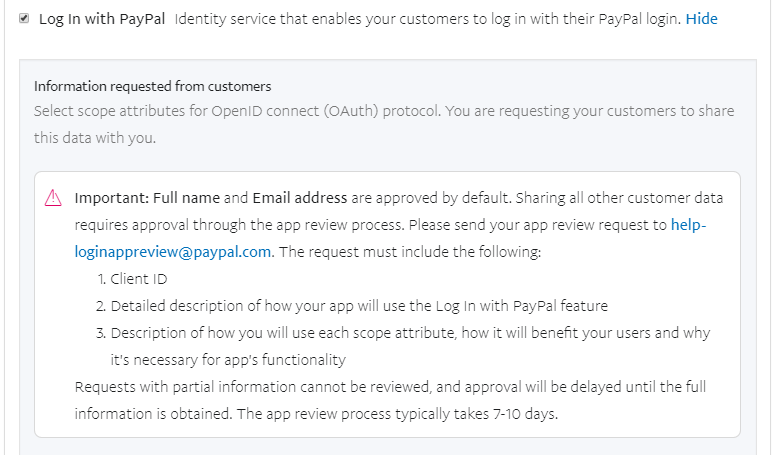
PayPal explains that if you want to collect personal data about your customers, the use of your application will have to be reviewed before it can work. Then in the personal information listed under the message, you can only check for "full name" box. In order to be able to check the request for personal information other than the full name of your customers, Paypal now requires that you send them an e-mail explaining in which purpose you create the application and what data you want to recover.
Start checking the "full name" box:
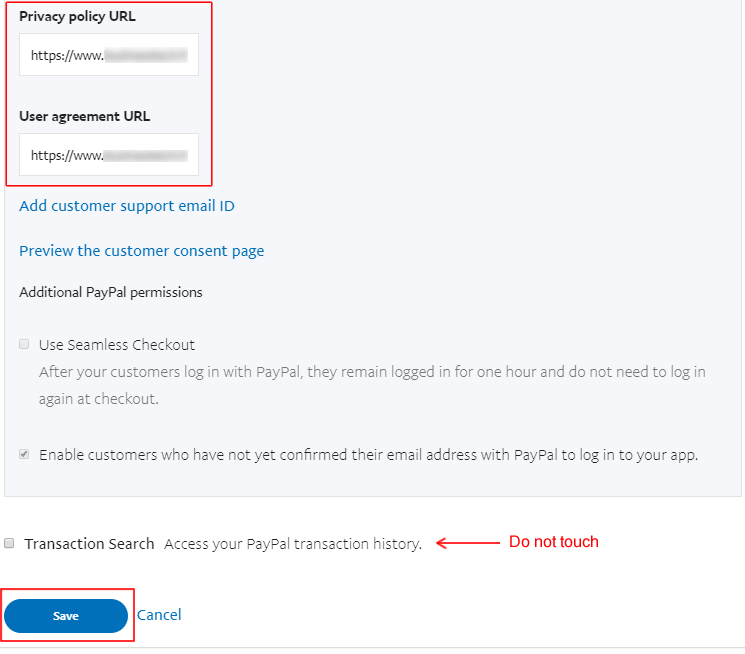
Then scroll down to the "Privacy policy URL" and "User agreement URL" fields and fill them out with the corresponding URL. Note that the two URL can be the same. Finally click "Save":
Then send the app use authorization request email to the following address: help-loginappreview@paypal.com
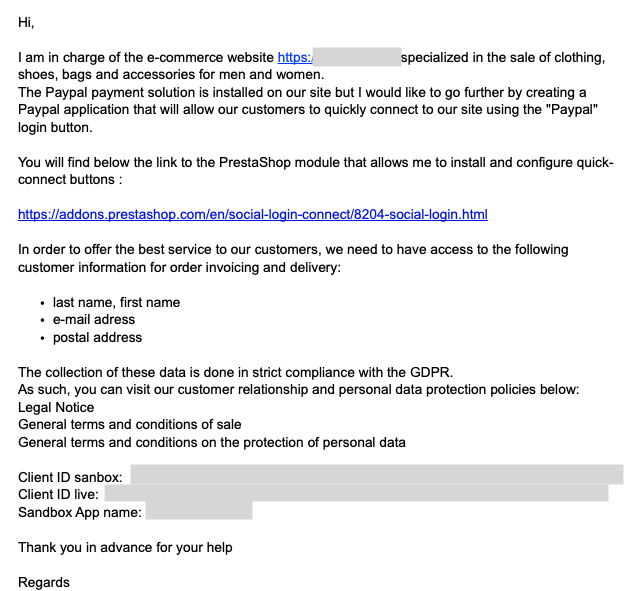
In this e-mail, we advise you to provide them the Social Login module (english) link: https://addons.prestashop.com/en/social-login-connect/8204-social-login.html and to explain them that you want to set up, through this module, on your website, a button that would allow your customers quickly connect, thanks to their PayPal account. To do this, explain them that you need to collect your customer address information. You can add that the reason why you want to collect the postal address is for billing and shipping needs. Emphasize that the data collection will be done in strict compliance with the RGPD and send them the link to your data protection policy. Remember to provide them your app name, the sandbox client ID and the live client ID.
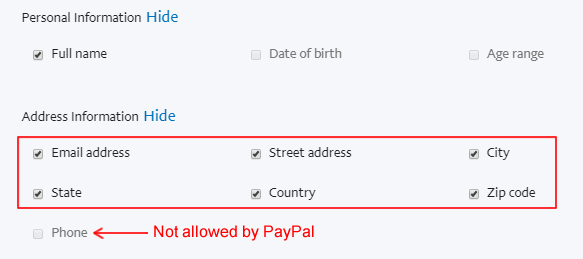
Please note that PayPal refuses to give the right to merchants to retrieve the customer phone number, for security reasons. It is therefore useless to ask for the phone access in your e-mail because Paypal will refuse it.
Here is an example of email:
You should receive the PayPal approval in few days.
Once your app is validated, return on the PayPal for developers website and in the "My Apps & Credentials" tab, in "REST API apps" section click your app name:
Return to the "Log In with PayPal" feature, click "Advanced Options" and check all the boxes made available by PayPal. Attention, so that the connector works you must check ALL the boxes that can be checked as below:
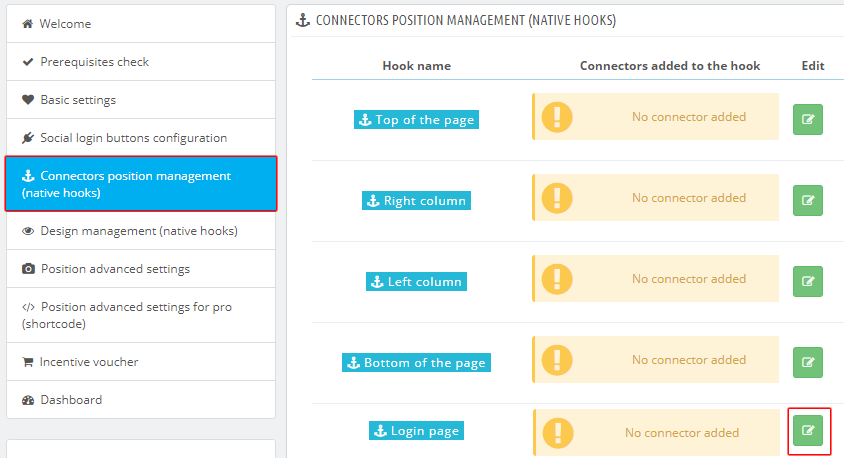
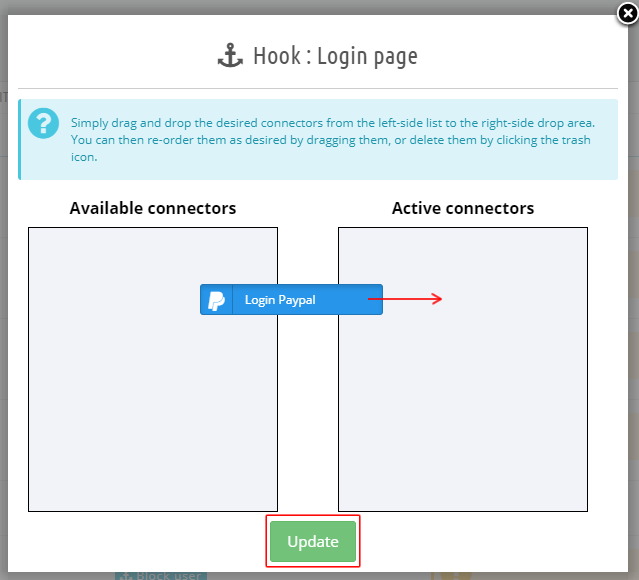
Do not forget to click "Save" and return to the Social Login module configuration. Click the "Connectors position management (native hooks)" tab and the pencil button matching with the position you want for your connector(*). Drag and drop the PayPal connector to the left column and click "Update":
Do the same for all the positions where you want the connector to appear.
(*)This is just an example but, of course, to define the connector position more precisely, you can use the advanced position tool.
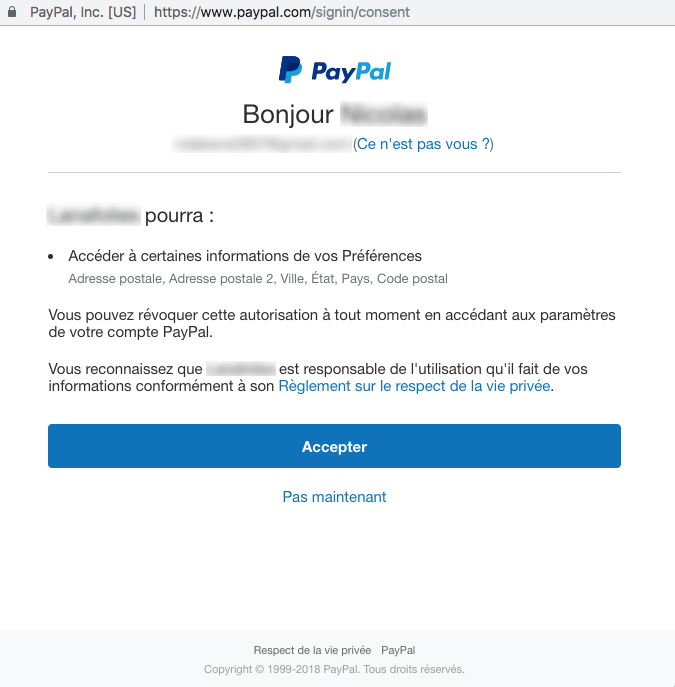
Once your connector is placed on your site, test it. By clicking on it, you should see this type of message (in french here):