How to create a Facebook and Instagram Shop?
Before you begin:
- We recommend that you have already created a Facebook business Page, but if not, you can create one when you set up your Shop.
- We recommend that you have already created a catalog and imported your products into it, but if not, you will be able to create one when you set up your Shop, or, if no catalog is present in your Business Manager account, one will be created for you by default, once the Shop is created.
- You must be an administrator of the Business Manager account that owns the Facebook Page and catalog and have at least Page and catalog management rights. Click here to learn more about roles and permissions in Business Manager.
- If you want to make your Shop visible on Instagram as well, you will also need an Instagram Business account. Your Business Manager account must own the Instagram Business account. The Instagram Business account must be linked to your Facebook Page.
To create your Facebook and/or Instagram Shop, follow the procedure below:
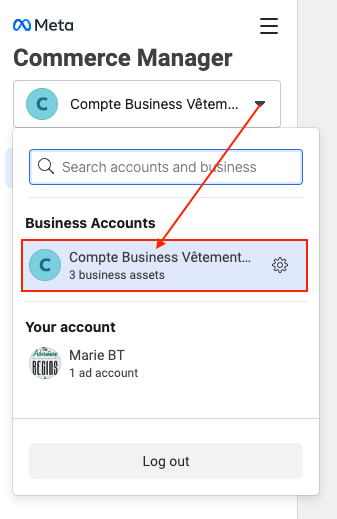
Log into the Facebook Business Manager and select your Business Manager account:
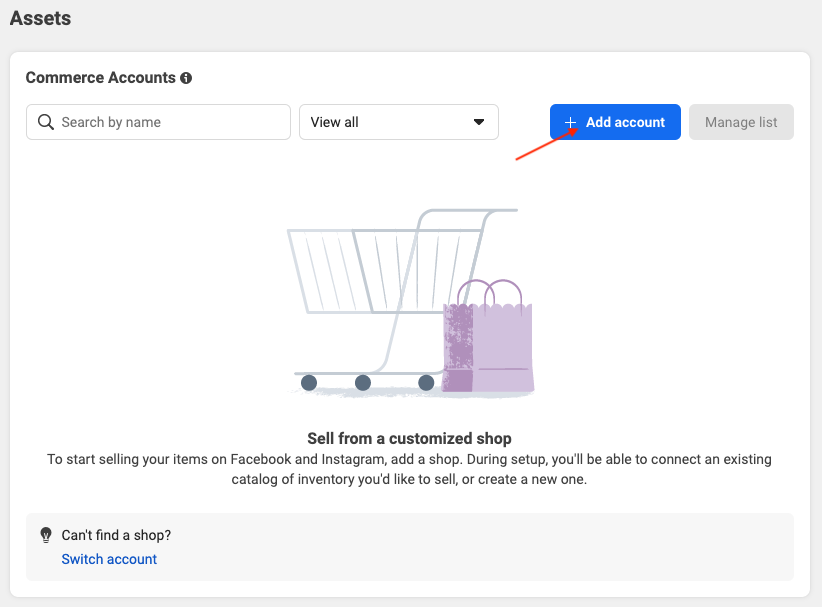
Click on "Add account":
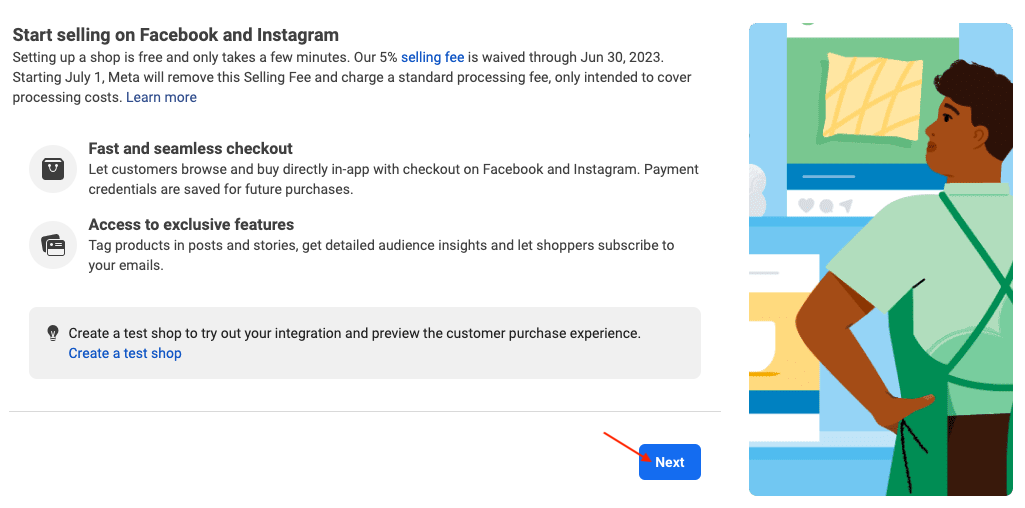
Click on "Next":
You will now need to check each of your Shop's configuration elements:
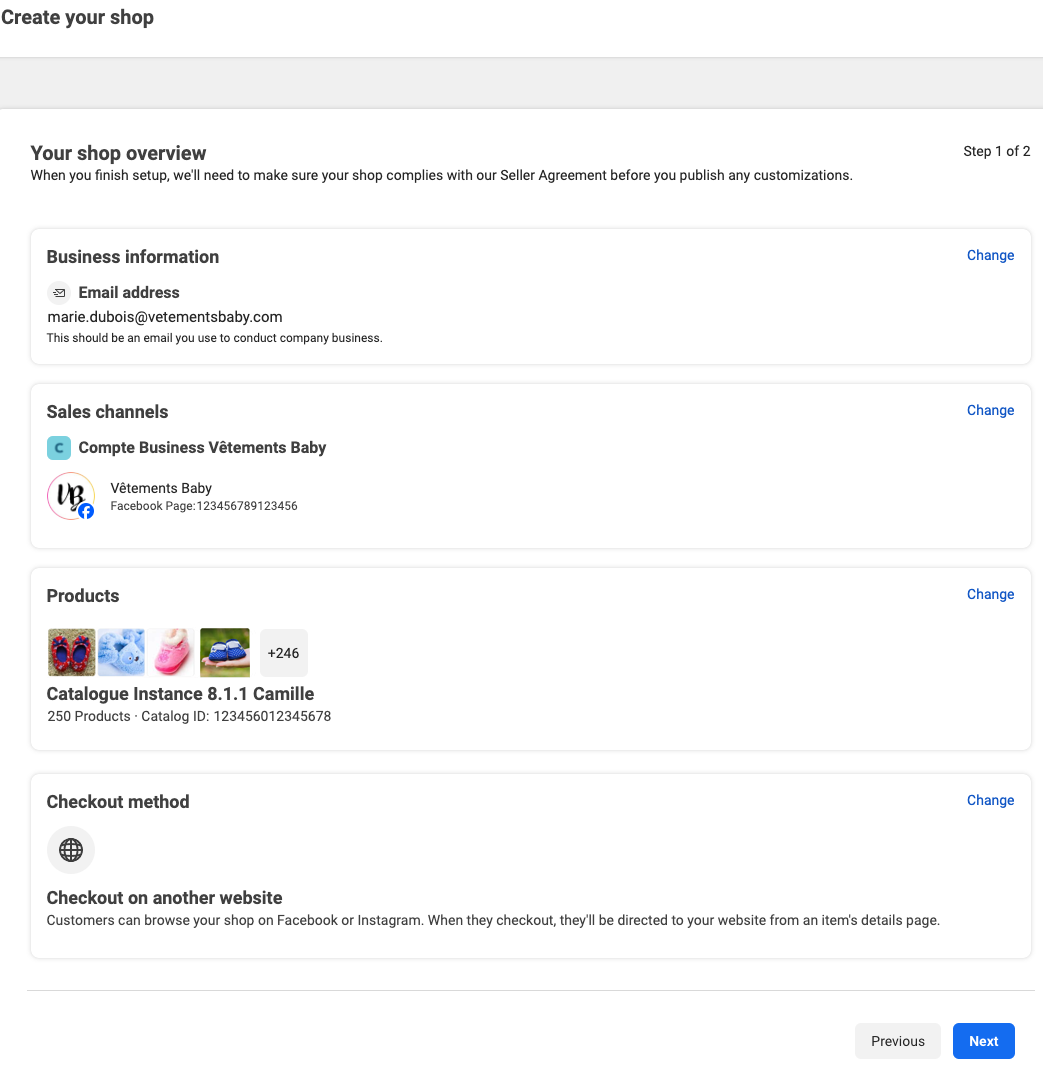
1 - Business information
Check that your business e-mail address is correct. If not, click on "Change". This should be an email you use to conduct company business.
2 - Sales channels
Check that the sales channel(s) selected to show your products are the right ones (Facebook page, Instagram account, ...). If not, or if you want to add one, click on "Change".
Select your sales channels such as your Facebook Page and/or your professional Instagram account if you have one, then click "Next" :
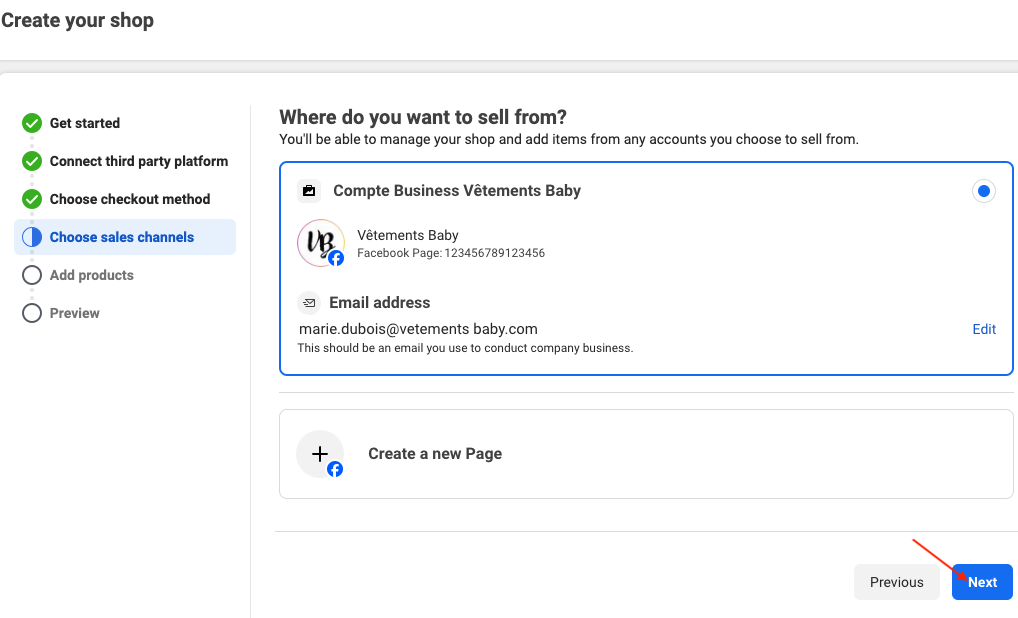
Confirm your business e-mail address, then click on "Send":

3 - Products
Check that the selected catalog is the correct one. If not, click on "Change".
Select the catalog you want to show. Follow our FAQ to know how to create a catalog or create one from here:
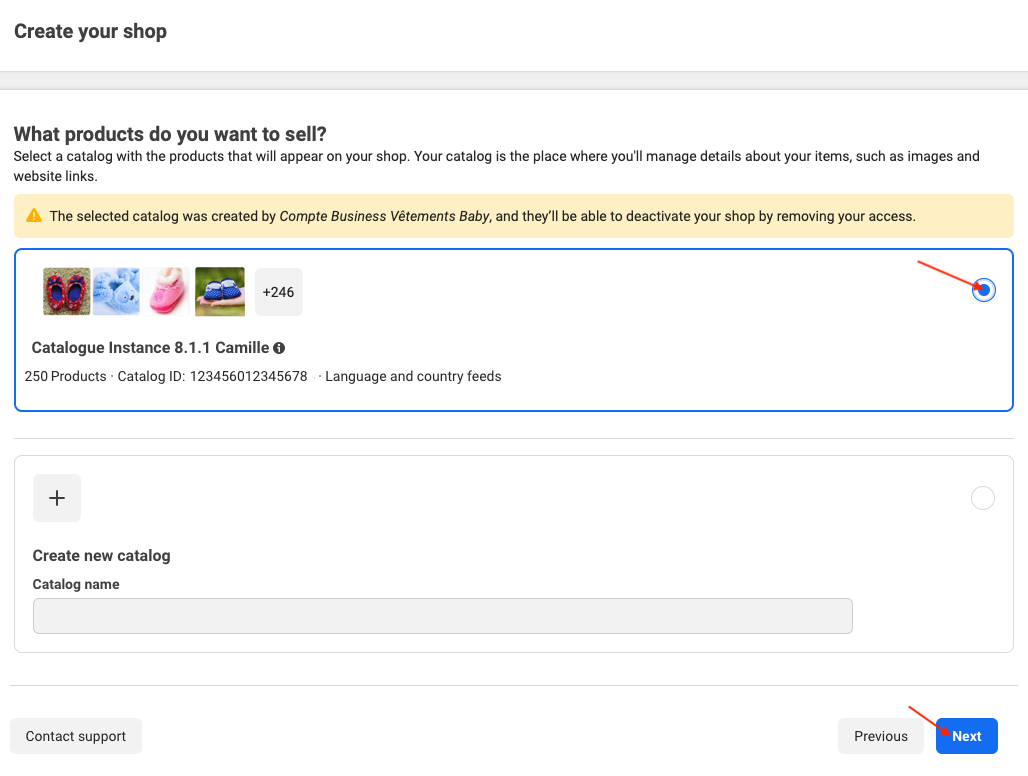
Click on "Next".
Note: If you don’t have a catalog already, you won’t see this step. Facebook will create a catalog for you automatically in Commerce Manager called “Items for (name and ID of your Page)”. You can add your items later when you’ve finished setting up your Shop.
4 - Checkout method
Check the checkout method that will be proposed. If it doesn't suit you, click on "Change". Choose "Checkout on another website" to redirect users to your website to finalize their purchase. Once you've chosen your checkout method, click on "Next":
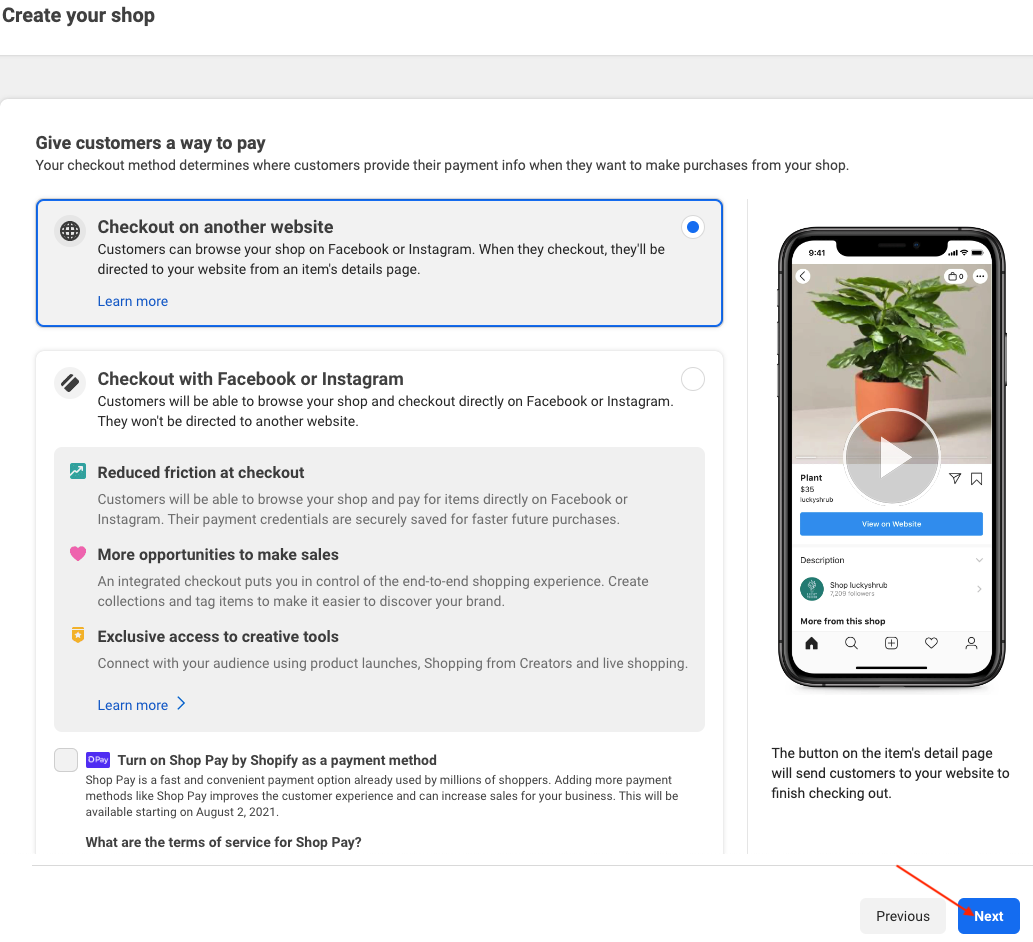
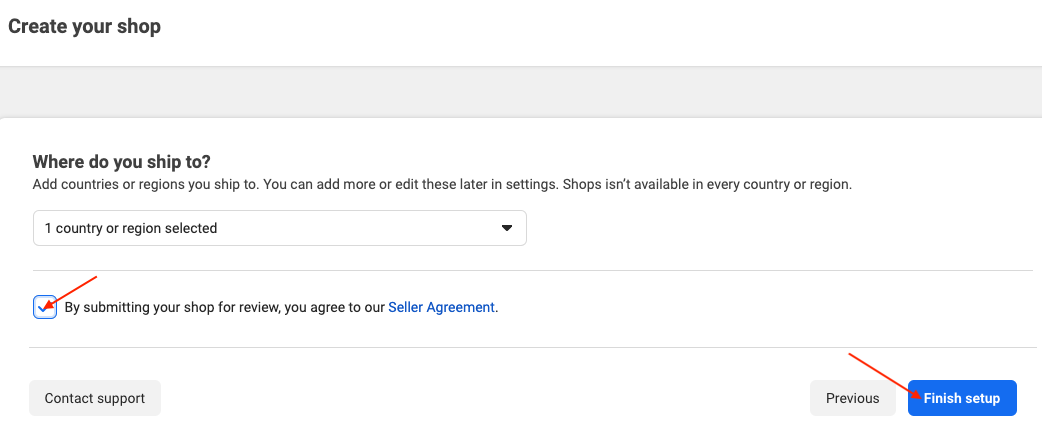
Select countries or regions to which you ship. You can add more or edit this list later in the settings. Be careful, Facebook and Instagram Shops are not available in all countries or regions:
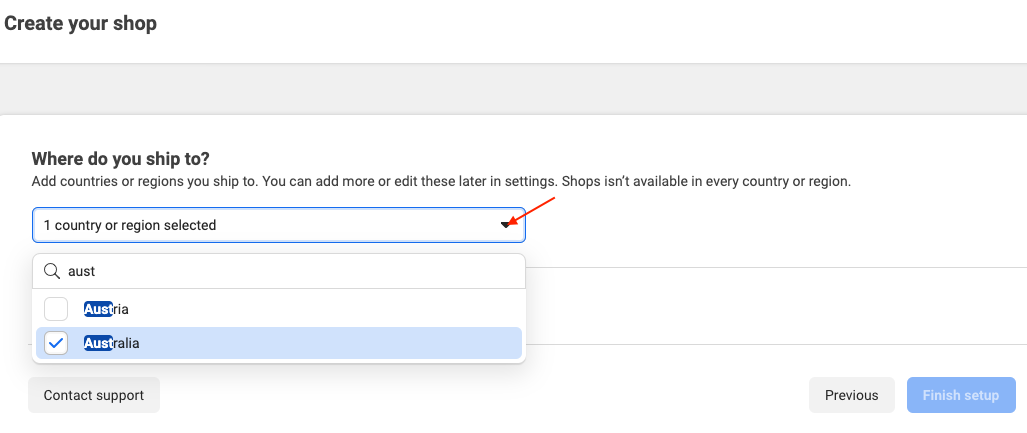
Check the box that certifies that you accept the Merchant Agreement and then click on "Finish setup":
Meta will now review your Commerce Account to ensure that it complies with business rules before you can customize and publish your Shop on your Page.
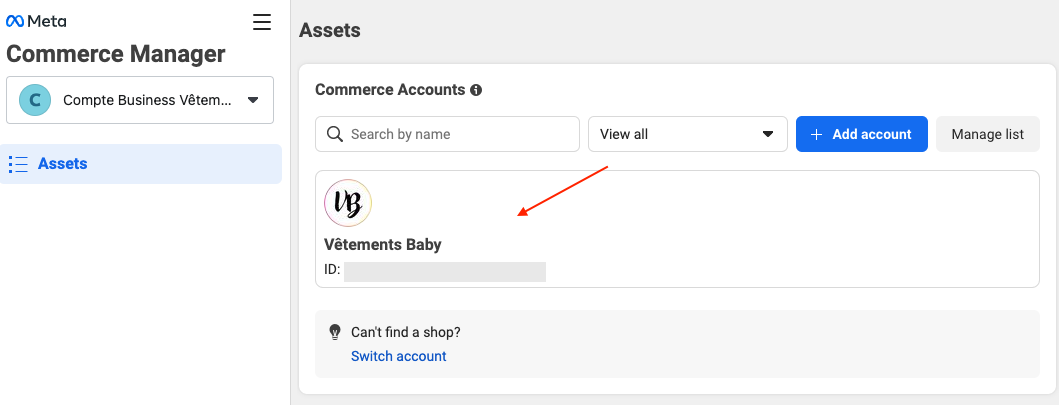
In your Commerce Manager, select your Commerce Account:
and in "Overview", click on "Start Verification" if you haven't already verified your business:
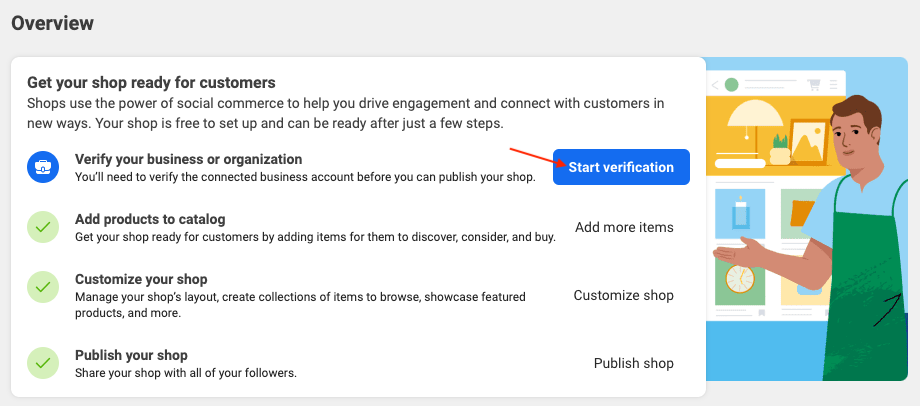
Follow the verification steps indicated.
You will receive an e-mail when Meta has approved your account for Shops. You will be able to personalize your Shop and publish it.
Other FAQs in this category
- How to import my products into a Facebook catalog?
- How to create a Facebook product catalog?
- Facebook Starter Guide
- How to create a Business Manager account?
- How to create a Facebook Page?
- How to import my products into the "Shop" section of my Facebook Page?
- What are the consequences of the release of iOS14 on the module's Facebook Pixel?
- How to customize my Facebook Shop?