How to configure my module?
![]()
Module - WhatsApp Chat
The "WhatsApp Chat" module allows you to install Facebook's WhatsApp chat. This messenger allows you to chat in real time with your visitors and inform them as if you were in a physical store.
Prerequisites
In order to use the WhatsApp chat plugin on your shop, you need to have a WhatsApp account. A personal account is sufficient but we strongly recommend you to download the "WhatsApp Business" application for more features dedicated to professionals, like the possibility to create a product catalog or automated messages. Visit our FAQ on how to create a WhatsApp Business account to learn more.
Configuration
After installation, go to the configuration of your new module "WhatsApp Chat".
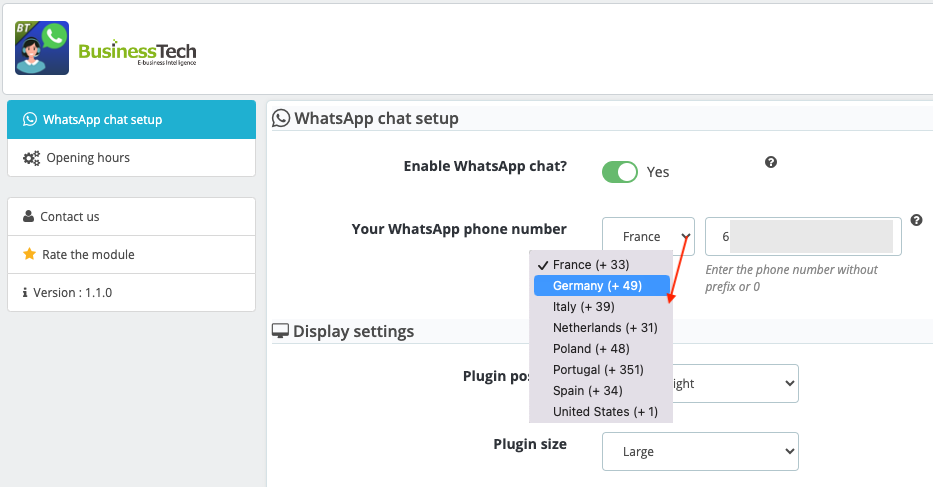
In the "WhatsApp chat setup" tab, activate the chat by selecting "Yes" in the corresponding option and enter your phone number by selecting your country's identifier beforehand. Enter the number without any prefix or 0:
Click on "Save" at the bottom of the page.
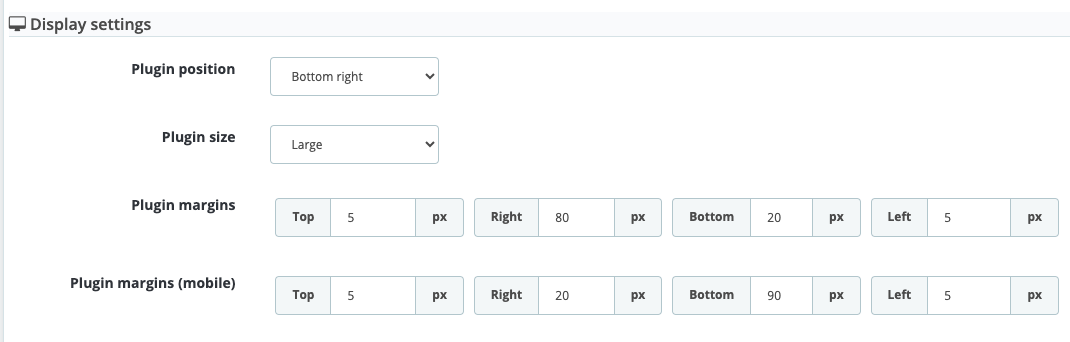
Then configure the position of your chat plugin (bottom right/bottom left), its size (small/large) and its margins (on desktop and then on mobile).
For example:
Finally, you can enable/disable the chat display on mobiles:

Click on "Save" and check the chat rendering on your site (desktop and mobile).
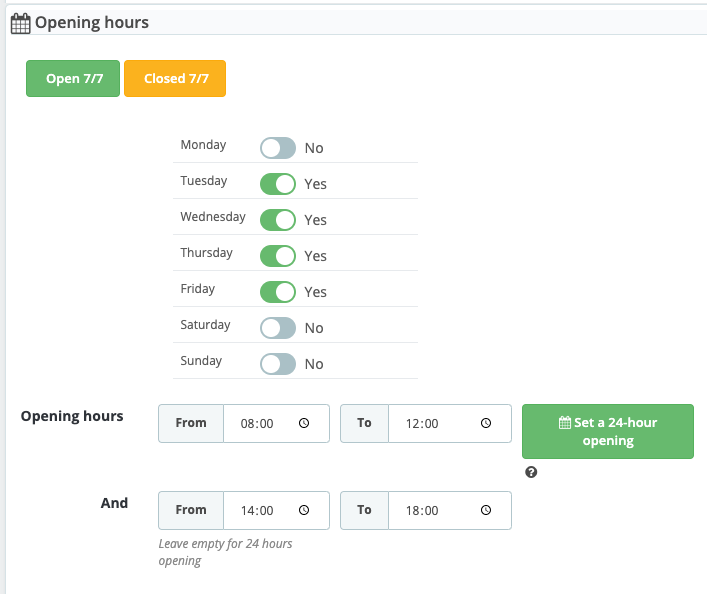
To define a chat activation schedule so that it only appears when you are available, go to the module's "Opening hours" tab. To find out more about setting the schedule, click here. Note that you can deactivate the chat display at any time (in the event of exceptional unavailability, for example) via the "WhatsApp chat setup" tab, then reactivate it whenever you like, without losing your configuration.
Finally, click on "Save".