How to create a TikTok Pixel?
To configure your tracking tag (pixel) and be able to track your visitors' actions on your shop, first log in to the TikTok Ads Manager platform. If you don't have an account yet, click here to know how to do it.
Click on the "TikTok Ads Manager" logo to display your dashboard:
![]()
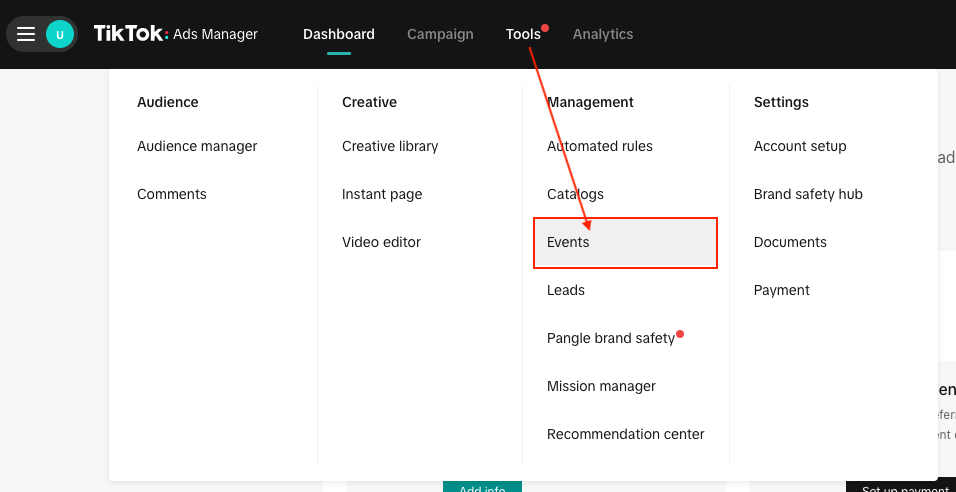
In the top menu, click on "Tools" and then on "Events":
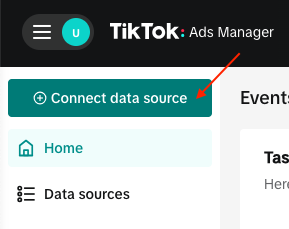
Click on "Connect data source" in the left-hand menu:
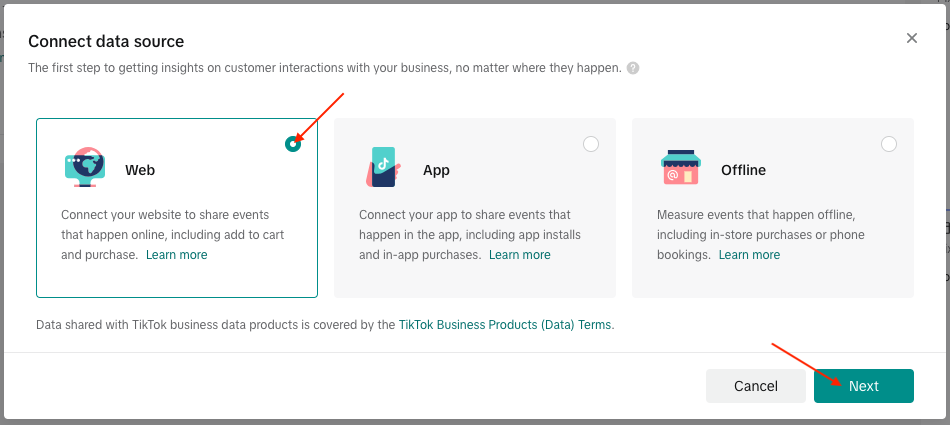
Check "Web" and click "Next":
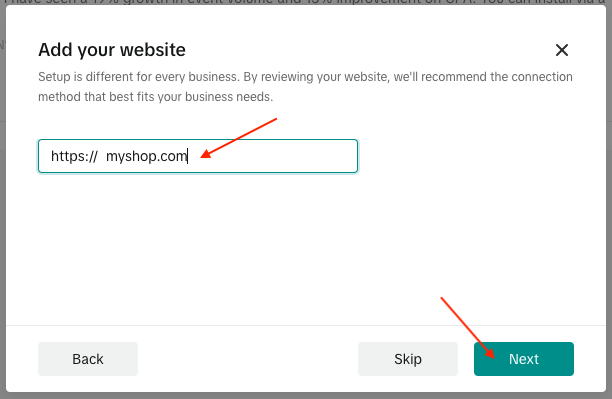
Enter the URL of your site and click "Next":
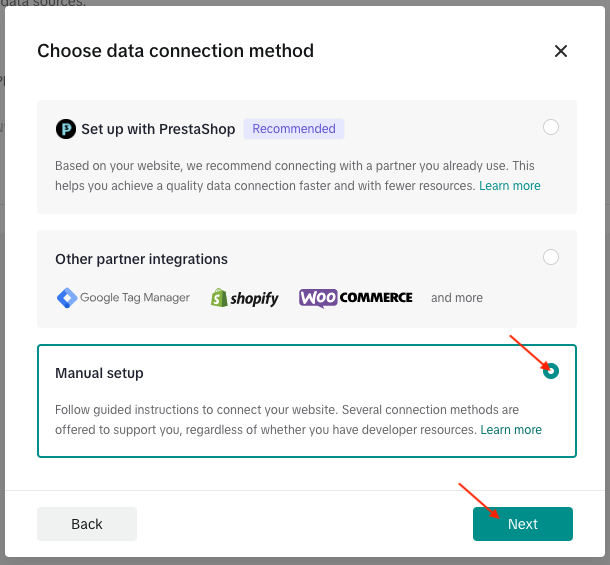
Choose "Manual setup" and click "Next":
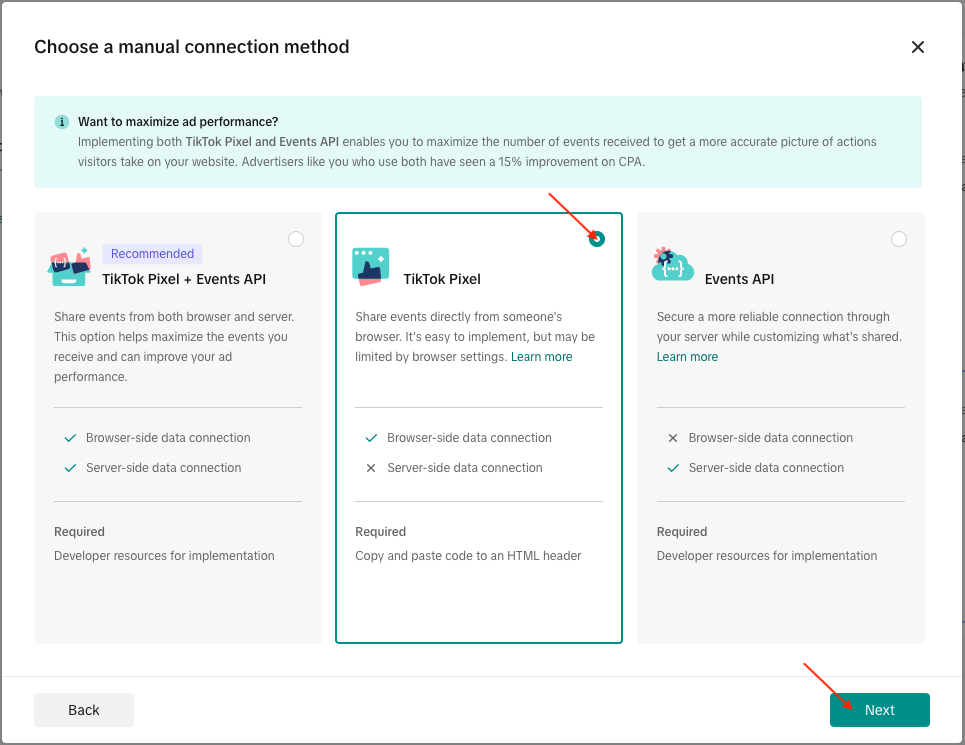
Choose "TikTok Pixel" and click "Next".
Note: if you want to configure the Pixel and the Events API directly, you can select "TikTok Pixel + Events API" now. The following procedure concerns the creation of a pixel only (to know how to activate the Events API later, click here).
Enter a name for your Pixel (e.g. a name incorporating the name of your store) then click on "Create":
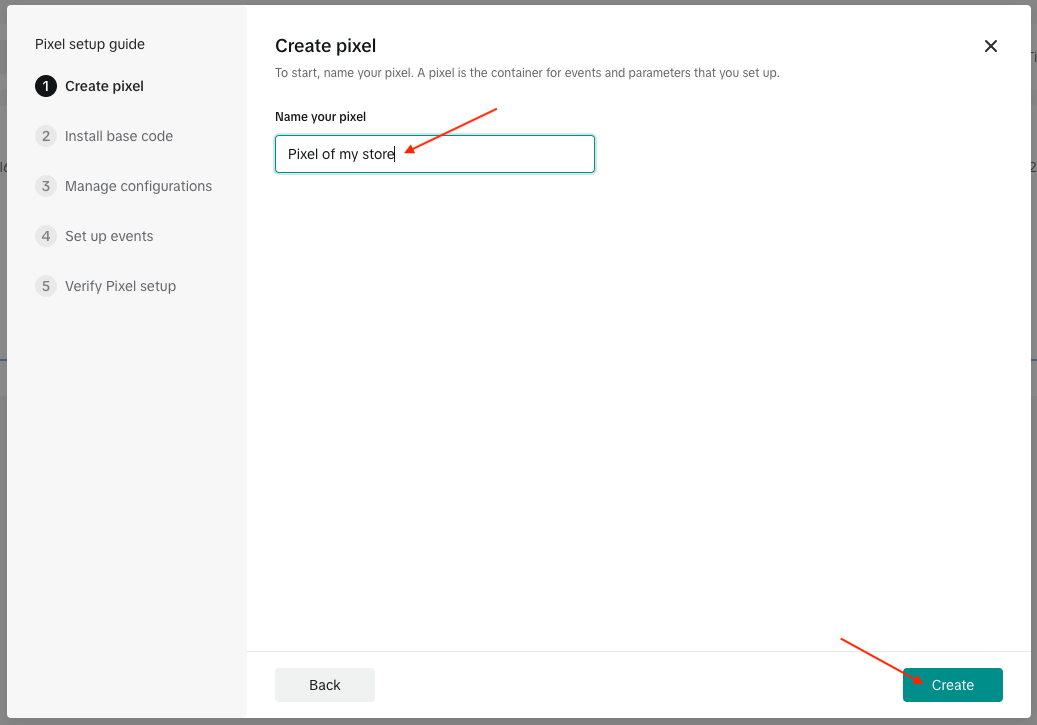
Your Pixel has been created.
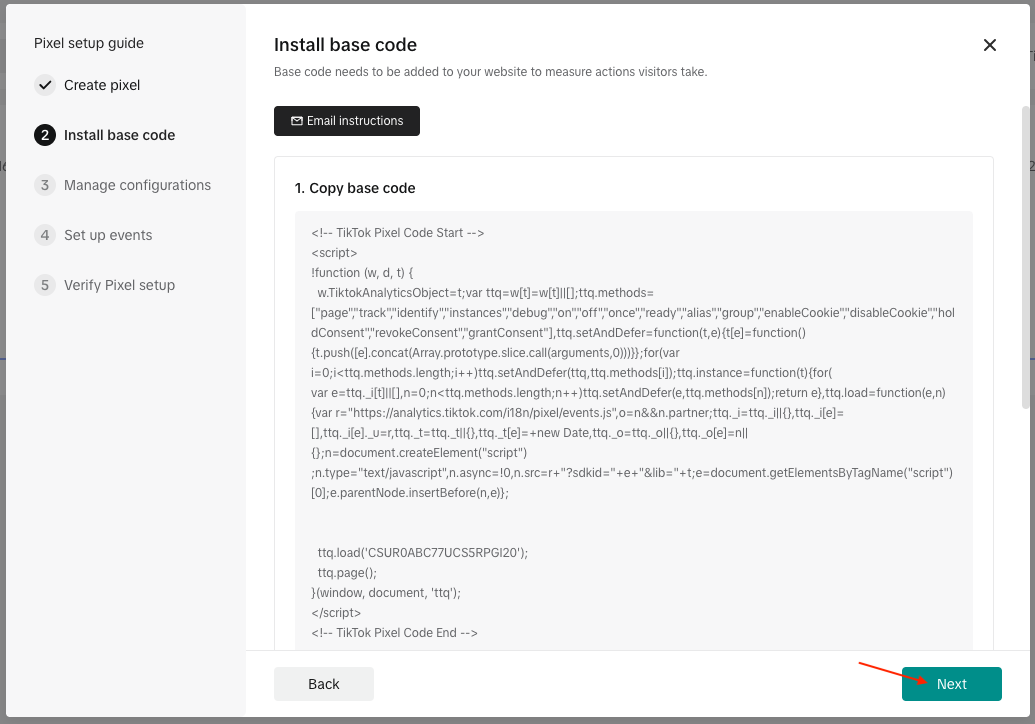
Then click "Next", as you don't need to integrate the code into your site, as our module does that for you.
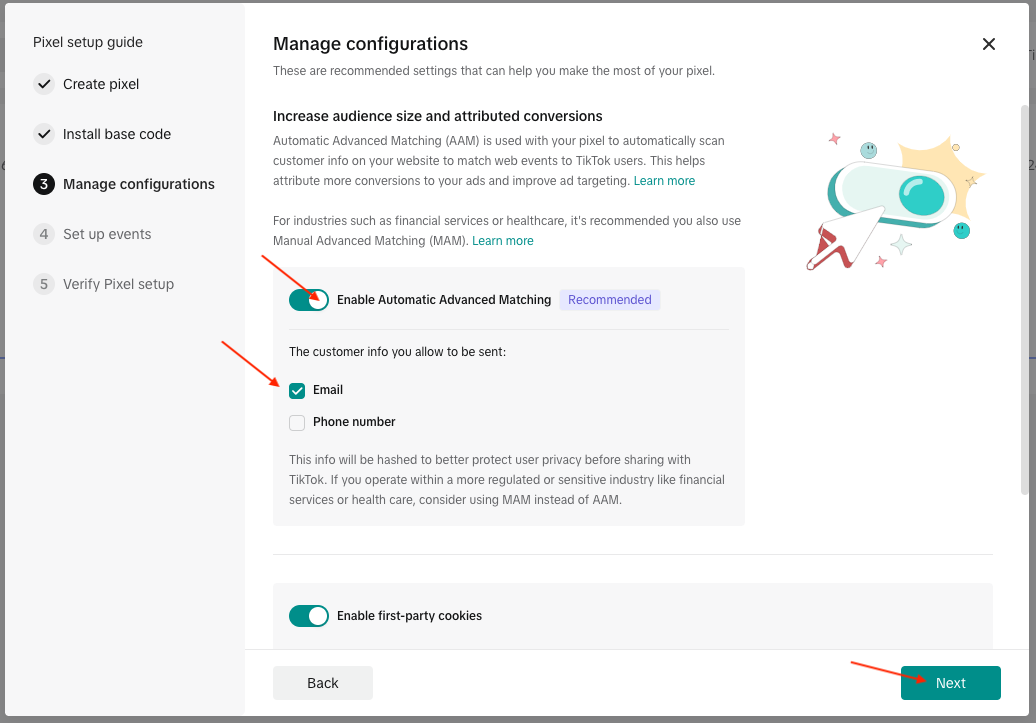
Configure your Pixel. Leave checked the options that are already checked, and also check the Advanced Matching option for more effective ad targeting. Indeed, "Advanced Matching" allows you to better match your customers and their journey across different devices and sessions with TikTok users. It involves sending your customers' email address and/or phone number to TikTok in a secure, encrypted manner for comparison with the social network users. In order to optimize the retargeting of dynamic product ads through the TikTok social network, we recommend that you activate this feature. You will also need to enable it in the module configuration. To learn more about Advanced Matching and its activation in the module click here.
To activate Advanced Matching, check the corresponding option and select only send e-mail. Indeed, for performance reasons, the module is configured to send only the e-mail address, and not the phone number, which would require too many server resources to retrieve. Then click "Next:
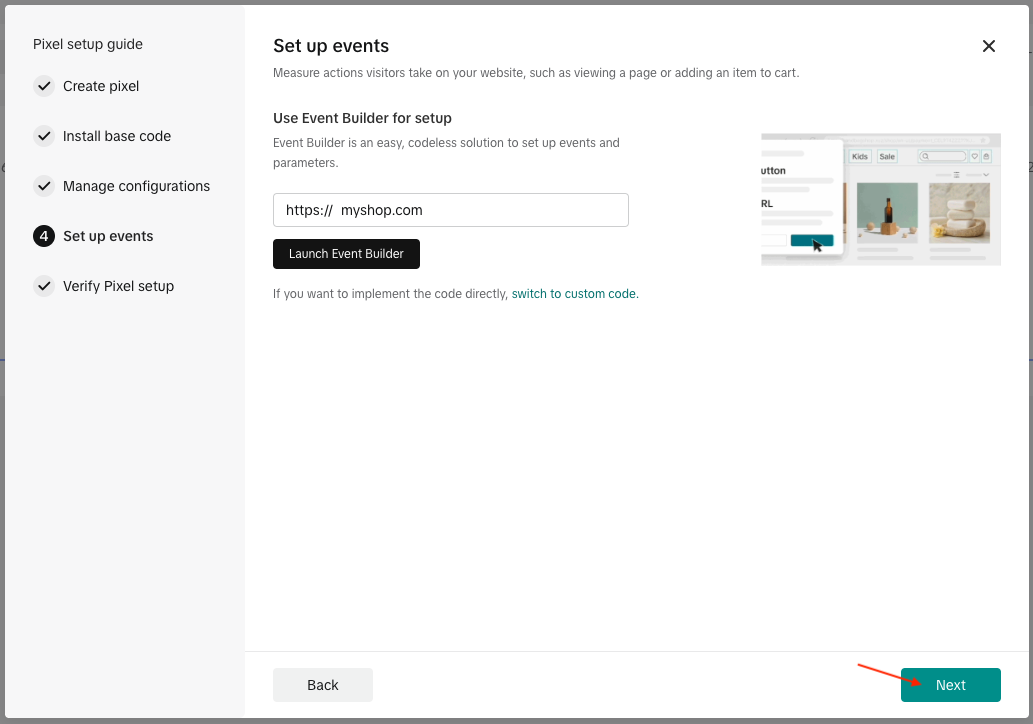
Click "Next" in the next step (step with instructions for creating events), as the module has already created them for you:
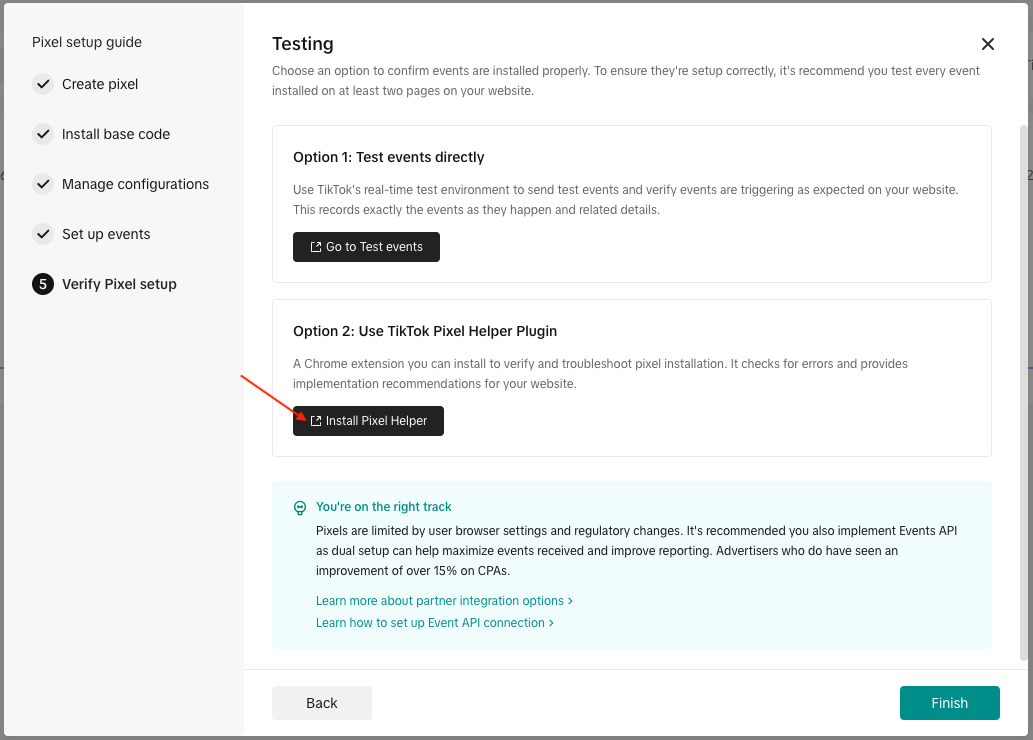
You will now be able to test the correct operation of your tracking tag. Click on "Install Pixel Helper" to download the "TikTok Pixel Helper" extension, which will enable you to check that the Pixel has been correctly implemented on your site:
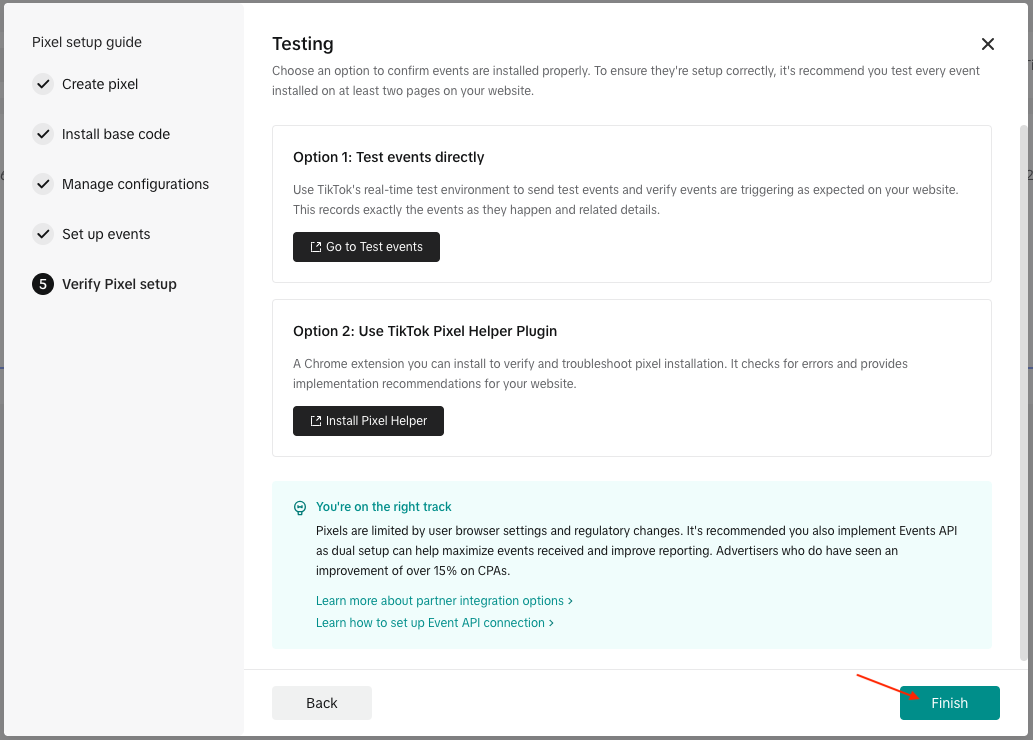
Once the download is complete, click on "Finish":
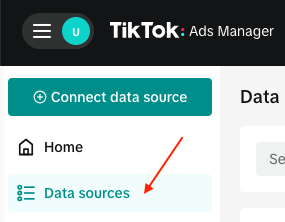
Click on the "Data sources" tab in the left-hand menu:
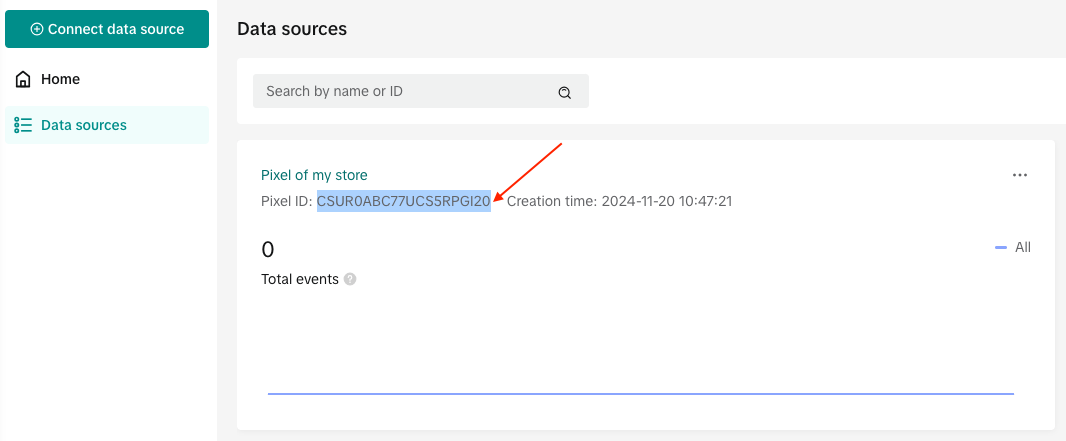
Copy the ID of your Pixel:
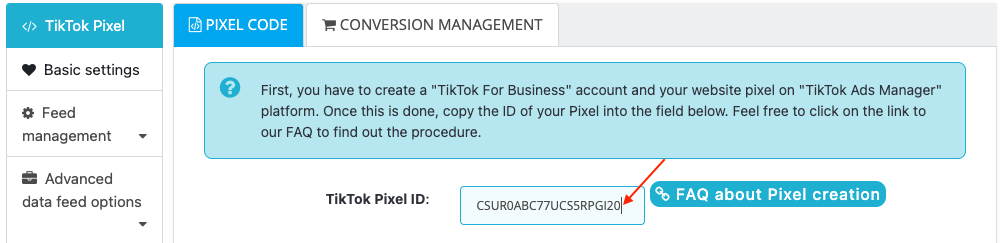
Go to the "TikTok Pixel" tab in your module configuration and paste the Pixel ID in the corresponding field:
Don't forget to activate the Advanced Matching if you have previously enabled it in Pixel configuration. Don't forget to save.

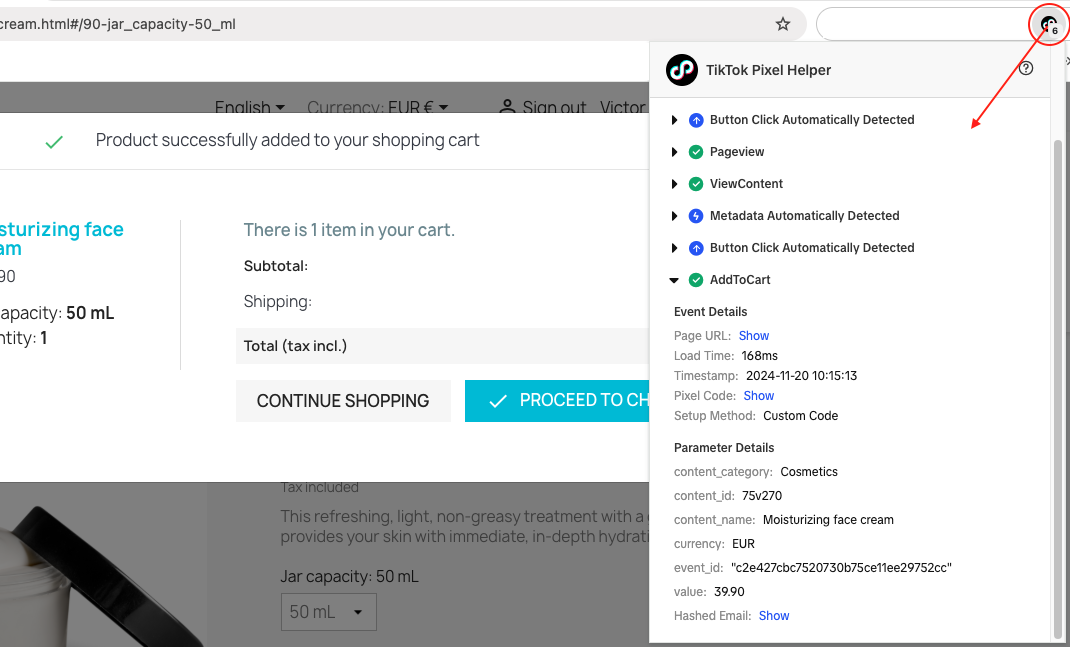
Go to your online shop and browse through the pages, add a product to the cart, place a test order, etc... checking each time, thanks to the "TikTok Pixel Helper" extension installed beforehand, that the events are indeed triggered.
Example:
Also go to your TikTok Ads Manager account to check the event logging. To do this, go back to the "Data sources" tab and click on your pixel name. You'll be able to see details of the events detected.
Finally, we strongly advise you to activate the Events API as well, to get a better analysis of the effectiveness of your ads and your ROI. To find out how to activate it, click here.