How to use the Pixel Diagnostics tool?
You have the possibility to test the detection by your pixel of the e-commerce events that take place on your site, and then their registration in your account on the TikTok Ads Manager platform, by using the "Pixel Diagnostics" tool set up by TikTok (if you use the Chrome browser, you also have the possibility to test the detection of the events with the Chrome TikTok Pixel Helper extension).
To do this, follow the procedure below:
Prerequisites
To do these tests you must:
- have installed the TikTok pixel on your site thanks to our module (see our documentation)
- have the TikTok app on your smartphone and have created an account (otherwise you will have to download it)
Procedure
Go on the TikTok Ads Manager platform and login to your TikTok for Business account.
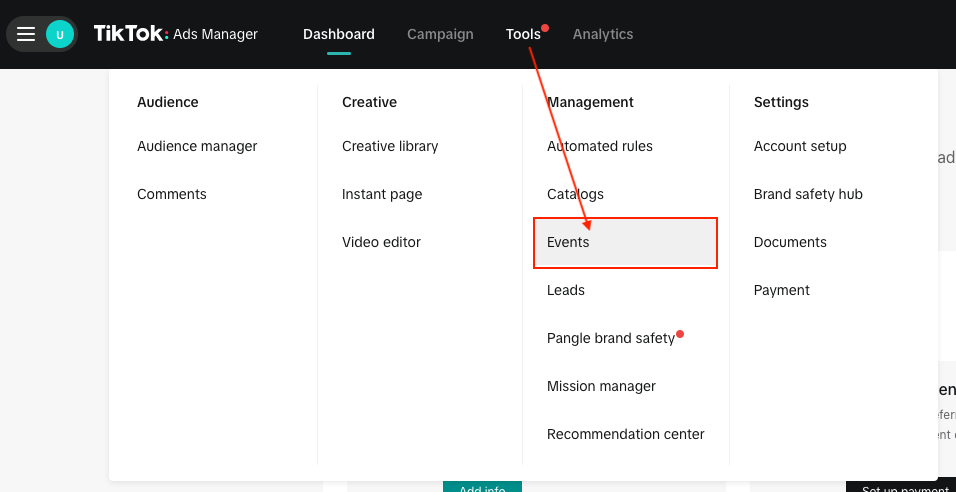
Click on the "Tools" tab and on "Events":
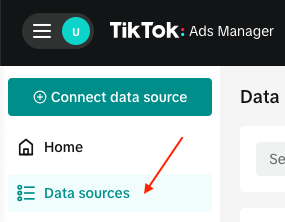
Click on the "Data sources" tab in the left-hand menu:
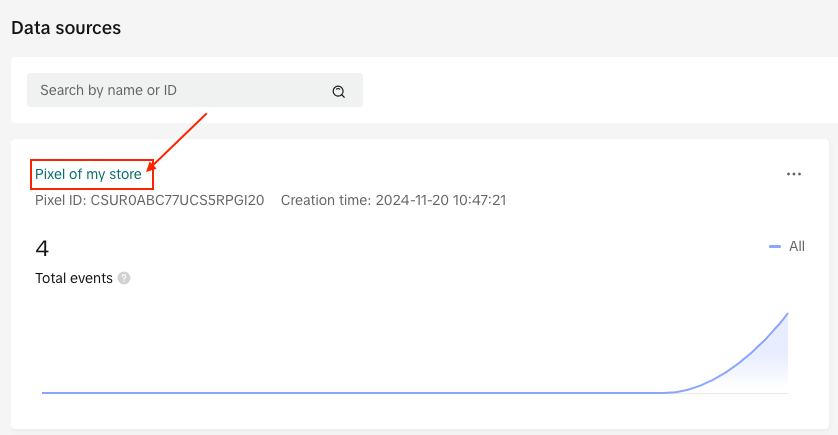
and on your Pixel's name:
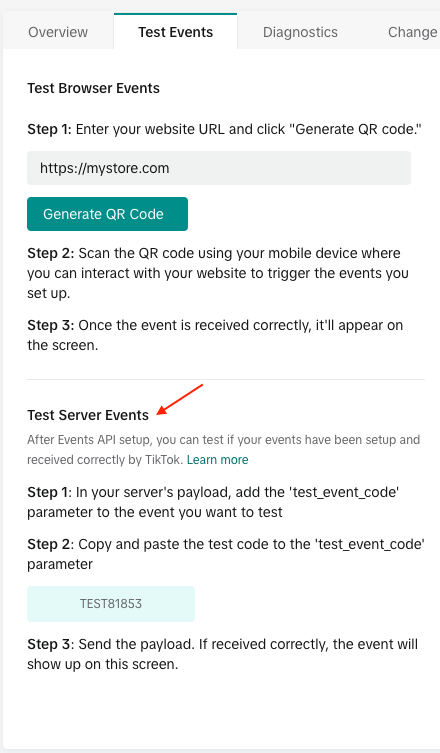
Go to the "Test Events" tab:

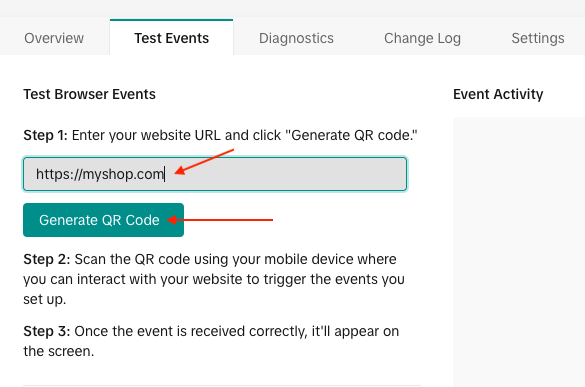
Enter the URL of your shop and click on the "Generate QR Code" button:
On your smartphone, open the TikTok app and access the "Discover" section:
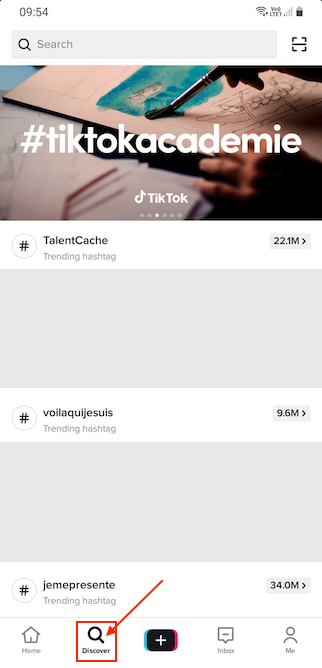
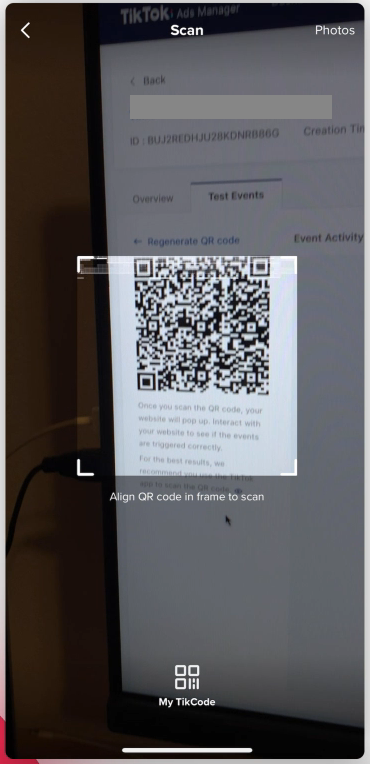
Click on the small square at the top right to open the QR code scanner:
![]()
With this tool, scan the QR code displayed in the "Test Events" tab:
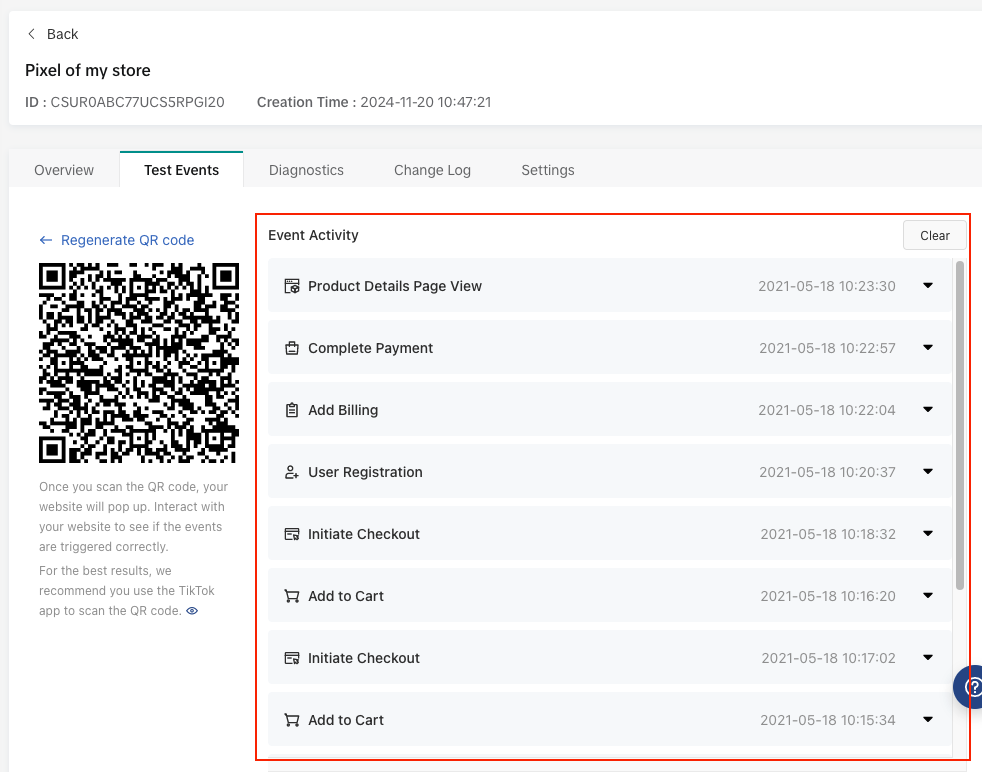
Your site will open directly in the TikTok application: browse your store, display products, categories, add products to the cart, place a test order etc... You should see the events detected in real time in the right part of the "Test Events" tab, under "Event Activity":
If some events do not fire you should see a "caution" sign on the corresponding event, like this:
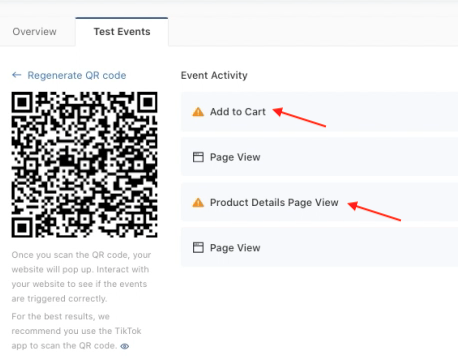
Then click on the concerned event and go to the "Diagnostics" section of this documentation to understand what is wrong.
If you have enabled the Events API, you can also test the reception of events from your server. To do this, go back to the "Test events" tab and scroll down to the "Test Server Events" section. Follow the instructions, navigate your site: you should see the events displayed.
