What is the Conversions API and how to enable it in the module?
While a Facebook pixel sends online activity via cookies to your customers' web browsers, the Conversions API allows you to send activity directly from your server. Data collection is no longer dependent on browsers and their potential loading errors, connectivity issues or ad blockers.
For example, if a user clicks on one of your Facebook ads and goes to your site to make a purchase, the pixel will send, among others, the purchase event to Facebook by setting a cookie on his browser. However, if this user has refused the cookie setting or uses an advertising blocker such as AD block, the cookie will not be set and the event will not be sent. Therefore, you will not be able to have the information about this conversion. The number of conversions recorded by Facebook is therefore less accurate and the effectiveness of an ad may appear to be less than what it really is. This has an impact on the cost invested per advertising objective which is higher because the objective may appear not to have been reached.
To solve this problem, Facebook has implemented the sending of events directly from your server via an API, without going through browsers.
In addition to not being dependent on the web browser, sending data via the API directly from your server allows you to send much more information about your customers (such as email, phone, postal code, date of birth etc. if available) in addition to the events they have made. Of course, to protect the privacy of your customers, all information sent is encrypted. This sending of additional information allows a better correspondence with Facebook users and between different events recorded on different media and over time. You get a better tracking of the purchase path, from discovery to conversion, and a better analysis of the effectiveness of your digital advertising since you have a better view of the number of conversions attributed to your ads.
To learn more about how the conversion API works, click here.
Our module allows you to set up the conversion API in a very simple way.
First of all, the conversion API cannot be used without first implementing a pixel. It complements the pixel operation. So, if you haven't already done so, create your pixel and link it to your catalogs.
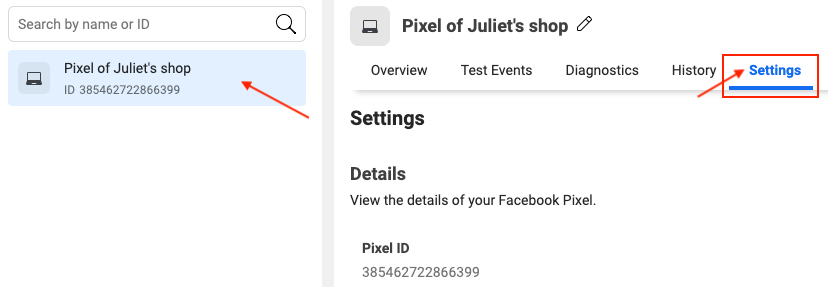
Then, go to the events manager of your Business Manager account, select your pixel and go to the "Settings" tab:
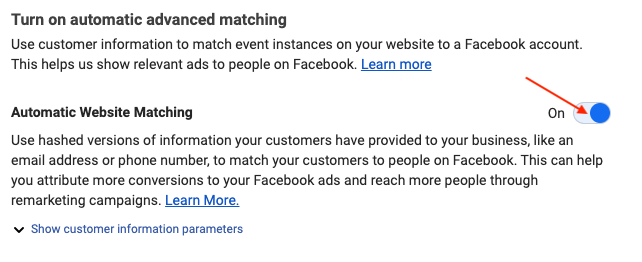
Enable the automatic advanced matching:
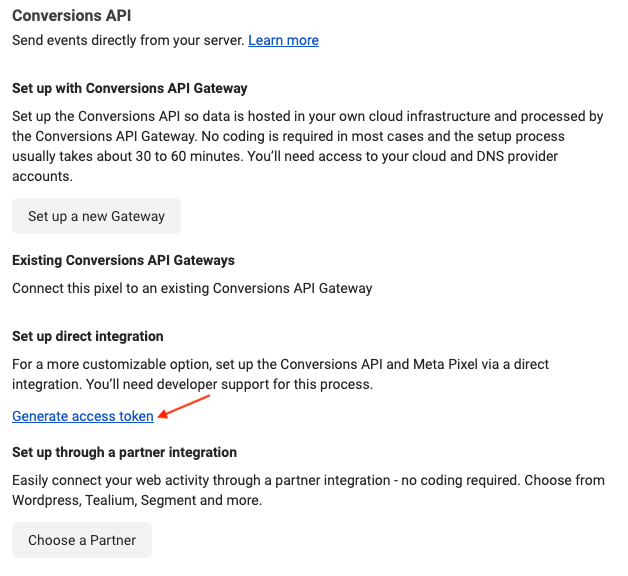
Scroll down to the "Conversions API" section, and in "Set up direct integration" click on "Generate access token":
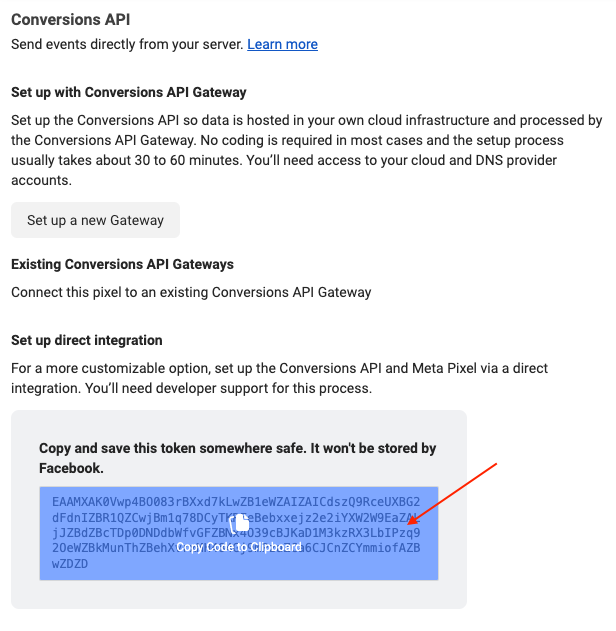
Copy the token by clicking on it:
Go to the module configuration, in the "Facebook Pixel" tab. Enable the conversion API, paste the token into the corresponding field and save:
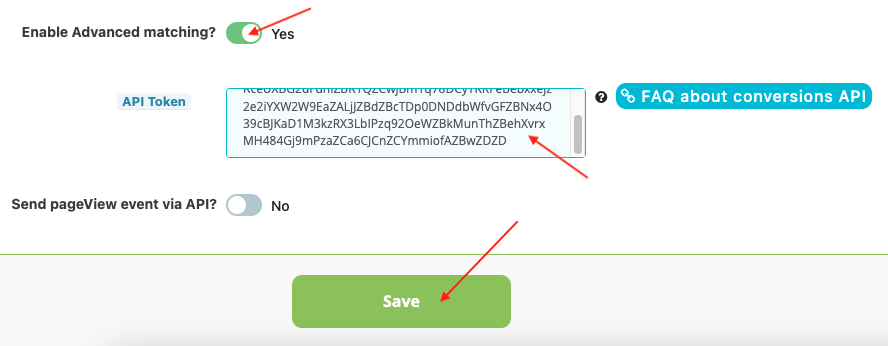
The module is already pre-configured to send all the necessary e-commerce events via the API. All you have to do is to observe the events retrieved through the API in your Business Manager account.
Other FAQs in this category
- Where to find my Business ID?
- How to create and install my Facebook Pixel?
- How to configure the module ?
- How to fill my shop's URL?
- How to automatically update my feeds (on-the-fly output or CRON task)?
- Do I have to ask the module to include the attribute IDs into combination URLs?
- How to choose the construction mode of product IDs in the feed?
- How to create custom labels to segment my catalog?
- How to match my products with Facebook categories?
- How to create advanced exclusion rules?
- Do I need to rewrite numeric values into the combination URLs?
- My shop uses multi-currency : how to make Facebook detect the correct currency?
- Do I have to include the LANG ID in the product ID?
- How to test my Pixel code?
- Should I include anchors in my product URLs?
- What is the Facebook "Advanced Matching" feature?
- I manage several languages/countries/currencies: How to use Facebook country feeds?
- How to tag products reserved for adults?