How to create and install my Facebook Pixel?
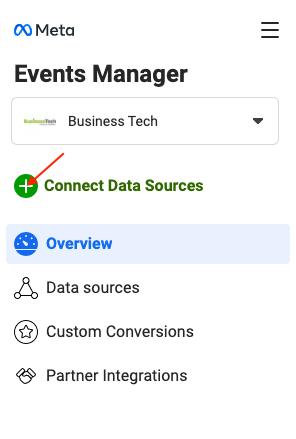
After having created an account in the Facebook Business Manager (click here if you've not yet done so), go to the "Events Manager".
In the vertical menu bar on the left, hover over the green "+" and click on "Connect data sources":
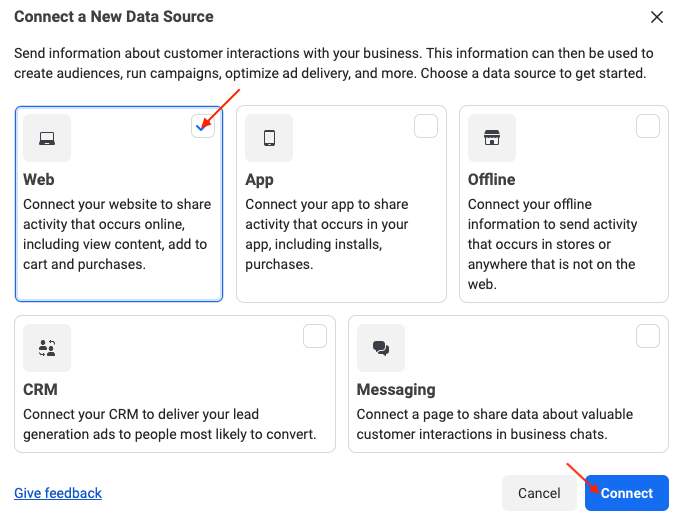
Select the source "Web" and click on "Connect":
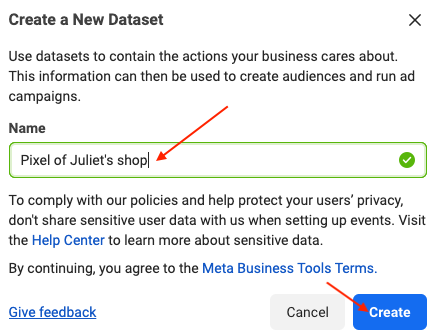
You're going to create a space in which you'll find all the data collected by your tag (pixel). This space is called a "dataset". Give it a name, e.g. "Pixel of ..." with the name of your store, then click on "Create":
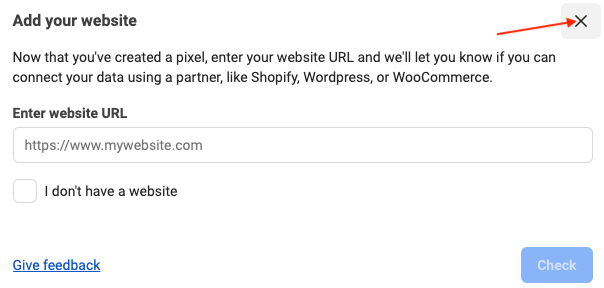
Then close the step that consists in checking if your website is eligible for pixel integration by one of Facebook's partners, you don't need to do it. Indeed, our module will automatically integrate the pixel on the pages of your site for you:
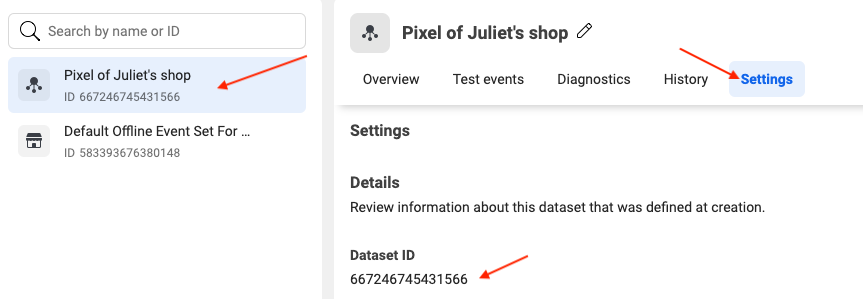
Click on the name of the dataset you have just created, then go to the "Settings" tab and click on the ID to copy it:
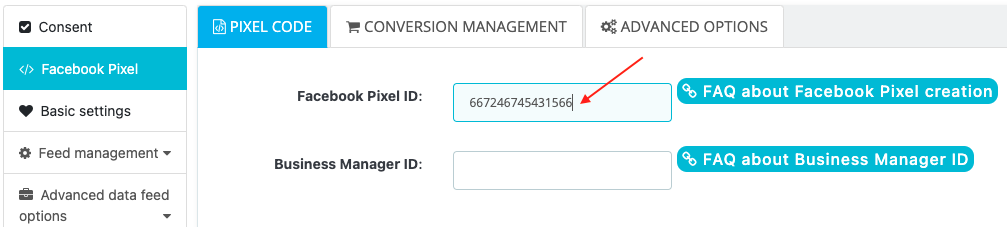
Paste it in the "Facebook Pixel" -> "Pixel Code" tab of the module:
Fill in the ID of your Business Manager account in the following field. To learn where to find it in your Business Manager account, read our dedicated FAQ:
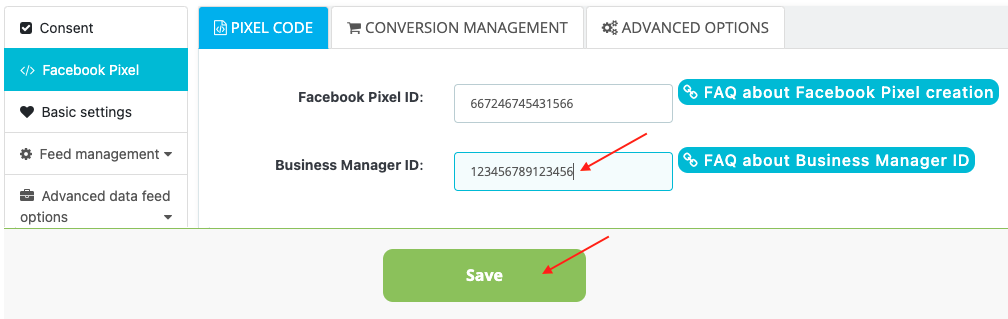
Do not forget to save.
You will now have to link this pixel to all your Facebook catalogs.
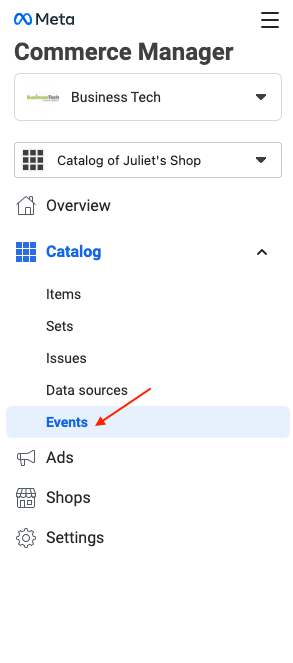
Go to the "Commerce Manager" and click on the name of your first catalog (click here to know how to create a new catalog and here to know how to import your products in it):
In the menu on the left, click on "Catalog" -> "Events":
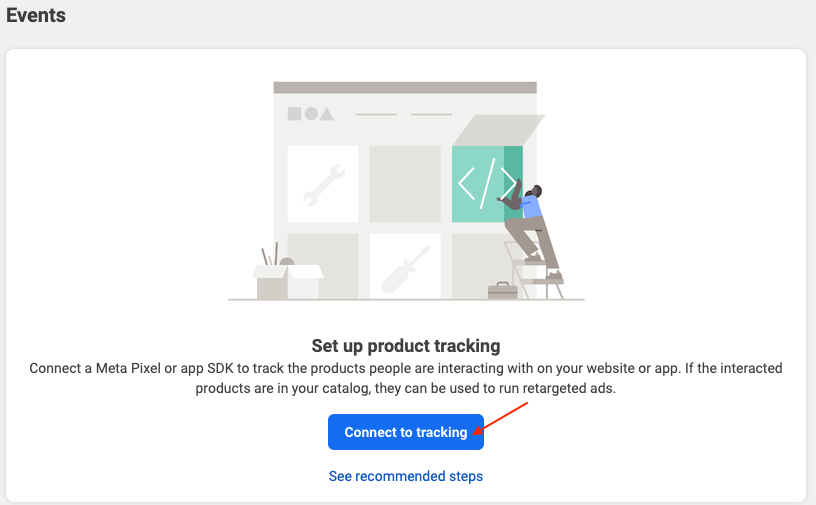
and on the "Connect to Tracking" blue button:
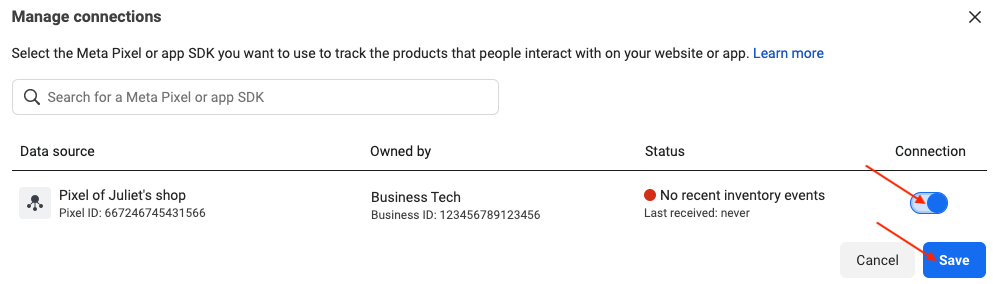
Select the pixel you've just created and click on "Save":
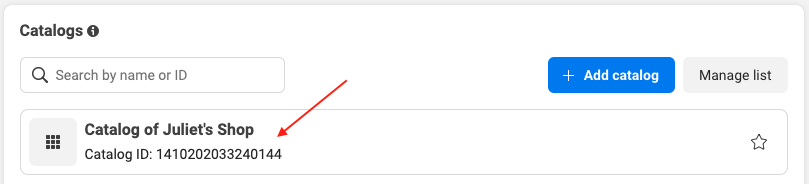
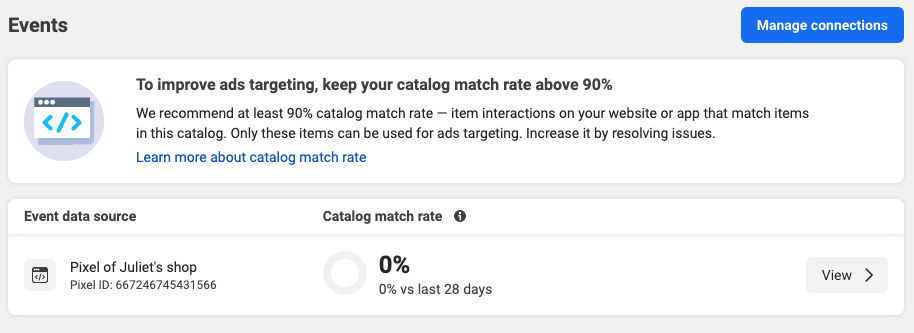
Your pixel is now associated with your product catalog:
If you have several catalogs, you just have to link the same pixel to each of them by repeating exactly the same steps as the first catalog.
Once the pixel is associated with all your catalogs, click here to visit the FAQ that will help you to test it.
Other FAQs in this category
- Where to find my Business ID?
- How to configure the module ?
- How to fill my shop's URL?
- How to automatically update my feeds (on-the-fly output or CRON task)?
- What is the Conversions API and how to enable it in the module?
- Do I have to ask the module to include the attribute IDs into combination URLs?
- How to choose the construction mode of product IDs in the feed?
- How to create custom labels to segment my catalog?
- How to match my products with Facebook categories?
- How to create advanced exclusion rules?
- Do I need to rewrite numeric values into the combination URLs?
- My shop uses multi-currency : how to make Facebook detect the correct currency?
- Do I have to include the LANG ID in the product ID?
- How to test my Pixel code?
- Should I include anchors in my product URLs?
- What is the Facebook "Advanced Matching" feature?
- I manage several languages/countries/currencies: How to use Facebook country feeds?
- How to tag products reserved for adults?