How to configure my module?
![]()
Module - TikTok Ads + Pixel & Events API
The "TikTok Ads + Pixel & Events API" module allows you to export your entire catalog, or just a selection of products, into the TikTok Ads Manager so you can create product ads. Our module allows you to configure your data feed in detail in order to control the data sent.
It also installs a tag (called a "pixel") to track your visitors' actions on your site's pages so that you can display personalized ads on the TikTok social network and bring them back to your store. In particular, you can create dynamic remarketing ads and show TikTok users who have already visited your site the products they are interested in, in order to encourage them to complete their order. The pixel also allows you to create new audiences for your ads, similar to your customers, in order to attract TikTokers who don't know you but who might be interested in your products because they have the same profile as your customers. Finally, you can track the performance of your TikTok ads through the TikTok Ads Manager platform dashboard.
Preamble
To help you set up your pixel and product feed, we have provided links to the corresponding documentation next to some of the options. Feel free to click on them to understand how to set up each option. In addition, by hovering your mouse over the option name or the small question mark next to the field, you can also access small explanatory texts.
Find all the documentation associated with the "TikTok Ads + Pixel & Events API" module by clicking here.
Prerequisites
In order to export your product feed to TikTok and install the TikTok Pixel on your store, you must first:
- create a TikTok For Business account on the TikTok Ads Manager platform. To know how to do, you can follow our dedicated documentation.
- configurate your pixel through the TikTok Ads Manager platform and retrieve its ID. Follow the procedure step by step by clicking here.
- create a TikTok product catalog, by following our documentation
Configuration
After installation, enter the configuration of your new module "TikTok Ads + Pixel & Events API".
A- Installation and configuration of the TikTok Pixel
Setting up of the pixel on your site pages
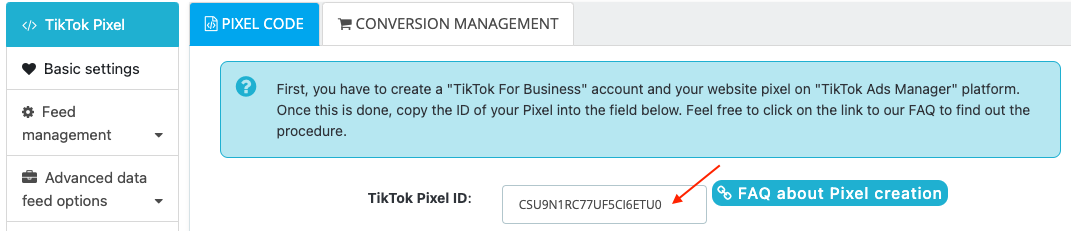
In the "Pixel code" tab, enter the ID of the pixel created in your TikTok Ads Manager account:
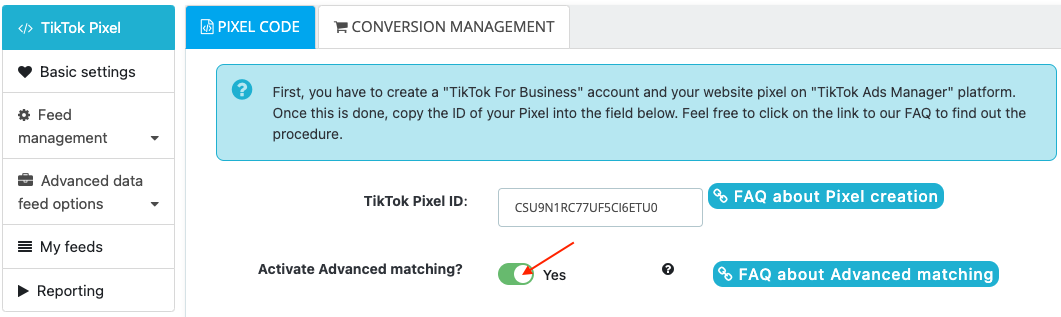
Enable Advanced Matching if you want to optimize your dynamic remarketing ads to the fullest by sending your customers' email through the pixel, in an encrypted manner:
Activate the Events API if you want to enable the sending of your marketing data to TikTok directly from your server, and thus maximize the analysis of the number of conversions generated thanks to your ads. Enter your access token in the dedicated field:
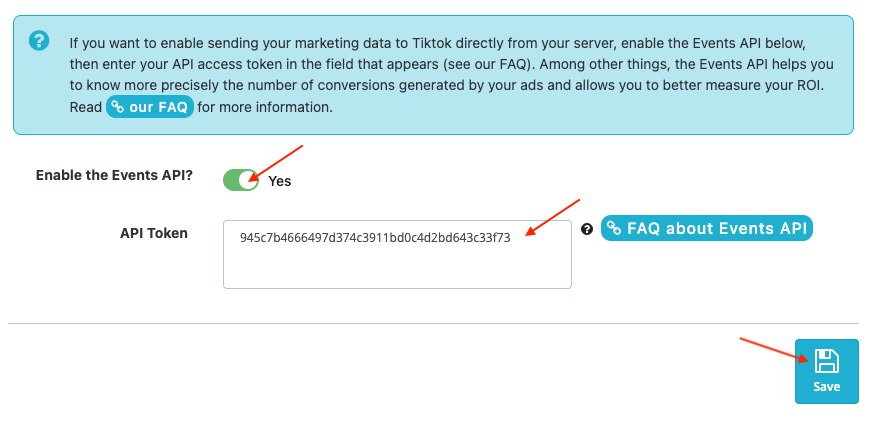
Save: your tag is now up and running.
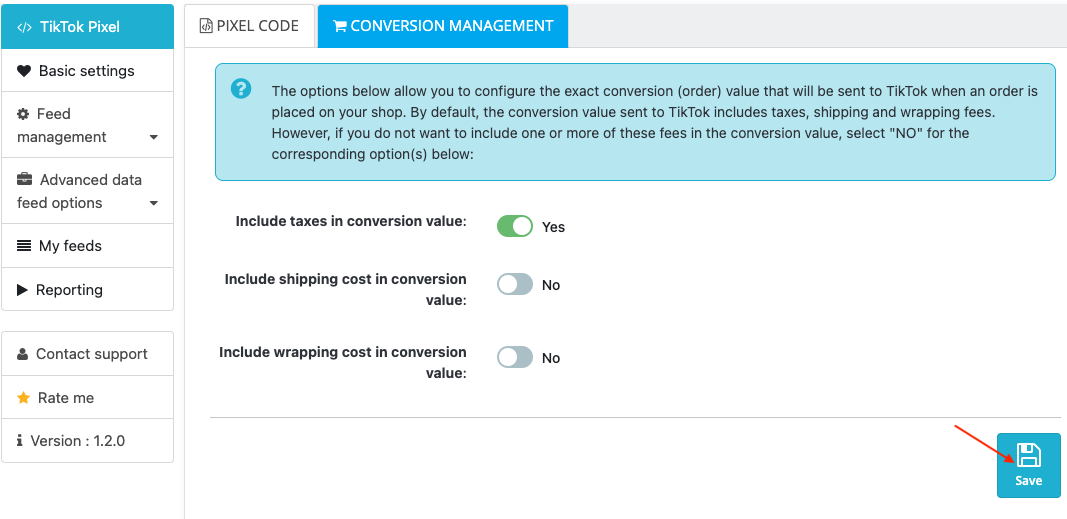
Conversion value management
When the pixel detects a new order placed on your site, it sends the order amount to TikTok. This is called the "conversion value". We give you the possibility to customize this value by including or excluding taxes, shipping costs and/or wrapping costs. Make your choice by activating/deactivating the options in the "Conversion management" tab:
B- Configuration of the product feed to be exported
First of all, feel free to refer to the official TikTok documentation on product data.
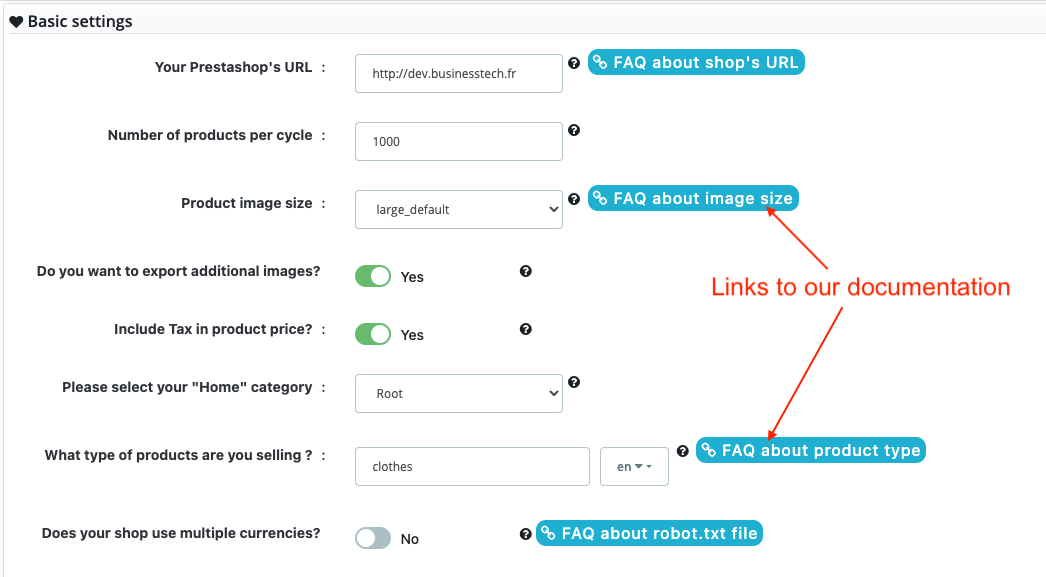
Basic settings
Go to the "Basic settings" tab of the module.
To find out how to fill in each option, move your mouse over the labels or the question mark to read the explanatory texts. For more information, click on the links to the associated FAQ documents. Among other things, to learn more about the size of product images required by TikTok, click here.
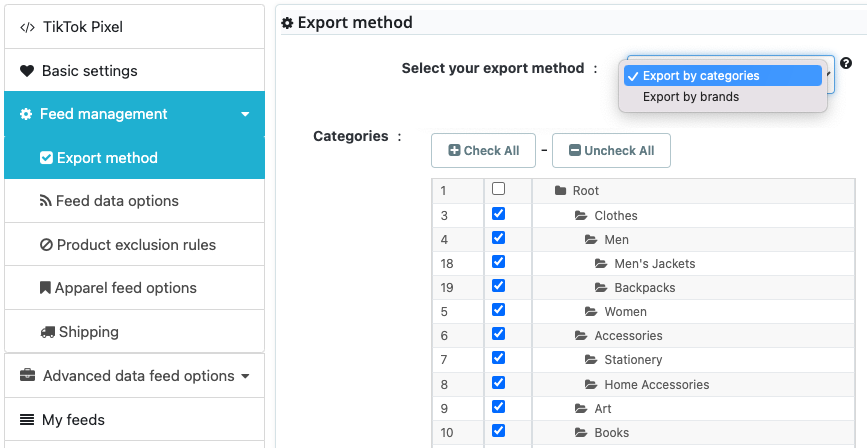
Feed management
First, through the "Export Method" tab, choose the method of selecting the products to export (by categories or by brands), then make your selection and save:
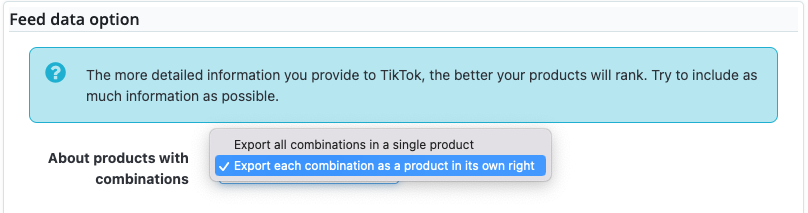
Then click on the "Feed data options" tab. Here you can choose for example to export all combinations as a single product, or each product combination as a product in its own right (one combination = one separate product):
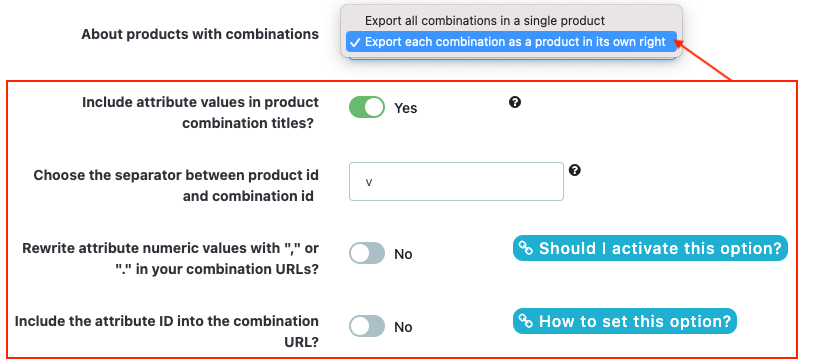
If you export each combination as separate products, additional options allow you to specify how product IDs and URLs are written. Click on the related FAQs to learn more:
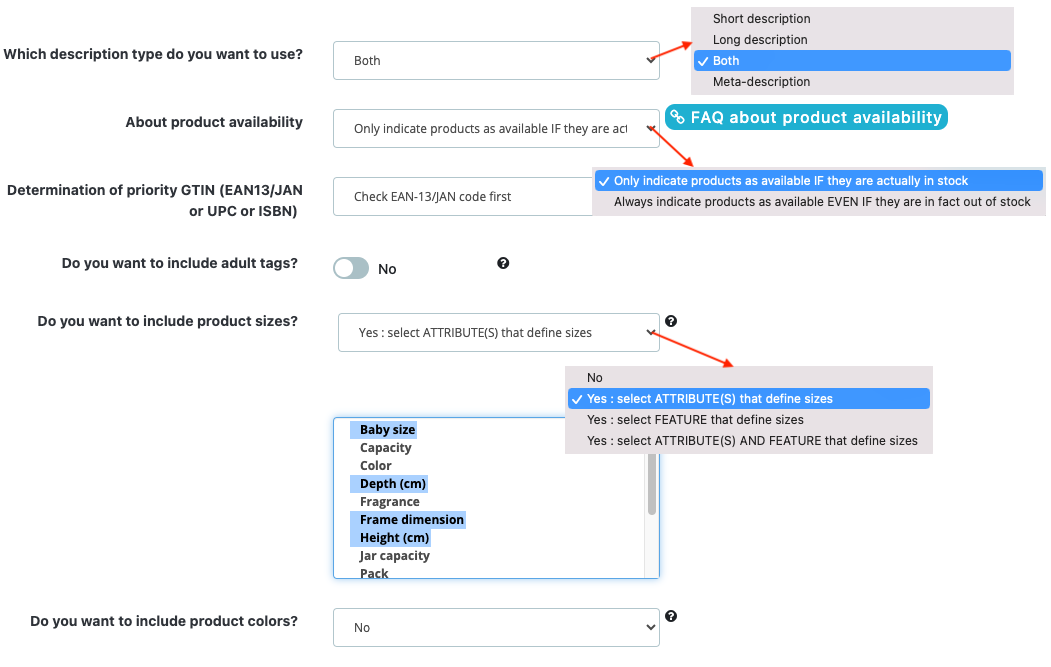
Then choose the type of description to be exported, how to display the availability of your products or if you want to export the sizes and/or colors of your products. Don't forget to save and go to the next tab.
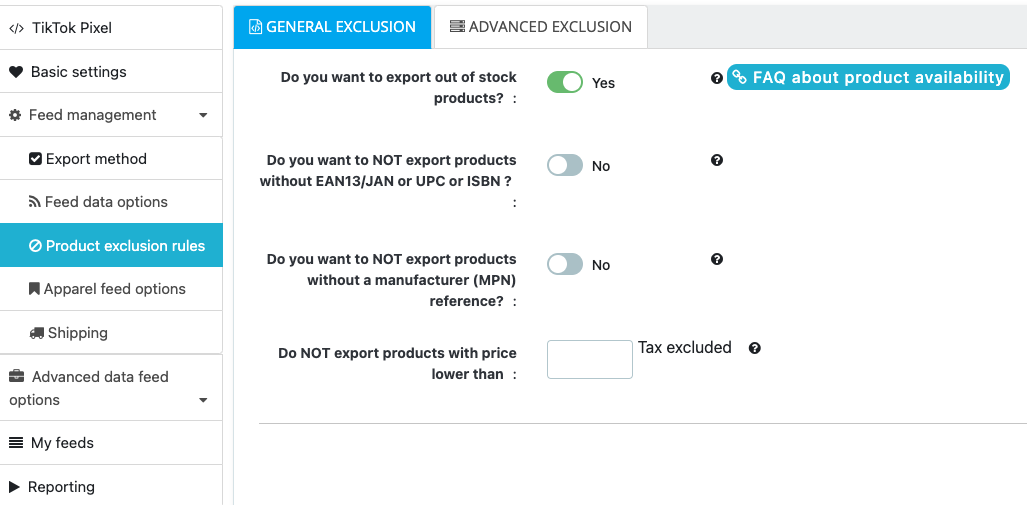
The "Product exclusion rules" tab allows you to refine your choice of products to export. The "General Exclusion" sub-tab contains standard exclusion rules such as, the possibility to exclude products that are out of stock, or priced below a certain value:
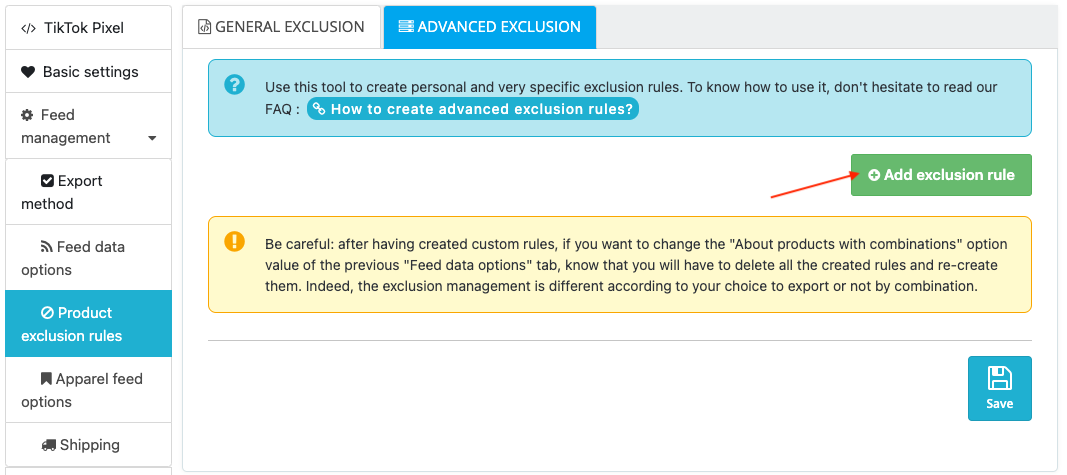
The "Advanced exclusion" sub-tab allows you to create your own product exclusion rules to be as precise as possible. Read our FAQ to know how to do it.
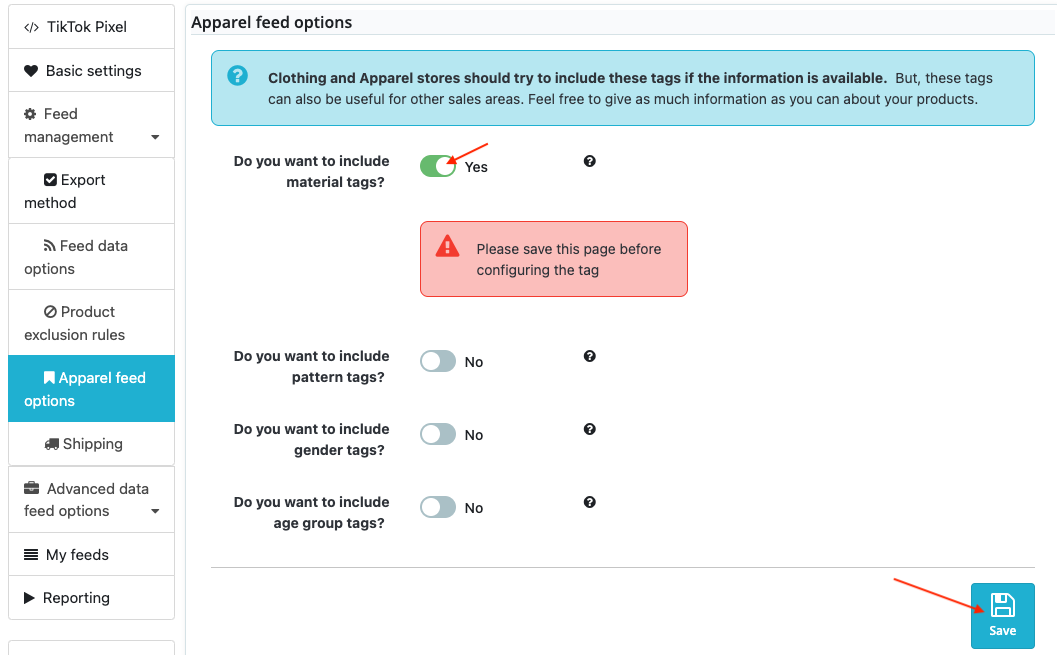
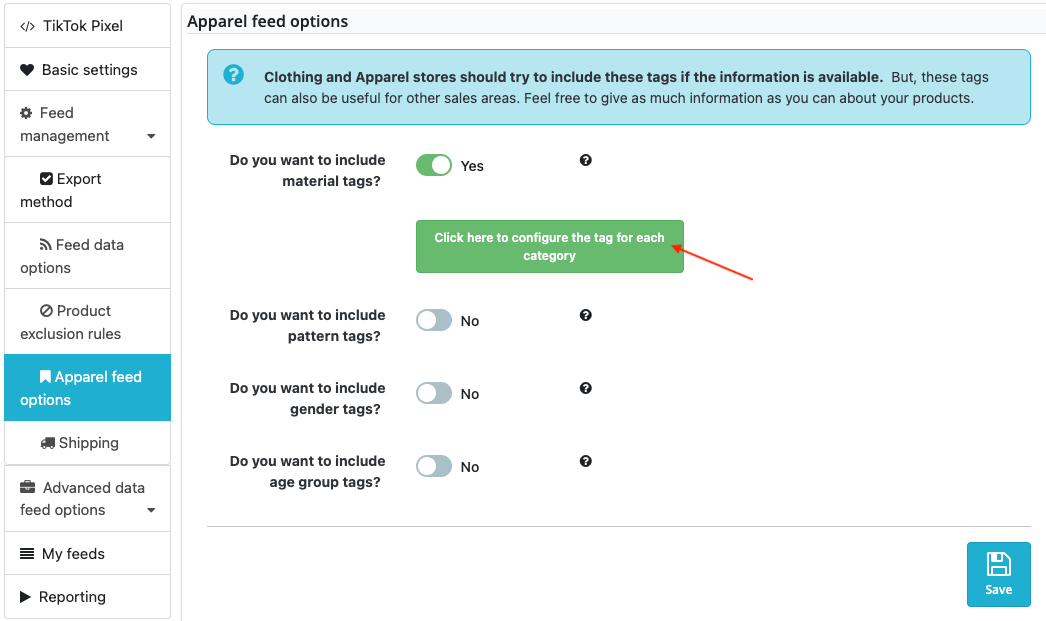
The "Apparel feed options" tab allows you to add additional information about your products, such as the pattern, material or age group for which they are intended. This information is particularly useful if you are in the clothing industry, but it can also be useful in any other industry. For each tag, activate the option, save and then click on the green button to configure the tag for each category.
Example for the material tag:
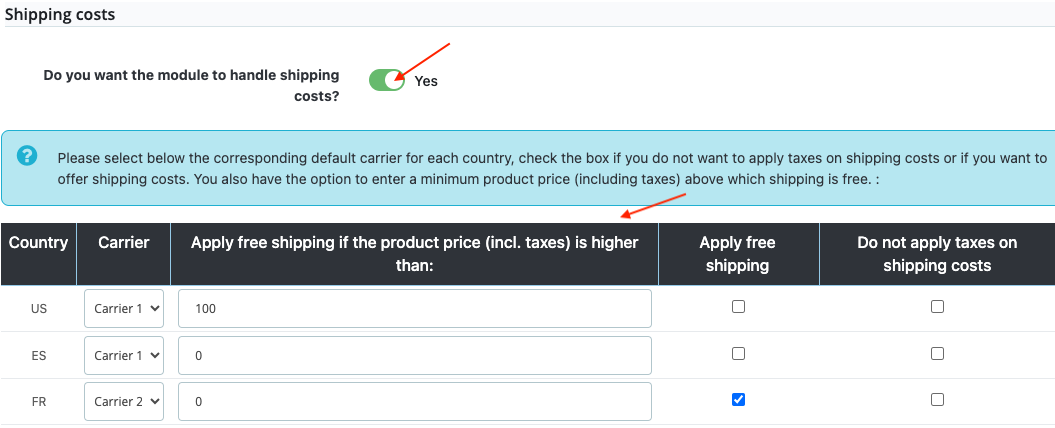
Finally, you have the possibility to send the amount of the shipping costs for each country in which you want to display your ads. To do this, activate the option "Do you want the module to handle shipping costs?" in the "Shipping" tab and indicate the corresponding carrier for each country. Don't forget to register:
Advanced data feed options
- The first tab allows you to match your own categories with the official TikTok categories. Indeed, each merchant has its own category titles. However, TikTok cannot manage all the possible and imaginable titles. To solve this problem, TikTok uses official category names that are, in fact, those created by Google. You have to match your own categories to the official ones. Since each country has its own official taxonomy, you need to make the match for each country you want to run your TikTok ads in. Read our FAQ on the subject to know how to do it.
- The "Google Analytics integration" tab allows you to add, inside your product links, some parameters (utm_campaign, utm_source and utm_medium) in order to better track, in your Google Analytics account, clicks and sales made with your TikTok product ads.
- Finally, the "Custom labels integration" tab allows you to assign custom labels to your products in order to segment your catalog on TikTok. It's the same principle as Google's custom labels. To know how to proceed, follow our FAQ on the subject.
My feeds
Your product data feeds (one for each unique "Country/Language/Currency" group installed on your store) are now configured and ready to be exported to TikTok Ads Manager. To know how to import your feeds, read this FAQ. To know which method to use to automatically update your products, click here.
Note: the module allows you to analyze your feed to know if it respects the TikTok requirements in terms of product data. To do this, in the "XML + CRON" section, click on "Use this solution" and then generate your feed manually by clicking on the double red arrow. The diagnostic tool will appear. Please read carefully our FAQ to know how to use the diagnostic tool. You can find the results of this analysis in the following "Reporting" tab.
Reporting
This tab allows you to display again the last diagnostic generated about your feed quality. For each "Country/Language/Currency" group, click on the icon of the "Action" column. The last diagnostic will be displayed.
ATTENTION: if you change the configuration of your feed, do not forget to generate your feed again manually (in the tab "My feeds" -> "XML + CRON") and to save again the tab "reporting", in order to be sure to have the last report.