How to create and install my Facebook Pixel?
Use the Meta data source intended for this shop. Do not confuse its ID with the business portfolio ID or catalog ID.
Prepare the source in Meta
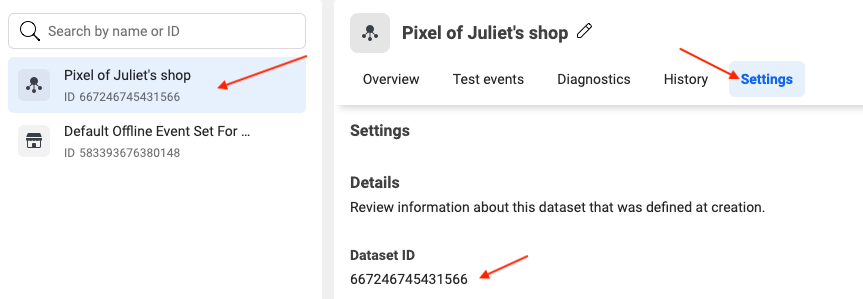
In Events Manager, select your web data source or create it using the official Meta Pixel setup instructions. Available options depend on your account and permissions. Obtain the Pixel ID associated with the source; the module provides its own integration, so do not also paste a second Pixel code into the theme.
Configure the module
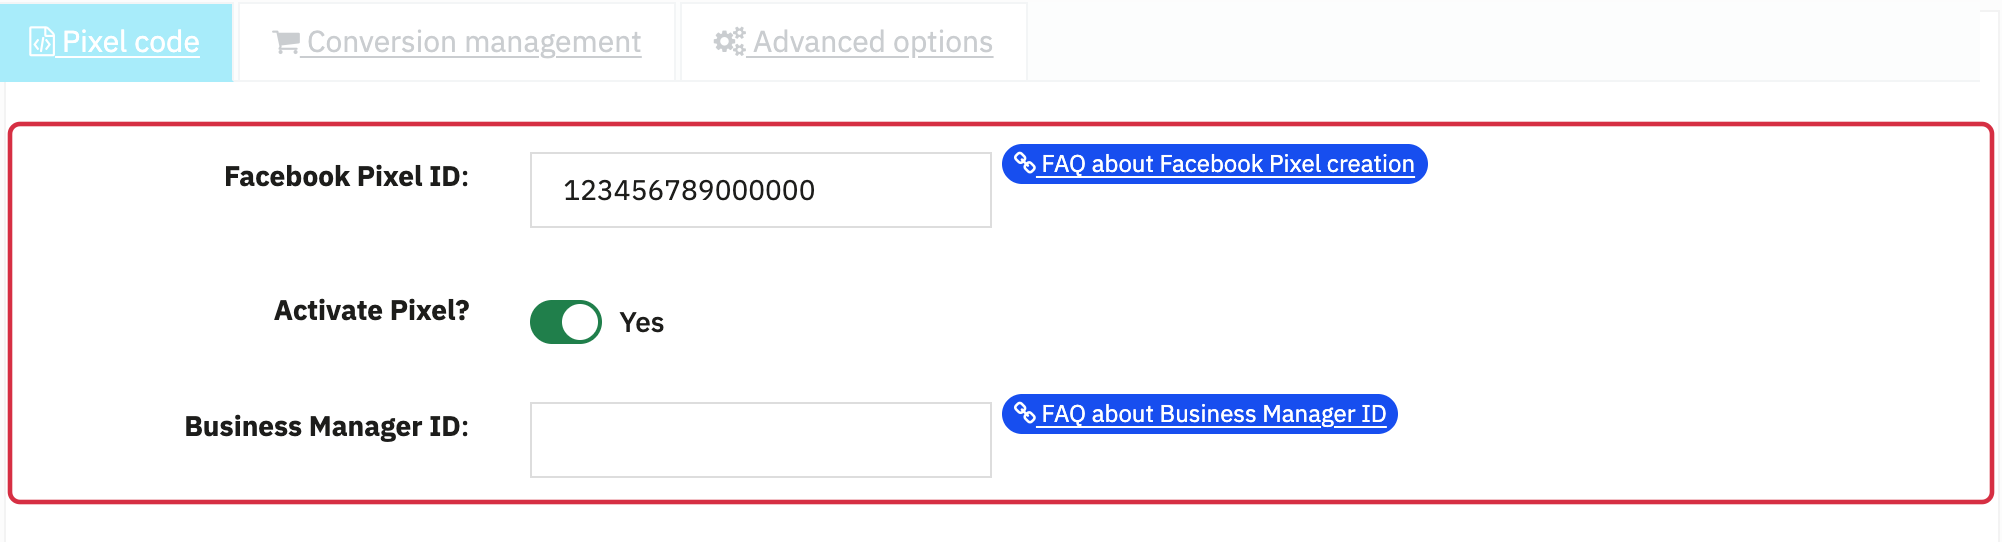
- Open Facebook Pixel → Pixel code.
- Enter Facebook Pixel ID and enable Activate Pixel? to use tracking.
- Enter the Business Manager ID in its separate field if needed; see where to find it.
- Save, reload and verify the values. Configure consent before testing the storefront.
Connect tracking to the catalog
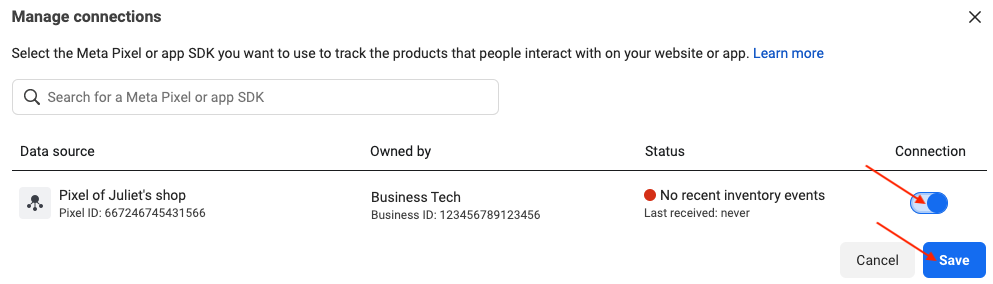
In Commerce Manager, select the correct catalog and connect the event source matching the shop's Pixel. The official catalog creation guide allows this connection during creation or later. The content_ids sent must match item IDs in the catalog; see ID construction modes.
Finish with browser tests and reception checks. Having the ID in the module alone does not prove that Meta receives events.
The retained earlier illustrations below show examples and navigation landmarks. Names, dates and layouts may differ in your version; follow the checks described in the text.
Other FAQs in this category
- Where to find my Business ID?
- How to configure the module ?
- How to fill my shop's URL?
- What is the Conversions API and how to enable it in the module?
- How to automatically update my feeds (on-the-fly output or CRON task)?
- Do I have to ask the module to include the attribute IDs into combination URLs?
- How to choose the construction mode of product IDs in the feed?
- How to create custom labels to segment my catalog?
- How to match my products with Facebook categories?
- How to create advanced exclusion rules?
- Do I need to rewrite numeric values into the combination URLs?
- My shop uses multi-currency : how to make Facebook detect the correct currency?
- Do I have to include the LANG ID in the product ID?
- How to test my Pixel code?
- Should I include anchors in my product URLs?
- What is the Facebook "Advanced Matching" feature?
- How can I use Facebook country feeds for several languages, countries and currencies?
- How to tag products reserved for adults?